As you observed in the preceding exercise, shape text
does not always rotate as you rotate the containing shape. Whether it
does depends on how the underlying shape was designed.
In
this exercise, you will see additional examples of automatic text
rotation. You will also rotate text manually and reposition text blocks
on shapes.
Note:
You need the Orient Shapes and Text drawing that you created in the preceding exercise. Open the drawing in Visio if it is not already open.
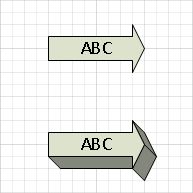
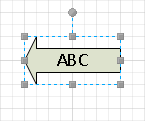
Drag a 2-D single arrow shape from the Blocks stencil onto the drawing page and position it below the box shape from the preceding exercise.
While the arrow is still selected, type ABC.
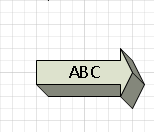
In the Shapes window, click Blocks Raised, drag a Right arrow onto the page, and position it below the arrow you placed in the previous step.
While the arrow is still selected, type ABC.
Draw a bounding box around both arrows to select them, and change the font size to 14 pt. (See the graphic on the left following Step 7.)
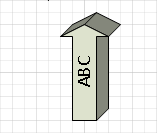
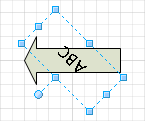
Select the upper arrow and use the rotation handle to rotate it 180 degrees.
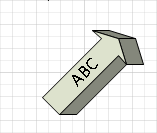
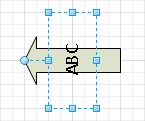
Select the lower arrow and use the rotation handle to rotate it 180 degrees.
The graphic on the left shows the results of Step 5. The graphic on the right shows the results of Steps 6 and 7.
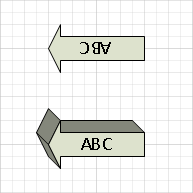
Although the two arrow
shapes are similar in some respects, their designers made different
choices for how text should be handled. In the upper arrow, the text
rotates along with the shape. In the lower arrow, the text responds to gravity,
or more correctly, it responds to a mathematical function that sets the
text angle based on the shape angle so that it appears to be responding
to gravity.
Tip:
For the technically inclined,
if you look in the TxtAngle cell in the Text Transform section of the
ShapeSheet for the lower arrow, you will actually see a function named
GRAVITY().
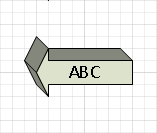
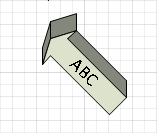
To
get a better sense of how the gravity function works, rotate the lower
arrow in several steps from its current position to its original
position.
You
can see that some shapes are designed so the text will be upright as
the shape is rotated, but what do you do with shapes that aren’t
designed that way? Enter the Text Block tool...
Text Block

On the Home tab, in the Tools group, click the Text Block button.
Click once on the upper arrow and notice that the selection handles appear as usual.
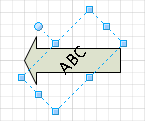
Drag
the selection handle clockwise. Notice that because you are using the
Text Block tool and not the Pointer Tool, only the text rotates. Stop
when you have rotated the text 180 degrees.
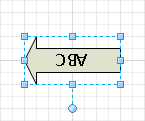
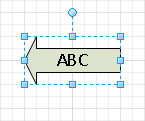
You can use the Text Block
tool to reorient the text in virtually any shape. However, be aware that
a shape designer can lock the text in a shape so that the text can
neither be altered nor repositioned. If you click with the Text Block
tool on a shape whose text is locked, the handles will be grayed out as
shown in the following graphic.
Note:
Save your changes to the Orient Shapes and Text drawing but leave it open if you are continuing with the next exercise.
