3. Connecting to a Wireless Network
In this section, we
assume that you have already connected a wireless access point to your
network and set it up using the instructions in the previous section or
the instructions provided by the manufacturer. Here we explain how to
connect a computer that has a wireless network adapter to your wireless
network.
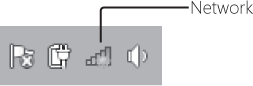
Whenever your computer's wireless network adapter is installed and turned on, Windows scans for available wireless
access points. If it finds at least one (and you're not already
connected to a wireless network), the Network icon in the notification
area glows orange to let you know that connections are available.
3.1. Connecting to a Network Using the WPS Button
An optional component
of the Wi-Fi Protected Setup standard is a push button setup method.
When present, this method provides the simplest way to connect a
computer running Windows 7 to a wireless network.
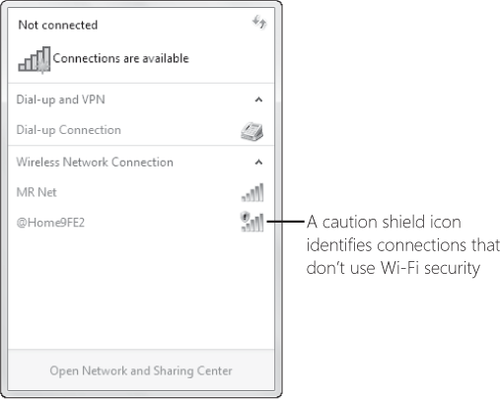
To make a network
connection, click the Network icon in the notification area.
Alternatively, in Network And Sharing Center, click Connect To A Network. Doing so opens a panel that shows all currently available network connections, as shown in Figure 1. This panel, sometimes called View Available Networks (VAN),
shows wireless networks and, if your computer has appropriate adapters,
available mobile broadband (such as 3G), virtual private network (VPN),
and dial-up networks.
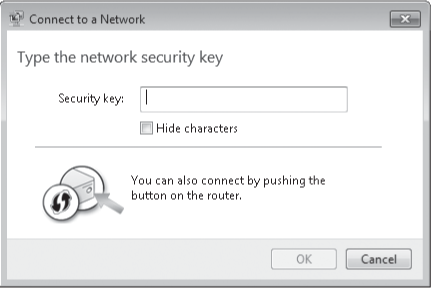
Click the network you
want to join, and click the Connect button that appears. If you haven't
connected to that particular network before, you'll see a dialog box
similar to the one shown in Figure 2. You can enter the security key that was created when configuring the router. But if your router has a WPS button, press it; the router broadcasts
some configuration information and in a few moments you have a secure,
encrypted connection to the network with no additional typing or
clicking required.
To confirm that your
computer is part of the network, open the Network folder in Windows
Explorer, and you should be able to see other computers and devices on
your network.
|
No other computers appear
If you're connecting
to a network in your home or office (as opposed to a public hot-spot,
such as an internet café), be sure that the network is defined as a
private network (either home or work). If you don't specify a network
location the first time Windows detects a network, by default it sets
the location type as public, which is safer. However, on a public network, network discovery
is turned off—which means you won't be able to see other computers on
the network. To see if this is the problem (and to resolve it), open
Network And Sharing Center. If Public Network appears next to the name
of your network, click Public Network. In the Set Network Location
dialog box, select Home Network or Work Network and click Close.
|
3.2. Using a USB Flash Drive
If you created a USB
flash drive with configuration settings for your wireless network, you
can use it to connect a computer running Windows 7, Windows Vista, or
Windows XP to the network. Plug the UFD into the computer that you want
to add to the wireless network. When the AutoPlay dialog box appears,
click Connect To A Wireless Network. Click OK a couple of times, and
you're done! (If Connect To A Wireless Network does not appear in the
AutoPlay dialog box, click Open Folder To View Files—or, if the AutoPlay
dialog box doesn't appear at all, open Windows Explorer and browse to
the USB flash drive—and double-click SetupSNK, a program in the UFD's root folder.)
|
If you
didn't create a UFD with wireless network configuration information
when you set up the wireless access point or router (or you lost it),
it's easy (but not obvious how) to create one. On any computer already
connected wirelessly, open Network And Sharing Center. Under Connect Or
Disconnect, click Wireless Network Connection (shown below). In the
dialog box that appears, click Wireless Properties, and then click Copy
This Network Profile To A USB Flash Drive.

You can also create a
connection UFD for a wireless network to which you're not currently
connected. In Network And Sharing Center, click Manage Wireless
Networks. Double-click the name of the network for which you want to
create a UFD, and then click Copy This Network Profile To A USB Flash
Drive.
|
Note:
These instructions
describe the process in Windows 7 specifically, although the process is
nearly identical on computers running Windows Vista or Windows XP. For
computers running other operating systems, the process of configuring a
wireless network connection varies; see the operating system
documentation or the documentation for the wireless network adapter for
more information.
3.3. Connecting to a Network Without WPS or a USB Flash Drive
Using a router's WPS
button or having configuration settings on a UFD (as described in the
previous sections) makes it dead simple to add a computer to a wireless
network. However, these options aren't always available. This might be
the case if you're visiting someone else's WLAN, if you didn't create a
UFD when you configured your wireless network, or if the UFD is simply
not available.
Click the
notification area's Network icon, click a network, and click Connect to
display a dialog box like the one shown earlier in Figure 17-5. Enter the security key that was created when configuring the router to join the network.
|
If you've forgotten the
security key, you can find it on a computer that's already connected to
the wireless network. On that computer, click the Network icon in the
notifi cation area, right-click the network name, and choose Properties.
On the Security tab, select Show Characters to display the network
security key.
|
3.4. Connecting to a Hidden Network
Some wireless
networks are set up so that they don't broadcast their SSID.
(Configuring a router to not advertise its name has been incorrectly
promoted by some as a security measure. Although it does make the
network invisible to casual snoops, lack of a broadcast SSID is no
deterrent to a knowledgeable attacker. Furthermore, attackers can learn
the SSID even when they're not near your wireless access point because
it's periodically broadcast from your computer, wherever it happens to
be.) Connecting to such hidden networks is a bit more challenging
because its name doesn't appear in View Available Networks (shown
earlier in Figure 17-4).
Instead, it's shown in the list as Other Network. Click that item to
connect, just as you would for any other wireless network, and Windows
asks you to provide the SSID.
You can also set up
your computer so that it connects to a particular nonbroadcasting
wireless network whenever you're in range, as follows:
Open Network And Sharing Center, and click Set Up A New Connection Or Network.
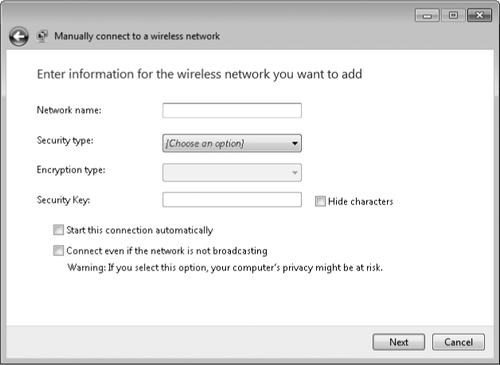
In the Set Up A Connection Or Network wizard, select Manually Connect To A Wireless Network and click Next.
Specify
the network name (SSID), the type of security used by the network, the
encryption type if the network uses WPA or WPA2 security, and the
security key or passphrase. Select Connect Even If The Network Is Not
Broadcasting. (What is the privacy
risk mentioned in the dialog box? When this option is turned on, your
computer sends out probe requests to locate the wireless network; an
attacker can detect these probe requests and use them to determine the
network's SSID. Your computer continues to send these requests even when
you're away from your network's access point.) Click Next.
Click Next, and then click Close.
3.5. Setting Up Per-User Wireless Network Connections
By default, when you set up a wireless connection on your computer, it's available to
all users of your computer. You can optionally make a connection
available only to the user who's currently logged on. To make that
option available, you must make a setting before you set up the wireless
network connection, as follows:
In Network And Sharing Center, click Manage Wireless Networks.
On the toolbar of the Manage Wireless Networks window, click Profile Types.
In the Wireless Network Profile Type dialog box, select Use All-User And Per-User Profiles.
Thereafter, when you set up a
new wireless network, Windows asks whether you want the network to be
available to all users or only to yourself. You can't apply this setting
to an existing network; to do that, you must delete the network (in
Manage Wireless Networks, select the network and click Remove) and then
re-create it (in Manage Wireless Networks, click Add).
