4. Surface SQL Azure Data in a Visual Web Part
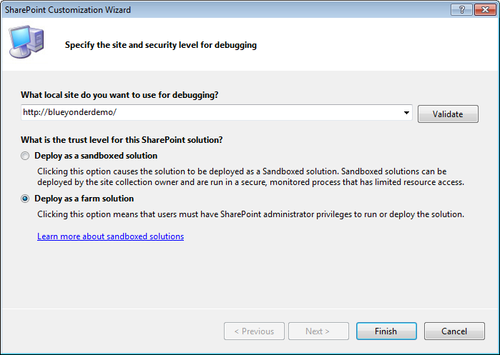
Open Visual Studio 2010 and click File | New Project. Select the SharePoint 2010 Empty Project template, and click Deploy As A Farm Solution when prompted in the SharePoint Customization Wizard.
Right-click the newly created project, and select Add | New Item. In the Add New Item dialog box, select Visual Web Part. Provide a name for the project (for example, SQL_Azure_Web_Part).

In
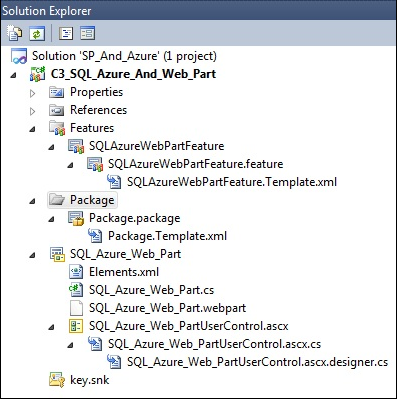
the Solution Explorer, right-click the newly added feature, and select
Rename. Provide a more intuitive name for the Feature (for example, SQLAzureWebPartFeature).
Right-click the ASCX file (SQL_Azure_Web_PartUserControl.ascx, for example), and select View Designer. When the designer opens, ensure that the Toolbox is visible. If it is not, click View, and select Toolbox. Click the Design tab, and drag a label, datagrid, and button onto the designer surface. Use the control types and names shown in the following table. | Control Type | Control Name |
|---|
| Label | lblWebPartTitle | | GridView | datagrdSQLAzureData | | Button | btnGetSQLAzureData |
After
you’ve added the controls, you can click the Source tab to view the UI
code. It should look something similar to the following code (note that
you won’t have the onclick event until you double-click the button to
add this event): <%@ Assembly Name="$SharePoint.Project.AssemblyFullName$" %>
<%@ Assembly Name="Microsoft.Web.CommandUI, Version=14.0.0.0, Culture=neutral,
PublicKeyToken=71e9bce111e9429c" %>
<%@ Register Tagprefix="SharePoint" Namespace="Microsoft.SharePoint.WebControls"
Assembly="Microsoft.SharePoint, Version=14.0.0.0, Culture=neutral, PublicKeyToken=71
e9bce111e9429c" %>
<%@ Register Tagprefix="Utilities" Namespace="Microsoft.SharePoint.Utilities"
Assembly="Microsoft.SharePoint, Version=14.0.0.0, Culture=neutral, PublicKeyToken=71
e9bce111e9429c" %>
<%@ Register Tagprefix="asp" Namespace="System.Web.UI" Assembly="System.Web.
Extensions, Version=3.5.0.0,
Culture=neutral, PublicKeyToken=31bf3856ad364e35" %>
<%@ Import Namespace="Microsoft.SharePoint" %>
<%@ Register Tagprefix="WebPartPages" Namespace="Microsoft.SharePoint.WebPartPages"
Assembly="Microsoft.SharePoint, Version=14.0.0.0, Culture=neutral, PublicKeyToken=71
e9bce111e9429c" %>
<%@ Control Language="C#" AutoEventWireup="true" CodeBehind="SQL_Azure_Web_
PartUserControl.ascx.cs"
Inherits="C3_SQL_Azure_And_Web_Part.SQL_Azure_Web_Part.SQL_Azure_Web_PartUserControl"
%>
<asp:Label ID="lblWebPartTitle" runat="server" Text="SQL Azure Web Part"></asp:Label>
<p>
<asp:GridView ID="datagrdSQLAzureData" runat="server">
</asp:GridView>
</p>
<p>
<asp:Button ID="btnGetSQLAzureData" runat="server"
onclick="btnGetSQLAzureData_Click" Text="Get Data" />
</p>
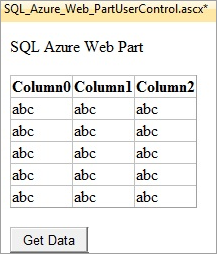
After you add the controls, edit the Text property of the label so it reads SQL Azure Web Part, and change the button text to Get Data. When you’re done, they should look similar to the following image.
Double-click the Get Data button to add an event to the btnGetSQLAzureData
button. Visual Studio should automatically open the code-behind view,
but if it doesn’t, right-click the ASCX file in the Solution Explorer,
and select View Code. Add
the bold code shown in the following code snippet to your Visual Web
Part ASCX code-behind file. Note that you’ll need to replace the servername, username, and password with your own variables and credentials for your SQL Azure instance (for example, server.database.windows.net for servername, john@server for username, and your password for the password variable): using System;
using System.Web.UI;
using System.Web.UI.WebControls;
using System.Web.UI.WebControls.WebParts;
using System.Data;
using System.Data.SqlClient;
namespace C3_SQL_Azure_And_Web_Part.SQL_Azure_Web_Part
{
public partial class SQL_Azure_Web_PartUserControl : UserControl
{
string queryString = "SELECT * from Customers.dbo.CustomerData;";
DataSet azureDataset = new DataSet();
protected void Page_Load(object sender, EventArgs e)
{
}
protected void btnGetSQLAzureData_Click(object sender, EventArgs e)
{
//Replace servername, username and password below with your SQL Azure
//server name and credentials.
string connectionString = "Server=tcp:servername;Database=Customers;" +
"User ID=username;Password=password;Trusted_Connection=False;
Encrypt=True;";
using (SqlConnection connection = new SqlConnection(connectionString))
{
SqlDataAdapter adaptor = new SqlDataAdapter();
adaptor.SelectCommand = new SqlCommand(queryString, connection);
adaptor.Fill(azureDataset);
datagrdSQLAzureData.DataSource = azureDataset;
datagrdSQLAzureData.DataBind();
}
}
}
}
Amend the .webpart file to provide some additional information about the Web Part; specifically, amend the Title and Description properties. You can also amend the location of where you deploy the Web Part. These amendments are shown in the following code: ...
<properties>
<property name="Title" type="string">SQL_Azure_Web_Part</property>
<property name="Description" type="string">Web part to load SQL Azure data.</
property>
</properties>
...
...
<Property Name="Group" Value="SP And Azure" />
<Property Name="QuickAddGroups" Value="SP And Azure" />
...
When
you’re done, right-click the project, and select Build. When the
project successfully builds, right-click the project, and select Deploy. After
the project successfully deploys, navigate to your SharePoint site and
create a new Web Part page. (Click Site Actions | View All Site Content |
Create | Page | Web Part Page | Create. Then provide a name for the Web
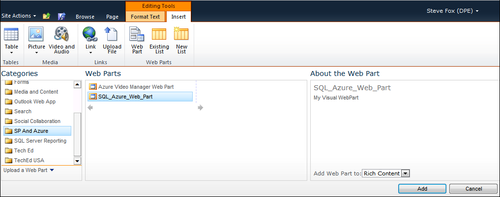
Part page, and click Create.) Click
Add A Web Part, navigate to the SP And Azure category, select your
newly deployed Web Part, and click Add. The following image illustrates
where you’ll find your newly created Web Part—in the SP And Azure group.
Click Stop Editing on the ribbon to save your changes to SharePoint. Click the Get Data button in the Visual Web Part to retrieve the SQL Azure data and display it in your new Visual Web Part. The result should look similar to the following image.
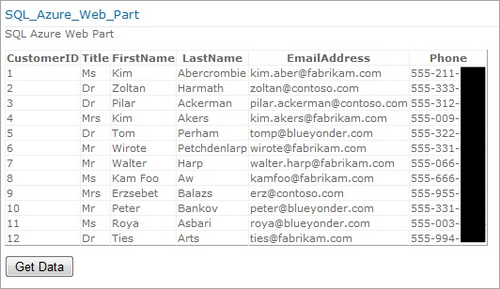
At this point, you’ve created a Visual Web Part that consumes your SQL
Azure data—albeit one that has very little formatting. You can use the
DataGrid Properties window to add some design flair to your Visual Web
Part if you like.
You could equally use the SQL connection
pattern to integrate SQL Azure with SharePoint in other ways. For
example, you could create a Microsoft Silverlight application that
displays data in similar ways. You can also use the SQLDataAdapter
class to update and delete records from SQL Azure, whether you make the
initial call from the Visual Web Part or from Silverlight.
You can wrap integration with a SQL
Azure database with a WCF service and use the service as your proxy to
the SQL Azure data; you could also create and deploy a Microsoft ASP.NET
application to Windows Azure that uses SQL Azure and then integrate
that with SharePoint; and you can use the Microsoft ADO.NET
Entity Framework and Microsoft Language Integrated Query (LINQ), and
develop WCF Data Services and access your SQL Azure data by using
REST.
|
