Logo
programming4us
programming4us
programming4us
programming4us
Home
programming4us
XP
programming4us
Windows Vista
programming4us
Windows 7
programming4us
Windows Azure
programming4us
Windows Server
programming4us
Windows Phone
 
Windows Vista

Adobe Fireworks CS5 : Extra Credit (part 2) - Stroking rendered text

- Free product key for windows 10
- Free Product Key for Microsoft office 365
- Malwarebytes Premium 3.7.1 Serial Keys (LifeTime) 2019
8/8/2012 3:27:00 PM

Stroking rendered text

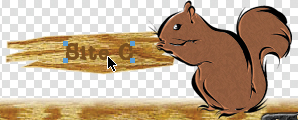
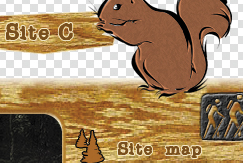
The text in this example is a little rustic, and is in keeping with the color theme of the site—but without a stroke, it blends into the background elements too easily. While all the other text is fine, the Site C text on the squirrel’s sign has not yet been changed. You will do this now.

1.
Use the Pointer tool to select the Site C rendered text.
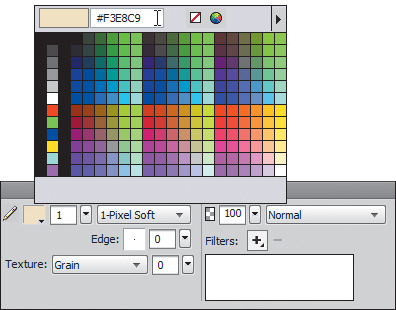
2.
In the Properties panel, change the Stroke color to #F3E8C9.

How do you convert text to a path, anyway?

Select the text block with the Pointer tool, and then choose Text > Convert To Paths from the main menu bar. The text is converted to a grouped set of paths. You can select individual letters with the Subselection tool.
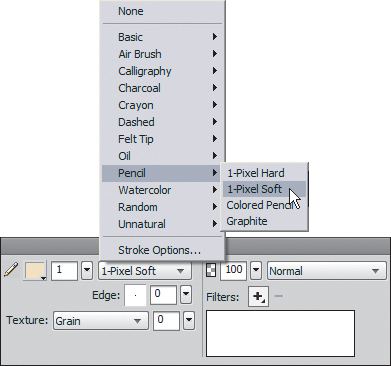
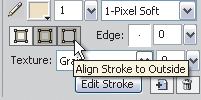

3.
Set Stroke Category to Pencil > 1-Pixel Soft.

You may find that the stroke does not match the other text elements on the console.

This mismatch is due to the default stroke position of Stroke Centered. If this has happened to your object, follow these steps to fix it.

4.
Zoom in to 500%.

5.
Select the Subselection tool.

6.
Hold down the Shift key, and click on each letter (remember, the letters are no longer a true font but rendered paths).
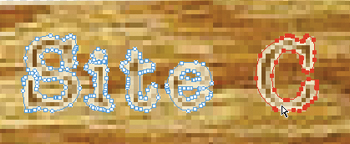
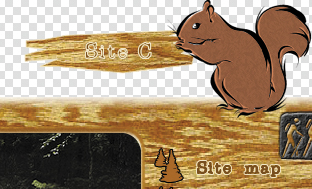
7.
In the Properties panel, change Stroke Location to Align Stroke To Outside.

Your Site C text should now match the text on the console.

8.
Save your work.

Stroking real text

The workflow for adding strokes to true text is a little different.

1.
Select the Text block with the Pointer tool.

2.
Choose the Stroke (or Text Outline) color box.

3.
Choose Stroke Options.

4.
Select the type of stroke you want (in our example, it was Pencil > 1-Pixel Soft). You can choose a stroke color at the same time by clicking on the color fill box in the Stroke Options dialog box.

5.
Press Enter or Return.
Other -----------------
- Adobe Flash Catalyst CS5 : Grouping and transforming
- Adobe Flash Catalyst CS5 : Binding the Data to the Visual Component
- Adobe After Effects CS5 : Building a 3D object (part 2)
- Adobe After Effects CS5 : Building a 3D object (part 1)
- Creating Basic Windows Images : Deploying Custom Images
- Creating Basic Windows Images : Capturing Custom Images
- Adobe Flash Professional CS5 : Importing Graphics - Importing Photoshop and Illustrator Files
- Adobe Flash Professional CS5 : Importing Graphics - Setting Photoshop Import Preferences
- Adobe InDesign CS5 : Creating and Running Scripts
- Adobe InDesign CS5 : Using Scripts - Exploring VBA
 
 
Top 10
- Microsoft Visio 2013 : Adding Structure to Your Diagrams - Finding containers and lists in Visio (part 2) - Wireframes,Legends
- Microsoft Visio 2013 : Adding Structure to Your Diagrams - Finding containers and lists in Visio (part 1) - Swimlanes
- Microsoft Visio 2013 : Adding Structure to Your Diagrams - Formatting and sizing lists
- Microsoft Visio 2013 : Adding Structure to Your Diagrams - Adding shapes to lists
- Microsoft Visio 2013 : Adding Structure to Your Diagrams - Sizing containers
- Microsoft Access 2010 : Control Properties and Why to Use Them (part 3) - The Other Properties of a Control
- Microsoft Access 2010 : Control Properties and Why to Use Them (part 2) - The Data Properties of a Control
- Microsoft Access 2010 : Control Properties and Why to Use Them (part 1) - The Format Properties of a Control
- Microsoft Access 2010 : Form Properties and Why Should You Use Them - Working with the Properties Window
- Microsoft Visio 2013 : Using the Organization Chart Wizard with new data
 
programming4us
Windows Vista
programming4us
Windows 7
programming4us
Windows Azure
programming4us
Windows Server