Windows Easy Transfer is designed for interactive use
and does not provide the automation features for mass usage as offered
by the User State Migration Tool (USMT). However, if you are working with an individual system in a
support role or if you are dealing with a small number of systems, the
Windows Easy Transfer utility can be a welcome feature.
The Windows Easy
Transfer tool comes with Windows Vista, so if you are moving a user from
one computer to another, what you need is ready to launch. If you are
moving a user from an earlier version of Windows, you'll need to obtain
it in one of two ways:
1. Running Easy Transfer from DVD
In the support
subfolder of the Windows Installation DVD, you will find a folder named
migwiz, and this contains the Windows Easy Transfer application (for
example. D:\support\migwiz\migsetup.exe). Simply run the migsetup.exe
file to begin. (A standard installation wizard is not displayed; it
simply prepares itself and executes the migration wizard directly.)
This does require that you
run as Administrator. Under Windows Vista you are prompted by User
Account Control (UAC) to allow execution as administrator. However, most
commonly this tool will be run on a Windows XP system, so you need to
consciously ensure execution as an administrator. As per usual, this can
be done either by logging on as an administrator or using the "Run As"
feature. Administrator privileges are required in order to successfully
scan and collect data and settings from other profiles on the local
computer.
2. Downloading Easy Transfer from Microsoft
You can download Windows Easy Transfer for Windows XP from Microsoft at www.microsoft.com/downloads/details.aspx?FamilyId=2B6F1631-973A-45C7-A4EC-4928FA173266&displaylang=en
The download does
require validation, but the download is free and anyone running a valid
installation of Windows is authorized to access the download. Running
from Windows Vista? The Windows Easy Transfer utility is actually
installed as part of the operating system so no download or install is
necessary. You can find it in the Welcome Center application (also
accessible by choosing Control Panel => System and Maintenance and from its program group in Start Menu => All Programs => Accessories =>).
3. Understanding the capabilities of Easy Transfer
Windows Easy Transfer
lets you move files and settings from one computer to another. It does
not remove any files or settings from the source computer in the
process. It allows for the transfer of the following items:
User accounts
Folders and files
Program settings
Internet related items
E-mail related items
NOTE
During use of
the Windows Easy Transfer tool, the computer cannot be used. Any running
applications must be closed, and the desktop is completely taken over
by the application during the process.
Although Windows
Easy Transfer does not handle migration of applications, a new tool is available as a beta download
entitled Windows Easy Transfer Companion.
It is based on a popular third-party migration tool named Alohabob PC
Relocator, as part of Microsoft's acquisition of Apptimum, Inc. It
provides for the migration of applications (beyond settings, the
applications themselves). It works for a limited set of over 100
applications. It is not likely to address even most of your needs, but
it certainly could be a help. At least for now, this technology is tied
to Windows Easy Transfer and not USMT, so it is again more likely for
use in migrations of very few computers.
The Windows Easy Transfer Companion beta is available for download at www.microsoft.com/downloads/details.aspx?FamilyID=39f724eb-4e37-4be0-adfc-786786e73e50&displaylang=en. An article discussing its use and a list of supported applications may be found at http://support.microsoft.com/kb/931696.
4. Using Windows Easy Transfer
After the
Windows Easy Transfer application is launched, the desktop is taken over
by the application. The application collects information on what it is
you want to transfer, where you want to store it, and then does the work
of collecting and storing the selected data.
Naturally, there are two distinct operations in using Windows Easy Transfer:
Collecting files and settings
The computer from which files and settings are to be migrated is referred to as the old computer by the Windows Easy Transfer tool. To make use of Windows Easy Transfer, sit down at the old computer and follow these steps:
Launch Windows Easy Transfer.
The tool must be run as administrator in order to access all areas
necessary. Therefore if launching Windows Easy Transfer from a Windows
Vista system, a User Account Control (UAC) prompt must be acknowledged.
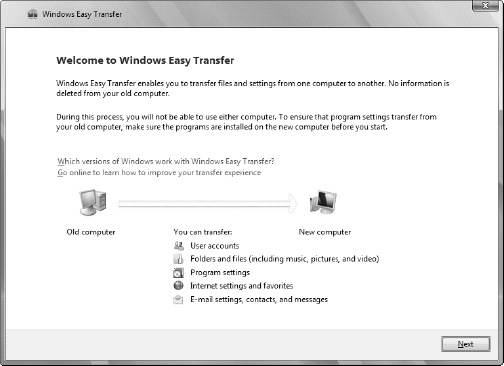
A Welcome screen appears as the first screen of the wizard (see Figure 1). It contains a summary of the tool's capabilities and links to help.
Click the Next button to begin.
The resulting screen lets you continue a transfer in progress (if files
and settings have been previously selected) or to start a new transfer.
Choose Start a new transfer to continue.
The wizard prompts to identify what task it is you want to perform by
asking which computer the tool it is on, which the application is being
executed: My new computer (to restore files and settings) or My old
computer (to collect files and settings).
Choose My old computer to continue.
The next screen asks how you want to go about performing the transfer.
Choices include using an Easy Transfer Cable, using a network
connection, or using removable media (such as a writable CD, DVD, or USB
drive). The first two options include using a network connection to
perform a live migration directly from the old computer to the new one.
If you are migrating operating systems, the target may actually be the
same computer. Further, choosing the removable media option also
provides the option to specify a network location (to store the payload
as opposed to performing the transfer directly). Therefore, for the
purpose of this walkthrough, choose Use a CD, DVD or other removable
media to continue the process.
NOTE
Unfortunately, an
Easy Transfer Cable is not simply a standard USB cable, but a
proprietary one with a chip that allows for the connection of two
systems. You cannot use a simple USB cable for this task. This option is
intended for home users who do not have a network to support the
migration. A handful of partners manufacture the cable for Microsoft
(including Belkin) and are available online for around $20 to $40.
Windows Easy
Transfer next prompts for what removable media you want to utilize for
the transfer. Options include CD or DVD, USB flash drive, or External
hard disk or to a network location. Naturally, the right choice is
dependent upon your environment.
For purposes of this walkthrough, choose External hard disk or to a network location.
On the next screen, specify the path to where the payload should be stored in the Network location field.
We also recommend that this data be protected by entering an optional
password (as is typical, the password must be typed twice to confirm it
was entered as intended).
Press the Next button to continue. You are prompted to choose what is to be transferred.
You can choose All user accounts, files and settings; My user account, files and settings; or Advanced options.
The recommended choice is All user accounts, files, and settings, but
in order to see just what can be migrated, choose Advanced options.
A
progress bar appears briefly as Windows Easy Transfer determines what
it will be able to migrate. When complete, a list of accounts, files and
settings are presented with check boxes alongside each. All are checked
by default, and any items you do not wish to migrate can be unchecked.
There are also buttons to add specific files or folders or to specify
other drives. At the bottom right, the size of the data to be
transferred is displayed. Keep an eye on this if the space you have for
the transfer is limited.
After all desired items have been specified, click the Next button to begin collecting user files and settings. When complete, a message that you are ready to transfer files and settings to your new computer is displayed.
Restoring files and settings
The computer to where files and settings are to be restored is referred to as the new computer
by the Windows Easy Transfer tool. To restore the data collected from
the old computer using the previous steps, sit down at the new computer
and follow these steps:
Launch Windows Easy Transfer. If you have any running programs, you are prompted to close them before proceeding.
A Welcome screen appears as the first screen of the wizard (see Figure 5.5). It contains a summary of the tool's capabilities and links to help.
Click the Next button to begin.
On the next screen, choose Continue a new transfer in progress to continue. You are prompted to identify how the data is to be retrieved: over the network or using removable media.
Choose No, I've copied files and settings to a CD, DVD, or other removable media to continue.
The
wizard then asks where the files were saved: On a CD or DVD, on a USB
flash drive, or on an external hard disk or network location.
Choose On an external hard disk or network location to continue.
On
the next page, you can type or browse to the location of your settings
file and optionally include a password in the field provided if you
choose to enter one during the capture process. When you have specified
the path (and if necessary the password) needed to access the data,
press the Next button to continue.
The
Windows Easy Transfer wizard next asks that you "Type a new user name
or click a name in the list" in order to specify the target account. You
can use the same name or a new one. If you create a new account the
password is not transferred to the new computer; instead the user will
be prompted to create a password the first time they log on to the new
computer.
After you have specified a target user account for those to be restored, click the Next button to continue.
A
summary page is offered so you may review the selected files and
settings. A tree-view is provided so you may browse what is to be
restored, and at the bottom right, the transfer size is identified.
Click the Transfer button to begin the restoral process.
During
the restoral process, you are warned not to use the computer or you may
need to restart the restoral process. After the transfer is completed, a
transfer summary is displayed with the option to see a detailed list of
what was transferred.
Click the Close button to exit Windows Easy Transfer.
