Although a computer blaring loud music can be fun when you’re relaxing or having a party, it’s not
a good idea when you’re working on a notebook computer around other
people in a crowded room or office. Fortunately, you can adjust the
sound levels for your system and for each of your applications. You can
also turn off the Windows startup sound if you don’t want to announce to
everyone in the room that you just turned on your computer. If your
computer has more than one output device, you can specify which one is
the default device while you’re setting the volume levels for each
device.
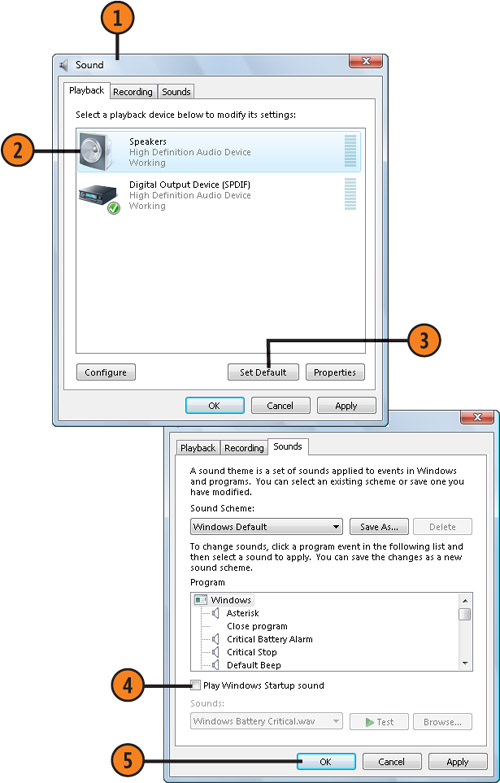
Set the Defaults
- 1. Click the Start button, type sound in the Search box of the Start menu, and click Sound to display the Sound dialog box.
- 2. On the Playback tab, double-click a device to display its Properties
dialog box. Make any device-specific settings that you want to be the
default settings for that device, including volume levels and
enhancements, and click OK. Repeat for each device. (The settings that
you can make in the Properties dialog box vary for different devices
because of the different features of individual devices.)
- 3. Click the device that you want to set as the default device, and click Set Default.
- 4. On the Sounds tab of the Sound dialog box, clear this check box if you
never want to hear the Windows startup sound when you turn on your
computer, or select the check box if you do want to hear the sound.
- 5. Click OK.
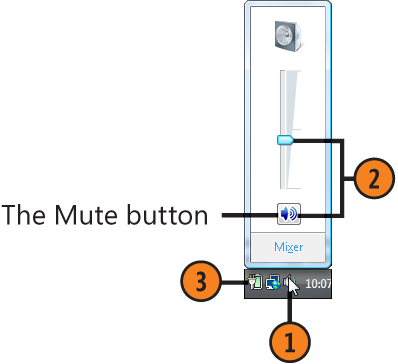
Set the Master Volume Level
- 1. Click the Volume icon in the notification area of the taskbar.
- 2. Do either of the following:
- 3. Click outside the Volume Control to close it.
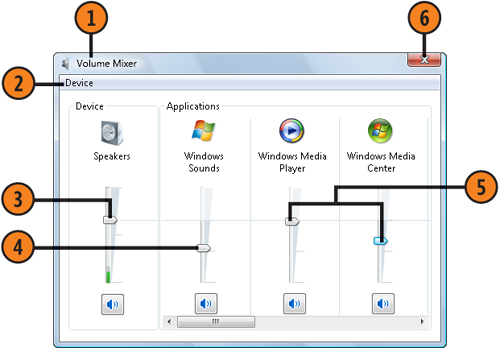
Set the Volume for Events and Programs
- 1. Click the Volume icon on the taskbar, and click Mixer to display the Volume Mixer dialog box.
- 2. Click Device, and specify which device you want to set the sound levels for if you have more than one device.
- 3. Adjust the volume for the device.
- 4. Adjust the volume for the event sounds used with Windows.
- 5. Adjust the sound level for each running program.
- 6. Close the Volume Mixer dialog box when you’ve finished.
|
