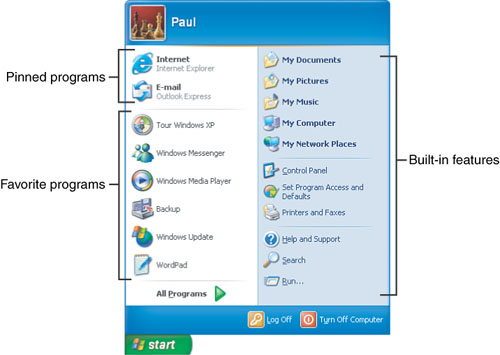
The Start menu is divided vertically into two sections, as shown in Figure 1:
| Favorite programs | This
is the left side of the Start menu, which appears by default with a
white background. This side includes the fixed Internet and E-mail icons
at the top, and below them are shortcut icons for the six programs that
you’ve used most frequently. |
| Built-in features | This
is the right side of the Start menu, which appears by default with a
light blue background. It contains icons for various built-in Windows XP
features. |
The list of favorite
programs is one of the best features in Windows XP because it ensures
that the programs you use most often are always just a couple of mouse
clicks away. If there’s a downside to this feature, it’s that it
displays a maximum of six icons, so many frequently used programs get
left off the list. However, if you have enough room, you can tell
Windows XP to display up to 30 icons in this area. Here’s how:
1. | Open the Control Panel’s Taskbar and Start Menu icon. The Taskbar and Start Menu Properties dialog box appears.
|
2. | Select the Start Menu tab.
Tip
A
quick way to go directly to the Start Menu tab is to right-click either
the Start button or an empty section of the Start menu and then click
Properties.
|
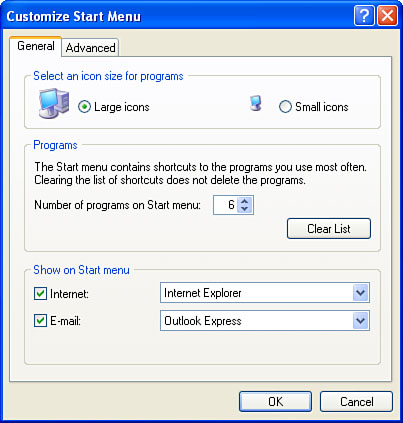
3. | Make
sure that the Start Menu option is activated and then click the
Customize button to its right. The Customize Start Menu dialog box
appears, as shown in Figure 2.
|
4. | Use the Number of Programs on Start Menu spin box to specify the number of favorite programs you want to display.
|
5. | If you want to start over with a fresh list of frequent programs, click the Clear List button.
Tip
If you need to get rid
of only one or two icons from the Start menu’s frequent programs list,
display the Start menu, right-click an icon you want to delete, and then
click Remove from This List.
|
6. | If
you don’t think you have enough screen space to display all the icons,
activate the Small Icons option. This significantly reduces the amount
of space each icon takes up on the Start menu.
|
7. | Click OK.
|
Tip
To prevent a
program from appearing on the Start menu’s frequent programs list, open
the Registry Editor and display the following key:
HKCR\Applications\program.exe
Here, program.exe is the name of the program’s executable file. (If the key doesn’t exist, create it.) Create a string value called NoStartPage and set its value to the null string ("").
You can also do this via Tweak UI. Open the Taskbar, XP Start Menu
branch and deactivate the check boxes for the programs that you don’t
want to appear on the Start menu.
