HomeGroup is a networking feature, new in Windows 7,
that is designed to provide easy sharing in a home environment without
needing technical expertise. With HomeGroup, Microsoft has striven to
strike a balance between security and convenience—a balance that has
been somewhat elusive through the evolution of Windows. Although Simple
File Sharing in Windows XP is convenient and relatively easy to set up,
it's inflexible and its security is weak. Sharing in Windows Vista is
considerably more secure and more flexible, but it's not easy to
configure properly, and it requires sacrifices that some home users are
reluctant to make, such as requiring the use of a logon password for all
accounts.
Microsoft usability
researchers found that many home users choose not to use logon passwords. Because
everyone in the home is fully trusted and because the computer is in a
physically secure location (a locked home) that precludes computer use
by unknown or untrusted users, these users find the logon password to be
nothing more than an unnecessary obstacle to computer use. This can be a
real annoyance to family users who simply want to share media
throughout the house, share a printer, and share documents. For this
reason, HomeGroup is designed to work equally well with computers and
users that do not use logon passwords and those that do. Even without
password protection, it keeps your files safe from users outside the homegroup. (It does so
through the use of a special
password-protected user account—HomeGroupUser$—and
a HomeUsers
security group that have network access privileges.
HomeGroup offers the following benefits:
Easy sharing of libraries and other files throughout
the homegroup in Windows Explorer
Easy access to shared media libraries in Windows
Media Player and Windows Media Center
Ability to stream media to devices (other computers,
media extenders and players, digital picture frames, and so on) using
Play To
Easy
sharing of USB-connected printers among all homegroup members
The requirements to
implement and use HomeGroup are few:
At least one
computer running Windows 7 Home Premium or above, to create the
homegroup
All
computers in the homegroup running Windows 7
The network location for all
computers set to Home Network
Note:
HomeGroup can be
useful even in networks
that include a mix of computers running Windows 7, earlier versions of
Windows, and other operating systems, such as Mac OS X and Linux.
Although only the Windows 7 computers can use HomeGroup features,
HomeGroup coexists nicely with the traditional sharing methods that
you'll need to use to share with users of other operating systems.
If you have only a single
computer with Windows 7 but you also have networked
media devices (for example, an Xbox 360 or a digital picture frame), HomeGroup can
be useful. On that computer, after you create a homegroup you can
discover these devices and play media to them more easily than you can
with earlier Windows versions.
For users,
setting up HomeGroup is a straightforward process. On one computer—it
doesn't matter which one because HomeGroup is a true peer-to-peer
networking system without a designated server/controller—you create a homegroup. Then, on
other computers, you join the homegroup.
1. Deciding
What to Share—And What Not to Share
When you first create
or join a homegroup, Windows asks which libraries you want to share, as shown in Figure 1. Not surprisingly, the libraries
shown here correspond to the libraries you see in Windows Explorer.
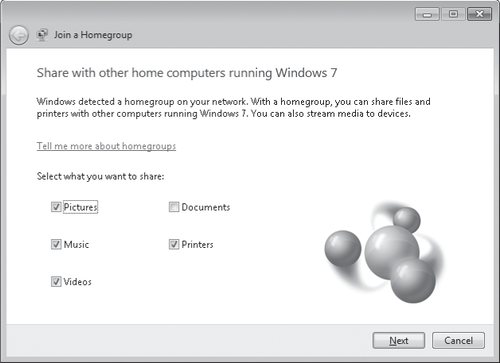
Note:
If your computer is
joined to a domain, these sharing options are not available when you
join a homegroup.
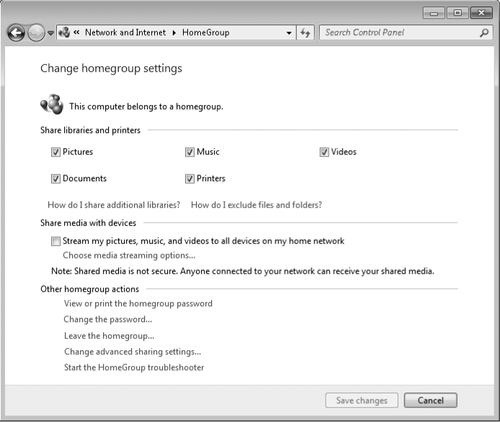
You can change your
library selections at any time later by visiting HomeGroup, which you
can open by typing homegroup in the Start menu search box or Control Panel, or
by right-clicking Homegroup
in Windows Explorer and choosing Change HomeGroup Settings. All those
routes lead to HomeGroup, as shown in Figure 2.
Fortunately, you're not limited to sharing only
the content of the Documents, Music, Pictures, or Videos libraries. If
you would like to share other folders or files with users of other computers in
your homegroup, you can use any of these methods:
Add the folder (or
folders) to an existing library. (You can do that by opening the library
and clicking the Locations link, or by right-clicking the item you want
to add and choosing Include In Library.) Folders and files that you add
to a shared library are automatically shared, with no additional steps
required.
Create
a new, custom library. (In Windows Explorer, right-click Libraries and
choose New, Library, or right-click the folder to include and choose
Include In Library, Create New Library.) Then share the library as
explained below.
Share
a folder that's not in a library.
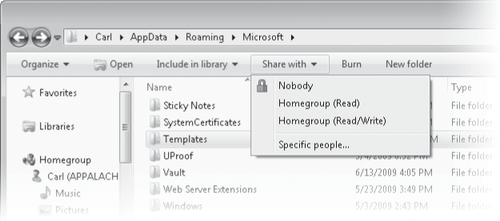
To share a custom
library or one or more folders,
open Windows Explorer and select the item (or items) you want to share.
On the toolbar (shown below) or on the right-click menu, click Share
With, Homegroup (Read) or Share With, Homegroup (Read/Write). Which
command you select, of course, determines whether a homegroup user on
another computer can create, modify, and delete folders and files within
the shared folder. Both options share the selected item with your
entire homegroup.
Warning:
Don't share the root
folder of a drive (for example, D:\). Although sharing the root
folder has long been common practice, we recommend against doing so.
Because of the way permissions are inherited, changing permissions on
the root folder can cause a variety of access problems. A better
solution is to create a subfolder of the root folder, put everything you
want to share into it, and share the subfolder.
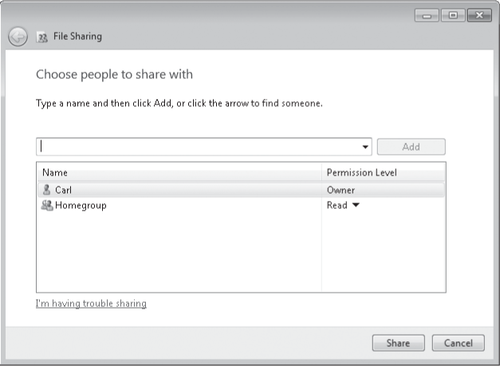
To share with only
certain individuals, choose Share With, Specific People. Doing so opens
the File Sharing dialog
box shown in Figure 3.
You also use the Share With
command on the toolbar or the right-click menu to prevent
sharing of a
particular folder or file within a shared library or folder. Simply
choose Share With, Nobody to stop sharing
the selected items.
Similarly, you can
override the default sharing
settings within a library—public folders are shared with read/write
access, and private profile folders are shared with read access—by
selecting a folder or file within the shared library or folder and
clicking Share With.
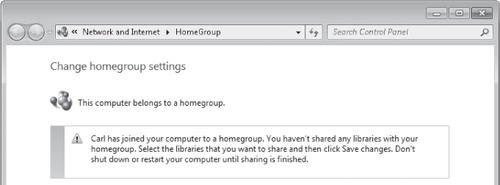
Note:
A computer joins a homegroup and, therefore, all users on that
computer have access to the homegroup's shared resources. However,
sharing options are maintained on a per-user basis; on a computer with
more than one user account, each user decides which of his or her
libraries to share. The first time a user goes to HomeGroup in Control
Panel after the computer has been joined to a homegroup, a screen like
the on shown next appears.