Windows XP Mode is a special feature available only
on higher-end versions of Windows 7—specifically the Professional,
Enterprise, and Ultimate editions (see Figure 1).
Windows XP Mode provides a fully licensed copy of Windows XP (with
Service Pack 3 already installed) running virtually within your Windows 7
system.
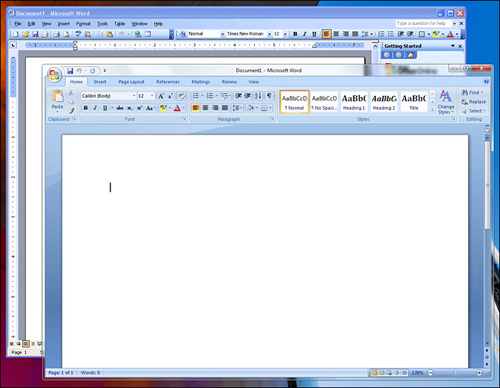
Unlike most virtualization
solutions, this one does not require that you run the Windows XP
instance as a separate desktop. Instead, as you install applications
within the virtual XP environment, they are published to the host
(Windows 7) operating system as well. Shortcuts for these applications
are even placed into the Start Menu. The result? You can run Windows
XP–based applications alongside Windows 7 applications on a single
desktop.
What’s the point of Windows
XP Mode? One of the problems that is a continuing concern among many
businesses is the stability with which Windows 7 will run applications
that were written for Windows XP. This doesn’t apply only to custom
applications, either—older software of all types has been found to have
issues of this sort, even including older versions of Microsoft Office.
Windows XP Mode
isn’t shipped as part of the standard Windows 7 installation DVD.
Instead, you download the installation from the Microsoft website
(similar to how Live Essentials is handled).
To install Windows XP
mode, you need to download two installers—the Windows Virtual PC
installer and the Windows XP Mode software, which uses Virtual PC to
run. However, before you do this, you should check your machine to make
sure it is capable of running Virtual PC, and thus Windows XP Mode.
The reason for this is that
Microsoft Virtual PC requires hardware virtualization support, which is
only available in newer systems. The best resource we found for
determining if your system includes virtualization support was to first
find out what kind of processor you have.
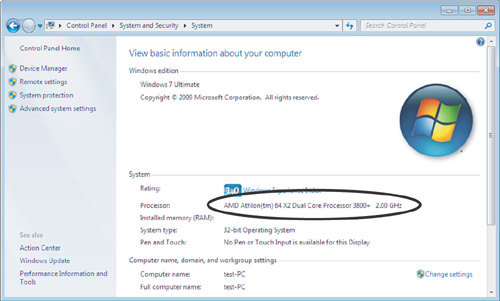
How do you do this? Inside Windows 7, open the Control Panel, click System and Security then click System. See Figure 2.
Next, depending on whether your PC uses an Intel or AMD CPU, go to one of these two sites:
Once you have verified that
your PC uses a CPU capable of using virualization, you can get started
with installing Windows XP Mode. Here’s how:
1. | Go to http://www.microsoft.com/windows/virtual-pc/download.aspx
and download the Windows Virtual PC and Windows XP Mode installers.
Note that this link also includes instructions on how to enable hardware
virtualization on your PC, if your computer’s CPU supports hardware
virtualization.
|
2. | Install Windows Virtual PC. Your system needs to be rebooted after you have installed Virtual PC.
|
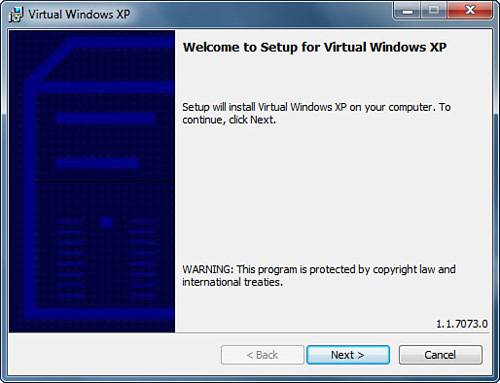
3. | After you have restarted your system, and Virtual PC has completed its installation, install Windows XP Mode (see Figure 3).
|
4. | Accept the Virtual Windows XP license.
|
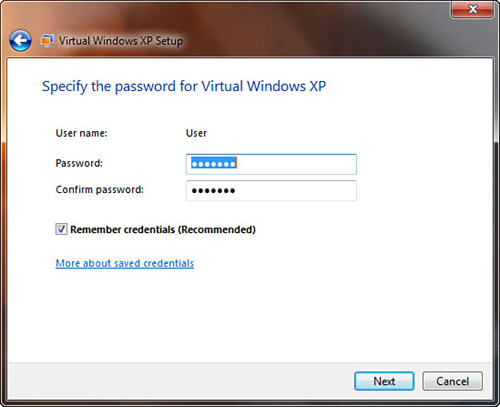
5. | Set up the user and password for the virtual Windows XP system, as shown in Figure 4.
|
6. | Finish the setup as you would for a regular Windows XP installation.
|
7. | Start the virtual system.
|
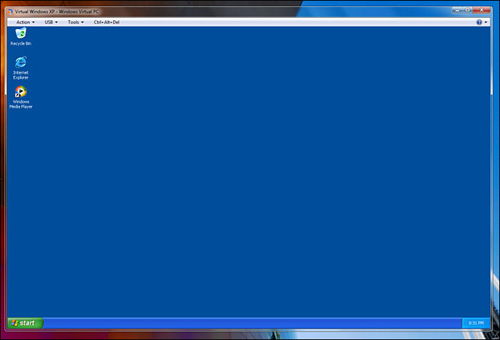
8. | After you’ve started the virtual Windows XP system, you’ll see what looks like a standard Windows XP desktop (see Figure 5).
The only difference is that it will have a new menu bar at the top,
which controls the virtual shell that the Windows XP instance runs in.
|
Configuring Windows XP Mode
After you’ve installed the virtual Windows XP system, you need to configure it and then install software:
1. | From
the Tools menu in the virtual machine, select Settings. This allows you
to configure a variety of system settings that apply to the virtual
machine.
|
2. | The
first thing that you will do when you start Windows XP Mode is to set
the password used by Virtual Windows XP. Enter the password, and a
confirmation of that password, before clicking the Next button.
|
3. | Next,
you will be asked to configure the update policy for the virtual
Windows XP subsystem. Because this is a fully functional Windows XP Pro
installation, it will have the same network vulnerabilities that a
standalone Windows XP system would.
Tip
Because the virtual
Windows XP system is fully licensed, we suggest you turn on Automatic
Updates, unless there is a good reason not to, and you are fully aware
of the consequences of that choice.
|
4. | Once
you’ve completed these steps, the virtual Windows XP system will start
up for the first time. The system will “set itself up” just like it
would for a regular installation. It will also enable the integration
features that allow Windows XP Mode to tie into Windows 7.
|
Virtual Windows XP Menus
The system window
that Virtual Windows XP opens on your desktop has several menus across
the top, allowing you to configure the virtual system as needed.
Action Menu
Table 1 explains the available options.
Table 1. Action Menu
| View Full Screen | This item expands the virtual Windows XP system window to the full size of your screen. |
| Sleep | Puts the virtual Windows XP system to sleep. Does NOT put your Windows 7 system to sleep, however. |
| Restart | Restarts and reloads the virtual Windows XP system. |
| Close | Quits the virtual Windows XP system and closes Windows Virtual PC. Does not exit Windows 7. |
USB Menu
This
menu lists all USB devices that Windows has identified and gives you
the option of attaching/detaching and sharing/not sharing each device.
Tools Menu
This menu has two options as shown in Table 2.
Table 2. Tools Menu
| Disable integration features | This
item turns off the Windows XP integration with Windows 7 and runs the
virtual Windows XP system as a separate, discrete virtual system. If you
have previously disabled integration, reselecting this item will turn
the integration features back on. |
| Settings | Brings
up the Virtual PC settings dialog box. This dialog shows the various
system settings configured for your virtual Windows XP system. If you
have shut down the virtual Windows XP system, but have the Virtual PC
window up, you can modify these settings. Note that this is only
possible if the virtual Windows XP system is not running. |