1. Problem
You have completed the build
phase of a BizTalk project and need to migrate your work from the
development environment to the test environment.
2. Solution
You must export the
BizTalk application you have been building for use in the new
environment. The BizTalk Administration Console provides the capability
to export and import artifacts. Combined with the use of BizTalk
applications, this allows for a simplified method of packaging your
solutions and deploying them to new environments. The following steps
outline the process for exporting a BizTalk application.
Open the BizTalk Administration Console.
In the left pane, navigate through BizTalk Server Administration to your BizTalk group, and expand the Applications folder.
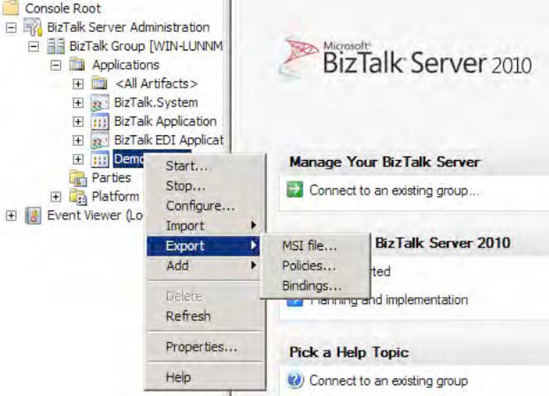
Right-click the application you wish to export and select Export→MSI File, as shown in Figure 1. This launches the Export MSI File Wizard.
Click Next on the Welcome page of the wizard.
On
the Select Resources page, verify that the resources you need to
include in the exported MSI package are selected. In the example shown
in Figure 2,
the resources consist of a number of BizTalk assemblies and their
bindings and a referenced .NET assembly. Click Next to proceed.

NOTE
Including bindings within
your MSI package will automatically overwrite any existing bindings in
the target application upon import. Exclude the bindings during the
export process if you do not want to overwrite the bindings in your
target application.
On the Specify IIS Hosts page, select the virtual directories you need to include in the exported MSI package. Click Next.
NOTE
You must specify IIS hosts for all web directory resources that have not
already been added to the BizTalk Management database. In our example,
the Order application has a SOAP receive location, which is configured to receive messages from the /addRequestWebService_Proxy/addRequestWebService_addRequestSPMLWebService_addRequest.asmx web service. Since the receive locations do not include the host, it must be specified during the export process.
On the Dependencies page, review the BizTalk applications your exported MSI package depends on, as shown in Figure 3.
Prior to importing your application into the test environment, you must
ensure that all applications listed on this page are present in the
test environment. In our example, the application depends on the BizTalk.System and BizTalk EDI applications. Click Next to proceed.

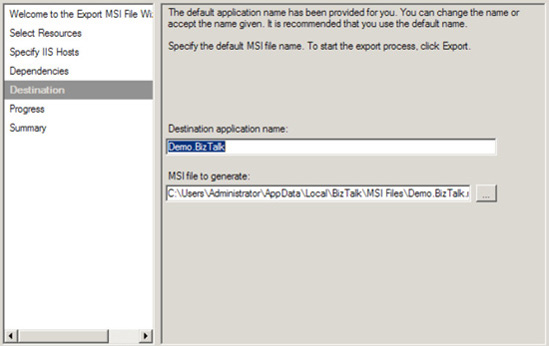
On
the Destination page, specify the destination application name (which
indicates what the application will be named in the test environment
after you have imported it) and the MSI package output location and file
name, as shown in Figure 4. In our example, the application will be named the same as it was in the development environment (Demo.BizTalk) and the MSI package will be written out to a folder on the C drive.
Click Export to generate the MSI package.
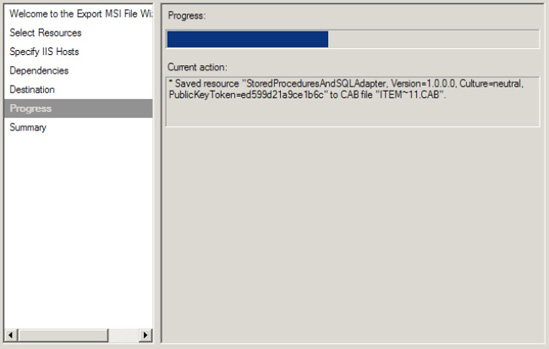
The
wizard displays the progress of the export operation and then shows a
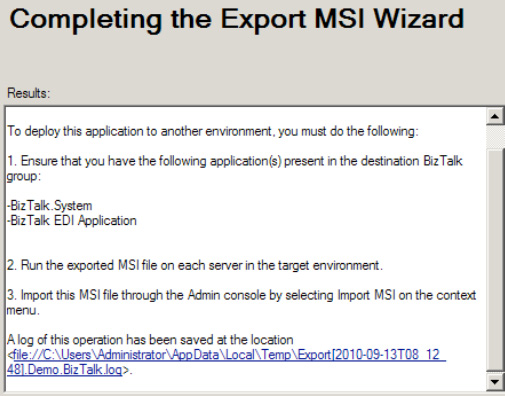
progress and summary screen when it has completed, as shown in Figures 5 and 6.
The summary includes a list of steps necessary to import the
application into a new environment, along with a link to the log file of
the export operation. Click Finish to close the wizard.
3. How It Works
While exporting applications is
an easy way to migrate solution artifacts between environments, it is
important to note what is not included in exported MSI packages.
Configuration values you have made in the BTSNTSvc.exe.config
file are not exported. If one of your artifacts relies on a custom
configuration value existing in this file, you must use another
mechanism (manual or otherwise) to add that same configuration value to
the target environment.
NOTE
In general, only those
artifacts that are specific to an application are exported. This means
that BizTalk group configurations (performance values or adapter
settings, for example) and Business Activity Monitor (BAM) artifacts are
not included in the exported MSI package.
You should be careful with
regard to security when exporting applications. Depending on your
solution, your MSI package may contain sensitive information (such as
passwords) and should be appropriately secured. One consideration is the
use of passwords in port bindings. Passwords are removed from all
bindings that you export directly from an application (as we did in our
example). If you want to persist passwords in a binding file, you must
create a binding file with the passwords in it and then add the binding
file to the application as a file resource.
You should also pay
attention to access rights on resources added to your application. All
permissions on files and folders are removed during the export process.
For web directory resources, the security settings in place at the time
of export are written to the MSI package.
In addition to using the Export MSI File Wizard, you can access the same functionality via the BTSTask ExportApp command-line utility. This utility accepts the following parameters, which mimic the steps taken in the wizard:
ApplicationName: The name of the BizTalk application to export
Package: Path and file name of the MSI package to export
ResourceSpec: Path and file name of the resource specification XML file
Server: SQL Server hosting the BizTalk Management database housing the application to export
Database: Name of the BizTalk Management database
In our recipe's example,
the exported application includes relatively few artifacts—just several
BizTalk assemblies, their bindings, and a required .NET assembly. Using
the Export MSI File Wizard is simple and straightforward. It produces a
single file that can be used to import the application into the test
environment. On a larger project, it is likely that your application
will have many more artifacts, including BizTalk assemblies, bindings,
policies, and folder structures such as virtual directories and
input/output folder hierarchies. Additionally, you might need to migrate
only a subset of an application to a new environment. Using the BizTalk
Administration Console, you can export application subsets, bindings,
and policies.
3.1. Exporting Application Subsets
Exporting
applications allows for all artifacts (or a subset of artifacts)
associated with an application to be exported into an MSI package. All
of the artifacts you select during the export process will be packaged
into a single MSI file, which you can use to install your application to
a different BizTalk environment.
In addition to exporting
an entire application, you can use the Select Resources page to specify a
subset of artifacts to export. Let's extend the solution one step
further in the project life cycle to see how this functionality might be
useful. Suppose that after testing the Order application in the test environment, you find and fix an error in the Troubleshooting
assembly. To apply your fix to the test environment, you need to export
only the modified artifacts. Step through the Export MSI File Wizard a
second time, and select only the Troubleshooting
assembly on the Select Resources page. This produces an MSI package
that includes only the selected assembly, which can be used to reimport
the modified artifact in the test environment.
NOTE
Make sure that the
assembly keeps the same strong name key and namespace on redeployment;
otherwise, the .NET environment will consider the assembly a new
component.
3.2. Exporting Bindings
Exporting bindings allows for
bindings associated with an application to be exported into an XML file.
Bindings are the links between your physical environment (for example, a
specific MSMQ queue or web service URI) and your logical environment
(for example, an orchestration receive port). You can export bindings
for an entire BizTalk group or a specific BizTalk application or
assembly.
You can use either the
Export Bindings Wizard (right-click the appropriate application in the
BizTalk Administration Console and select Export Bindings) or the BTSTask ExportBindings command-line utility to export bindings.
3.3. Exporting Policies
Exporting policies allows
for Business Rule Engine policies associated with a BizTalk group (all
policies in your BizTalk environment's Business Rule Engine database) or
application to be exported into an XML file. Take the following steps
to export policies for your BizTalk application:
Right-click
the appropriate application in the BizTalk Administration Console and
select Export→Policies. This launches the Export Policies Wizard.
Select
the policies and vocabularies you need to export, and specify a path
and file name for the exported policy XML file, as shown in Figure 7.

Click OK to export the policies.
It is recommended that you
include all vocabularies contained in the policies you export. This
prevents any missing vocabulary issues that can arise when one
vocabulary references another.
In addition to using the Export Policies Wizard, you can export bindings using the BTSTask ListApp and ExportApp command-line utilities in combination, as follows:
Run the ListApp
utility to create an XML file containing all artifacts for the BizTalk
group or application for which you need to export policies. An example
of using the List App utility is as follows:
BTSTask ListApp /ApplicationName:SampleApp /ResourceSpec:C:\SampleOutput.xml
Delete all artifacts from the XML file except the policies.
Run the ExportApp utility, specifying the updated XML file for the ResourceSpec parameter.
