Adding the Template to
the Certificate Server
After an
autoenroll Exchange Server user template has been created, the template
needs to be added to the certificate server and distributed to users.
You can do this by completing the following steps:
1. | Launch the Certification Authority Microsoft Management
Console (MMC) by clicking Start, Administrative Tools, and then
Certification Authority.
| 2. | Expand the Certification Authority folder.
| 3. | Expand the folder for your certificate server.
| 4. | Right-click the Certificate Templates folder, and
select New, Certificate Template to Issue.
| 5. | Highlight the AutoEnroll Exchange User template, and
then click OK.
|
Note
This
step of adding the AutoEnroll Exchange User template you created
earlier adds this new template to the certificate server. The AutoEnroll
User template allows user certificates to be issued automatically
through Group Policy.
Creating a Group
Policy to Distribute User Certificates
The next step
for autoenrollment is to create a group policy that can then distribute
certificates to the users’ laptops and desktops automatically. This is
done by creating a group policy and having the group policy distribute
the certificates created in the previous step. To create this group
policy, do the following:
1. | Launch the Server Manager and expand the Features, Group
Policy Management, Forest, and then Domains.
| 2. | Right-click the domain name of the network (such as
companyabc.com), and choose Create a GPO in This Domain, and Link It
Here.
| 3. | Enter the
name Exchange AutoEnrollment Group Policy Object and click OK.
| 4. | Select the domain and in the right pane, right-click
the new GPO and select Edit.
| 5. | Under the User Configuration container, expand the
Policies, Windows Settings folder.
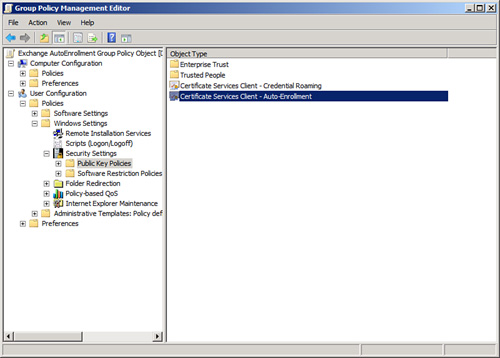
| 6. | Expand the Security Settings folder and then click to
select the Public Key Policies folder. You see an Object Type named
Certificate Services Client - Auto-Enrollment Settings, as shown in Figure 2.
| 7. | Right-click the Certificate Services Client -
Auto-Enrollment object, and select Properties on the shortcut menu.
| 8. | If needed, set the Configuration Model to Enabled.
| 9. | Check the Renew Expired Certificates, Update Pending
Certificates, and Remove Revoked Certificates check boxes and check the
Update Certificates That Use Certificate Templates check box. Then click
OK.
|
Validating That
Certificates Are Working Properly
The autoenrollment
of user certificates has now been configured for all users who log on to
the domain. To validate that certificates are working properly, do the
following:
1. | From a Windows workstation, log on to the domain.
| 2. | Launch the Certificates Microsoft Management Console
(MMC) by clicking Start, Run, typing mmc.exe in the Open text
box, and then clicking OK.
| 3. | Click File, Add/Remove Snap-in, select the Certificates
snap-in, and then click Add.
| 4. | Assuming you logged on as the user for whom you want to
verify that certificates are working, choose My User Account, and then
click Finish.
| 5. | Click OK.
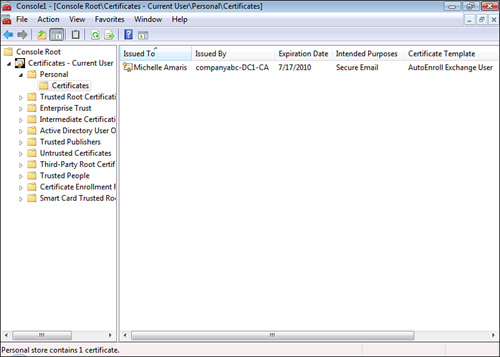
| 6. | Expand the Certificates – Current User folder.
| 7. | Expand the Personal folder and click to highlight the
Certificates folder.
| 8. | You should have a Secure Email certificate created by
the Autoenroll Exchange User certificate template, as shown in Figure 3.
|
If the Exchange Server
user certificate has not pushed to the user’s Certificates container,
you can easily add the certificate by doing the following:
1. | From a Windows workstation, log on to the domain.
| 2. | Launch the Certificates Microsoft Management Console
(MMC) by clicking Start, Run, typing mmc.exe in the Open text
box, and then clicking OK.
| 3. | Click File, Add/Remove Snap-in, select the Certificates
snap-in, and then click Add.
| 4. | Assuming you logged on as the user for whom you want to
verify that certificates are working, choose My User Account, and then
click Finish.
| 5. | Click OK.
| 6. | Right click the Certificates – Current User folder,
choose All Tasks, Automatically Enroll and Retrieve Certificates, and
then click Next to begin the wizard.
| 7. | Click Next at the Before You Begin screen.
| 8. | Highlight AutoEnroll Exchange User, and then click
Next.
| 9. | Click Next
to accept the defaults on the Friendly Name and Description page.
| 10. | Click Finish.
|
|
