The InfoPath Form web part can be leveraged to modify
the standard list pages to customize the user experience with the list.
To accomplish this implementation, follow these steps:
1. | Navigate to the list you want to modify.
|
2. | From the Site Actions menu, select Edit Page.
|
3. | Click Add Web Part on the page and select the InfoPath Form Web Part. Click Add.
|
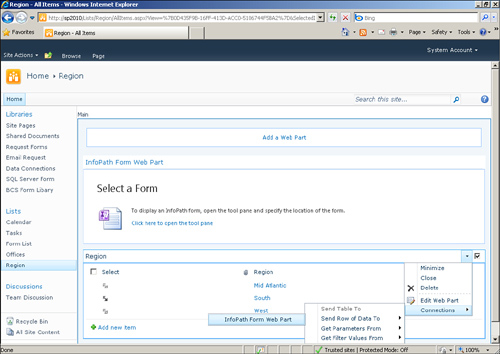
4. | From the list web part on the page, select Connections, Send Row of Data To, InfoPath Form Web Part, as shown in Figure 1, to create the connection between the two web parts.

|
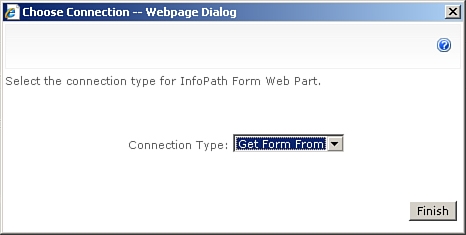
5. | In the Choose Connection dialog, select Get Form From, as shown in Figure 2. The InfoPath Form web part will receive the edit form from the list web part. Click Finish.

|
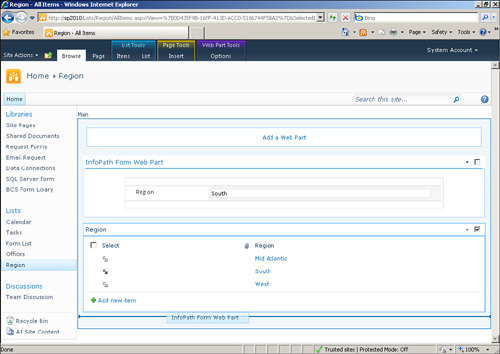
6. | Move the InfoPath Form web part below the list web part by dragging it below the list web part, as shown in Figure 3.

|
7. | On the Page ribbon bar, click Stop Editing to save the changes.
|
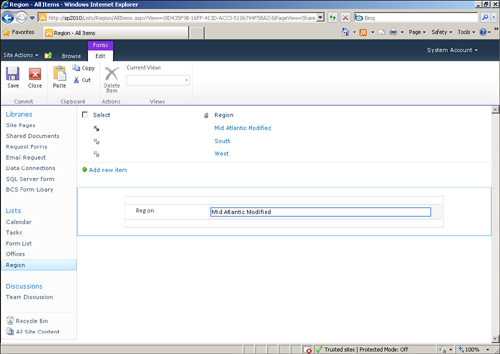
In browse mode, selecting a list item’s double-sided arrow icon displays the InfoPath edit form on the same page, as shown in Figure 4. Users may modify the entry right on the list page.

Note
Users who do not have
permissions on the list items will not be able to submit any changes.
The edit form will still show on the page and appear to be editable, but
an error message will appear if the user attempts to save a
modification.