Scenario/Problem:
You want to change the permissions a certain user or group of users has
on a file or list item. Because permissions for items are inherited
from the list or library they are in, the items or files have the same
permissions as the list. Sometimes you want to set different permissions
on documents or items than the ones for the list. For example, you want
to upload a document to share with several colleagues, but not with
other people who have access to the document library.
Solution:
To assign permissions on a file or list item, you need to get to the
manage permissions page of that file or list item.
When
you’re on the manage permissions page for the file or item, you might
be able to immediately change permissions, or you might have to first
disconnect the permission inheritance for that file or item. Permission
inheritance is on by default for all files or items in SharePoint. It
means that the file or item inherits its permissions from the list or
library in which it is located and has the exact same permission sets.
If the permissions for the list or library change, the permissions for
the file or item are updated automatically.
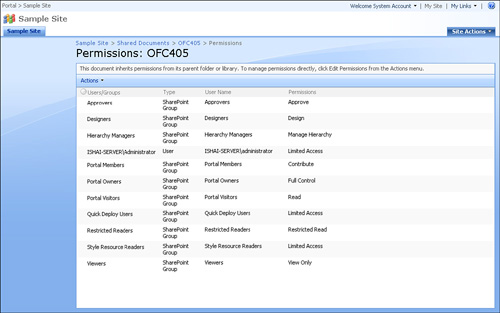
While inheritance is active, it is not possible to set a different permission level to the file or item (see Figure 1).
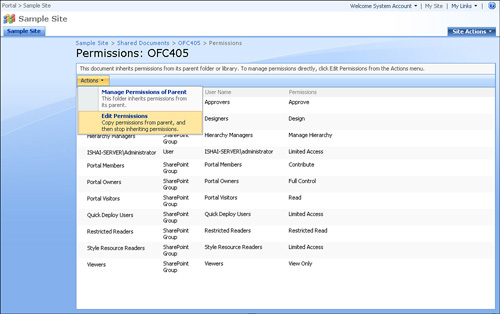
To stop the file or
item inheriting permissions, open the Actions drop-down menu in the
manage permissions page and choose Edit Permissions (see Figure 2).
The other choice is to manage the permissions for the parent, either
the list or library. If you choose that approach, you are redirected to
the manage permissions on a list or library page.
After you click
the Edit Permissions option, a prompt appears, asking you to confirm
that you want to disconnect the permissions inheritance from the list or
library. The prompt also explains that after you do so, changes to the
permissions of the list and library will not affect the file or item you
are managing. This means, for example, that if a certain user is
granted permissions to edit files or items in the list or library after
you disconnected the inheritance of permissions, that user still will
not be able to edit the specific list item or file that you managed
unless you (or someone else) give that user the permissions to edit that
document explicitly.
If you are sure that you
want to manage the permissions for this file separately from the
permission of the list or library, click OK. After confirming, the page
changes and allows you to manage the permissions for the file or item.
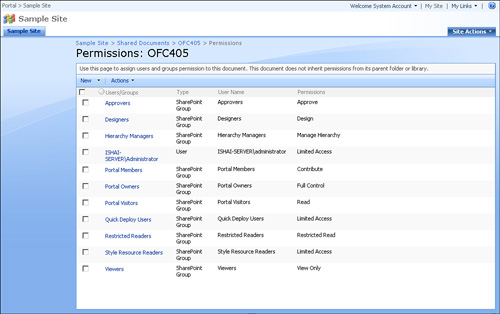
If the file or item’s
permission inheritance was already disconnected in the past, by you or
by someone else, you see the screen shown in Figure 3 when you click Manage Permissions for the file or list item.
Now
you can manage the permissions on the file. To add permission to a user
or group that doesn’t already have permissions, click the New button in
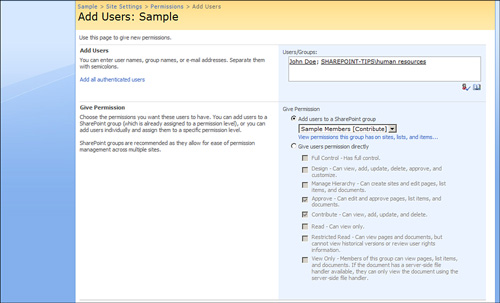
the top toolbar in the screen. Selecting New opens an Add Users page
that enables you to select either a user or group and select what
permission levels should be given (see Figure 4).
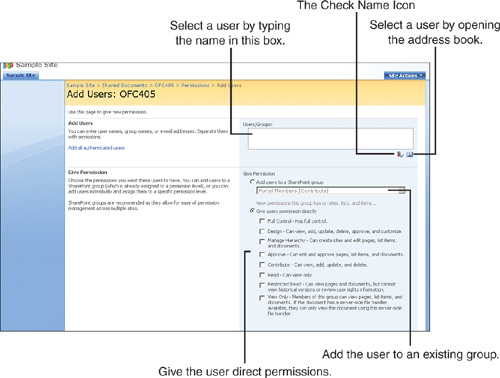
Under the Add Users section,
type the name (or part of a name) or email address for the user or group
that you want to add. Or click the address book icon to open the people
search dialog, where you can search for people by typing their name or
part of it. You can add more than one user or group at a time by
separating the names with a semicolon. This is similar to when you are
writing an email in Microsoft Outlook and you choose the person you want
to send the email to.
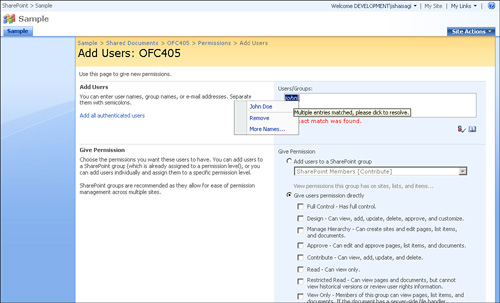
If you use the Check Name
icon and there is no exact match to the name you entered, a red
underline appears beneath the name. You can then click the name to open a
menu that shows users who are a close match to that name or select to
remove the name.
For example, typing John and clicking the Check Name icon results in a red line under the name John.
Clicking John shows that there is a user called John Doe. If that is
the user you’re looking for, click that name. If not, either click
Remove to delete John from the text box or click More Names to open the
search dialog (see Figure 5).
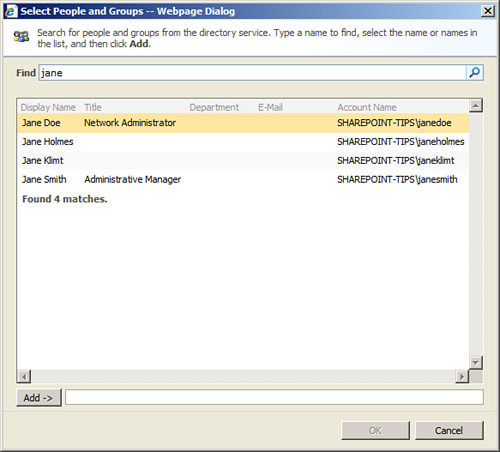
The search dialog
enables you to search for people. Just type part of the name of the
person or group that you want, as shown in Figure 6,
and click the Search icon. A list of possible matches appears. To
select one of them, double-click the name, and it is added to the box at
the bottom of the dialog. After you have chosen all the users and
groups, click OK to close the dialog and return to the Add Users page.
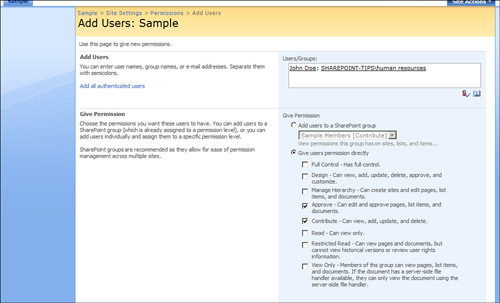
After
you have found the users and/or groups that you want to add to the
list, select the permissions they should have by selecting one or more
of the check boxes in the list of permissions under Give Users
Permission Directly (see Figure 7).
Selecting options here gives the users the permissions you selected. As
before, the higher permission level wins; so if you give someone the
permission to Read and to Contribute, the user can edit the file as well
as read it because of the Contribute setting.
Alternatively, you can
add the users or groups to a SharePoint group. This means they will get
whatever permission level the SharePoint group has. This is a useful
mechanism to control permissions; for example, if you decide that all
the users who have Contribute (edit) permissions on a document should
now have read-only access, you would have to edit each user’s
permissions. Instead, using SharePoint groups, you can add users to a
SharePoint group that has the Contribute permission level, and when a
change is required, you change the permissions only on that SharePoint
group, and not to each user separately. You can add both users and
security groups to the SharePoint group.
To add users or groups
to a SharePoint group, click the Add Users to a SharePoint Group
option, and then select from the drop-down list what SharePoint group
you want to add the users and/or security groups to (see Figure 8).
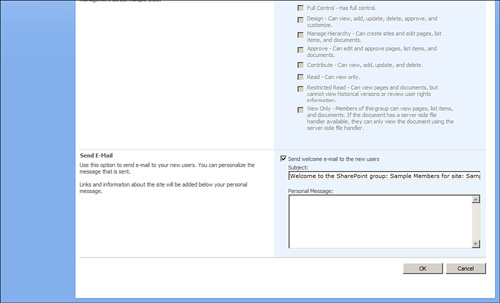
If the server
hosting the SharePoint site supports sending emails, another option will
appear allowing you to send email to the users, telling them that they
have permissions on the file or item (see Figure 9).
You have the option to select not to send the email, or if you select
to send it, you can change the title and body of the email.