Using extensibility with NAV 2009 SP1
With Microsoft
Dynamics NAV 2009 SP1, we can now use the RoleTailored client control
add-ins to extend the RoleTailored client with custom functionality
built using Visual Studio. A control add-in is a custom control,
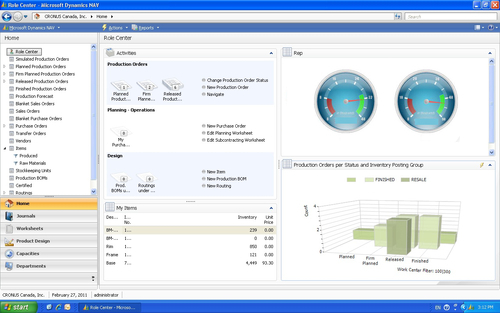
including visual elements, for displaying and modifying data on
RoleTailored client pages. The following screenshot shows use of an
external component in the RoleTailored client:
Using a control add-in on pages
We can use control add-ins
on field controls of RoleTailored client pages and they can be used on
more than one field control on a page.
We can use control add-ins on pages that are included in parts and FactBoxes of other pages.
We can design the user interface of the control add-in to fill the page part area entirely or partially.
Control add-ins cannot be used on the following areas:
Action pane
Command bar
Filter pane
Example of using an add-in on RTC
In the following example, we will see how to use a SQL Reporting Service (SRS) report part in a RoleTailored client.
The first step is to create an
SRS report using a standard NAV dataset. Use Visual Studio to design
this report using the NAV database. After the report is designed, build
and deploy the report.
In order to use the report
in RTC, we need to use Internet Explorer as a container to run the
report. The following code runs an IE page in the RTC. Notice the path
of the IE page is the path of the required report with toolbar
visibility as false.
ieInstance.Navigate("http://localhost/ReportServer/Pages/ReportViewer.aspx?%2
fBI+Reps-
AM%2fTop+Custs&rs:Command=Renderhttp://localhost/ReportServer?%2fBI+Reps-
AM%2fTop+Custs&rs:Command=Render:Toolbar=false");
base.OnVisibleChanged(visible);
Creating add-ins
To create the add-in, let's perform the following steps:
1.
In Visual Studio Express, Visual Studio 2005, or Visual Studio 2008,
create a Visual C# project type using the Class Library template.
2. Name the solution NAV_IE.
3. In the project, add references to the following assemblies:
Microsoft.Dynamics.Framework.UI.Extensibility.dll assembly: By default, the path to the assembly is C:\Program Files\Microsoft Dynamics NAV\60\RoleTailored client. This reference is required for all RoleTailored client add-ins.
System.Windows.Forms: This contains classes for creating user interfaces for Windows-based applications.
System.Drawing: This provides access to basic graphics functionality.
4. Open the Class1.cs file and add the following using directives:
using System;
using System.ComponentModel;
using System.Collections.Generic;
using System.Linq;
using System.Text;
using System.Drawing;
using System.Windows.Forms;
using Microsoft.Dynamics.Framework.UI.Extensibility;
using Microsoft.Dynamics.Framework.UI.Extensibility.WinForms;
5. Add the remaining following code to our C# program. The complete code should look like the following:
using System;
using System.ComponentModel;
using System.Collections.Generic;
using System.Linq;
using System.Text;
using System.Drawing;
using System.Windows.Forms;
using Microsoft.Dynamics.Framework.UI.Extensibility;
using Microsoft.Dynamics.Framework.UI.Extensibility.WinForms;
namespace NAV_IE
{
[ControlAddInExport("NAV_AddIn_Explorer")]
[Description("An embeded IE instance")]
public class NAVExplorer : WinFormsControlAddInBase
{
WebBrowser ieInstance;
protected override System.Windows.Forms.Control CreateControl()
{
ieInstance = new WebBrowser();
//MessageBox.Show("Create Control");
return ieInstance;
}
protected override void OnVisibleChanged(bool visible)
{
//MessageBox.Show("visible changed");
ieInstance.Navigate("http://localhost/ReportServer/Pages/ReportViewer.aspx?%2fBI+Reps-AM%2fTop+Custs&rs:Command=
Renderhttp://localhost/ReportServer?%2fBI+Reps-AM%2fTop+Custs&rs:Command=Render:Toolbar=false");
base.OnVisibleChanged(visible);
}
protected override void OnInitialize()
{
//MessageBox.Show("On Initialize");
base.OnInitialize();
}
public override bool AllowCaptionControl
{
get
{
return false;
}
}
}
}
6. Notice the commented MessageBox lines. We can remove the comments to debug and test the code.
7. Sign the add-in assembly. An assembly must be signed to be used in the RoleTailored client. Open the project's properties.
8. On the Properties window, click Signing, and then select the Sign the assembly checkbox.
9. In the Choose a strong name key file box, select <New…>.
10. In the Key file name box, type NAV-IE.
11. Build the solution.
Registering the add-in in Microsoft Dynamics NAV
To register an add-in, we
include it in the client add-in table in Microsoft Dynamics NAV. To
include an add-in in the table, we must provide the following
information:
Add-in name: The add-in name is determined by the Microsoft.Dynamics.Framework.UI.Extensibility.ControlAddInExportAttribute attribute value of the add-in class definition that we specified when creating the control add-in. The name in this example is NAV-IE, as shown in the code.
Public key token:
This is a 16-character key that is given to the assembly when it is
signed and built in Visual Studio. To determine the public token key,
run the Microsoft .NET Strong Name Utility (sn.exe) on the assembly. The sn.exe utility is available with the Visual Studio 2005 and Visual Studio 2008 SDKs.
To determine the add-in's public key token: At a command prompt, change to the directory that contains the sn.exe utility. For example, the default directory for Microsoft Visual Studio 2008 is C:\Program Files\Microsoft Visual Studio 8\SDK\v2.0\Bin.
Type the following command:
Copy sn.exe -T <assembly>
Replace <assembly> with the add-in assembly's path and file name, such as Program Files\Microsoft Dynamics NAV\60\RoleTailored Client\Add-ins\NAV-IE.dll.
We need to enter and note the public token key that is displayed:
1. Once the add-in is registered, it's now required to add the control in the table and then on the RTC page.
2. Open the object designer and create a new table with at least one picture field of type BLOB.
For example, create a table with ID: 50001 and name it Test-IE. Create two fields—Pic with types code and BLOB.
3. Now create a blank page, for example with ID 50019, call it Rep-1. Create the sections as shown in the following screenshot:

4. Keeping the cursor on the empty line, click View | Properties. The Properties should include the newly created source table, as shown in the following screenshot:

5. Close this view and go back to the sections. Now placing the cursor on the Pic section, view the properties. This should display the properties of the Pic ControlAddIn property and choose the registered add-in. Once the add-in is selected, it should look like the following screenshot: section. Lookup the

6.
As the part is created with the add-in, it can now be added to any RTC
page by designing the page and adding a section with this newly created
part.
7. Now we are ready to use any SRS report within our RTC page.
