4. Configuring RD Licensing
Windows Server 2008 R2 requires that at least one Remote Desktop
Licensing (RD Licensing) server be installed and running on any
network that has an RD Session Host. If a license server is not
installed within 120 days, all RD Session Host connections will be
disabled. Remote Desktop Services requires a separate Windows Server
2008 R2 Remote Desktop Services CAL or Windows Server 2008 Terminal
Service CAL for each user or device in addition to any Windows Server
CALs you might need. The RD Licensing server does not enforce per-user
licensing, but it does track usage in Active Directory against the
installed per-user licenses. Per-device licenses are enforced by the
RD Licensing server.
4.1. Installing Remote Desktop Licensing
In SBS, installing the RD Licensing role service on the same
server that is running RD Session Host is the preferred choice, but
you can also install it on the main SBS server, though it isn’t
recommended. If you’re going to have more than a single RD Session
Host, you can install it on any of the RD Session Host servers. To
install RD Licensing on the computer running Remote Desktop
Services, follow these steps:
Open Server Manager on the server running Remote Desktop
Services if it isn’t already open.
Select Roles, select Remote Desktop Services in the left
pane, and then select Add Role Services from the action
menu.
On the Select Role Services page, select Remote Desktop
Licensing.
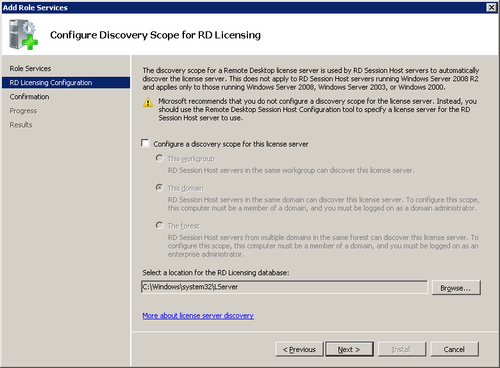
Click Next to open the Configure Discovery Scope For RD
Licensing page, shown in Figure 16. Leave the
Configure A Discovery Scope For This License Server box
cleared.
Click Next to open the Confirm Installation Selections
page. If everything looks correct, click Install to begin the
installation.
Click Close when the installation completes.
After the RD Licensing role service is added, you need to
activate the server before it will actually do anything. To activate
the license server, follow these steps:
Open the RD Licensing Manager (licmgr.exe).
Select the RD Licensing server in the left pane, and
select Activate Server from the Action menu.
The Activate Server Wizard opens. Click Next to open the
Connection Method page shown in Figure 17.
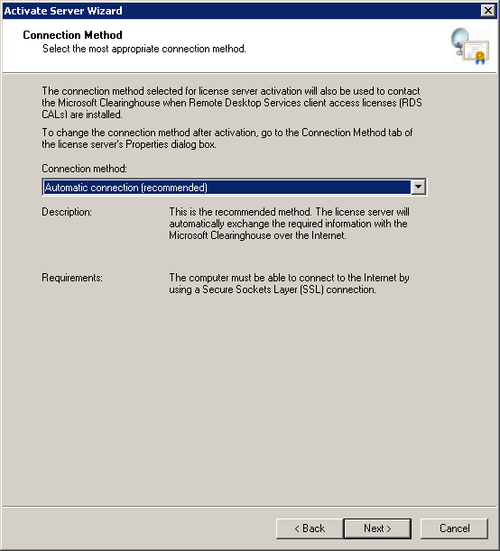
Select a connection method from the drop-down list. The
choices are Automatic Connection (Recommended), Web Browser, or
Telephone. Automatic Connection requires an Internet connection
from the server you are activating. Web Browser also requires an
Internet connection, but it can be run from any workstation.
Click Next.
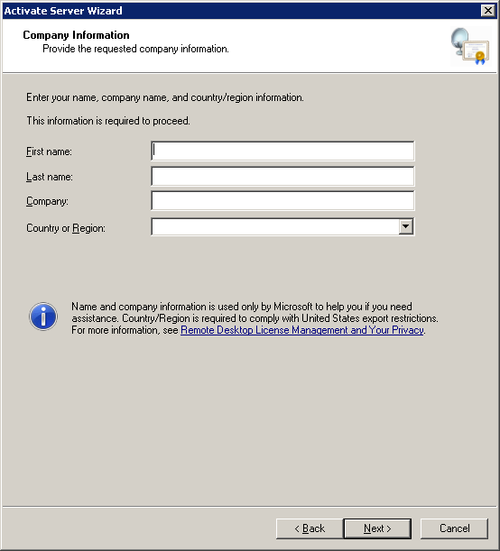
If you’ve chosen Automatic Connection, the connection will
be made, and then the first Company Information page is
displayed, as shown in Figure 18. Fill in
all the fields on this page—they are required. Click
Next.
The second page of company information is displayed. All
information on this page is optional—fill it in only if you want
to. Click Next, and if your connection is good, your server will
activate and you’ll be presented with the completion page. You
can continue to add CALs by selecting the Start Install Licenses
Wizard Now box.
Click Next until you get to the License Program page of
the Activate Server Wizard, as shown in Figure 19.
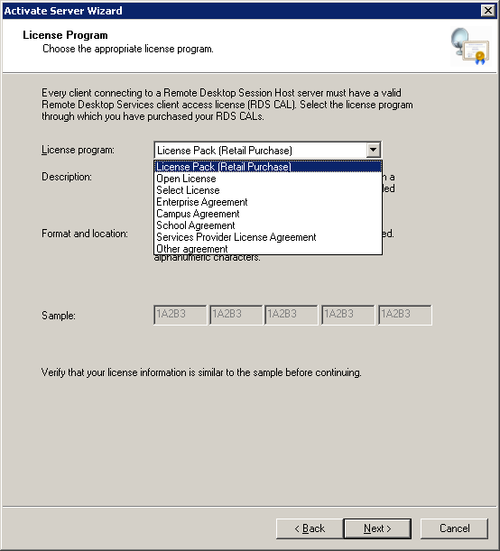
Select the type of license you’re entering from the
License Program drop-down list.
Click Next and fill in the license code. Click Next again,
and the activation will complete.
Note:
Additional steps are required for either web browser or
telephone methods. If you need to reactivate your server and
reinstall licenses, you’ll be required to use the telephone
method.
4.2. Assigning the Licensing Server and Licensing Mode
Prior to Windows Server 2008 R2, the recommended method for
terminal servers to identify and connect to a licensing server was
by discovery. This ended up being one of the most frequent causes of
Customer Support Services (CSS) cases for Terminal Services, and
with the introduction of Remote Desktop Services in Windows Server
2008 R2 the entire licensing server process has been significantly
improved.
In Windows Server 2008 R2, the recommended method for
assigning a license server is to explicitly assign one
(or more) servers. This gets around many of the issues that the
discovery process caused. To further improve the process, you can
now move licenses from one server to another without having to call
in to the Microsoft Clearinghouse, even if the server they are
currently assigned to is offline. These changes should reduce the
majority of the frustration and support calls that terminal server
licensing caused.
The one source of licensing frustration that hasn’t changed is
that an RD Session Host must choose between per-user or per-device
licenses and can’t have both types enabled on the same server. This
isn’t a big deal in a larger enterprise where there are multiple RD
Session Hosts, but on an SBS network, you’ll need to make a decision
about which type to use because most SBS networks will have at most
a single RD Session Host.
To assign a specific licensing server for an RD Session Host and set the
licensing mode for that server, follow these steps:
Open the Remote Desktop Session Host Configuration console
(tsconfig.msc) if it isn’t already open.
Double-click Remote Desktop Licensing Mode in the
Licensing section of the center pane to open the Properties
dialog box with the Licensing tab active, as shown in Figure 20.
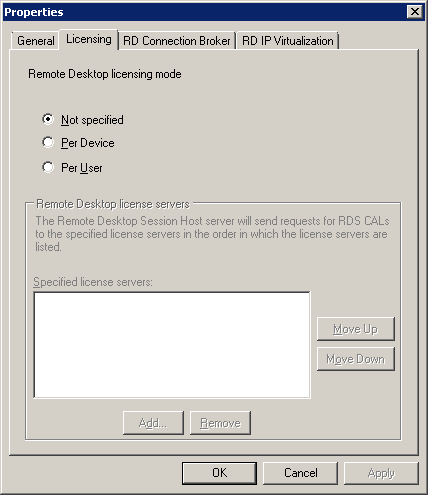
Select Per Device or Per User, and then click Add to open
the Add License Server dialog box shown in Figure 21.
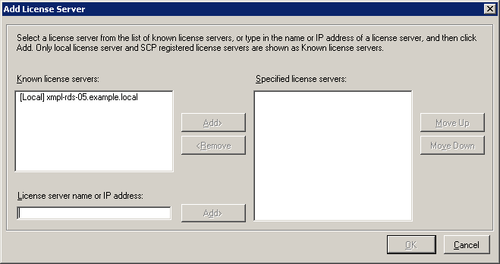
Select the local RD Session Host in the left pane, and click Add to move it to
the Specified License Servers pane. If you have a secondary
license server (unlikely in an SBS environment), you can specify
it here.
Click OK and then OK again to assign the licensing mode and server. (If you have open
Remote Desktop sessions on the server, you’ll see a warning that
the changes won’t affect the active sessions.)
