If we are using the Dynamics NAV SQL Server option,
the recovery plan for our backups will depend a lot on the recovery
model we have selected for the database.
We can change/select the
recovery model for the Dynamics NAV SQL database either from the SQL
Server management studio, or from the Alter Database window in the Dynamics NAV application, as shown in the following screenshot:
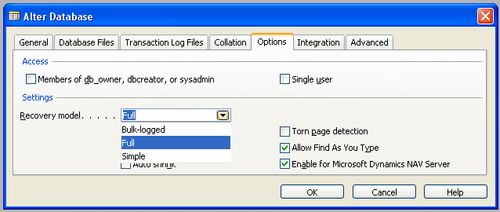
We have the following options for the Recovery model:
Bulk-logged:
The transaction log will contain information only about the large
transactions. This model provides support against disk failure and does
not affect the performance as much as the Full mode does.
Full: The
advantage that full log has over all other models is that it guarantees
the recovery of the database to the point of failure. It is advisable to
use this method for production databases, provided the resources are
available to do so. It is the most flexible method for recovery and
takes the most transaction log space, and using this method, the last
committed transaction can also be recovered.
Simple:
This is the easiest and the least resource-hungry of all recovery types.
The recovery of the database is limited to the last backup taken. It is
recommended to be used for development databases or non-production
databases, where recovery of data is not critical.
The client backup for SQL Server option remains the same as it is in the C/SIDE or Classic version of Dynamics NAV.
SQL Server gives a lot of
flexibility in terms of database backup, restore options, and the
options for backup media (such as tapes, drives, or other backup
devices). It also provides the ability to overwrite backups and perform
incremental/differential backups. Generally, SQL backup can be done
while transactions are being done on the database.
Creating a server-side SQL backup
Let's walk through the process of creating a server-side backup of the Dynamics NAV database as follows:
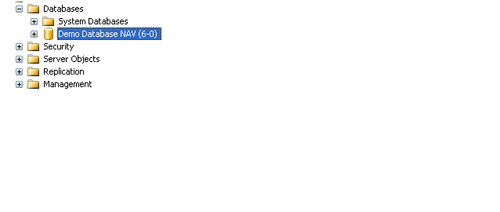
1. Go to SQL Server Management Studio and from the Object Explorer, highlight the Dynamics NAV database, as shown in the following screenshot:
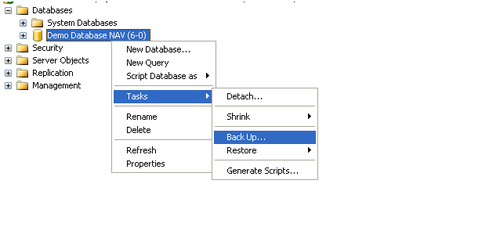
2. Right-click on the database and navigate to the Back Up... menu, as shown in the following screenshot:
3. Select Full in Backup type, and add a name for the backup and an appropriate description.
4. Click on the Add button and select the Disk option under Destination and input the filename and name of the directory in the File name field under Destinations on disk, where we would want to store the backup.
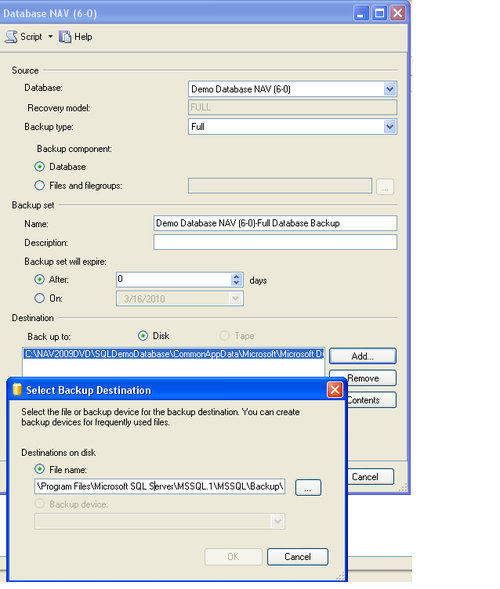
5. A message similar to the following screenshot is displayed after the backup is successfully completed:

Restoring the SQL backup
Let's walk through the process of restoring the SQL backup as follows:
1. To restore the SQL backup, right-click on the Database(s) item on the SQL Server and click Restore.
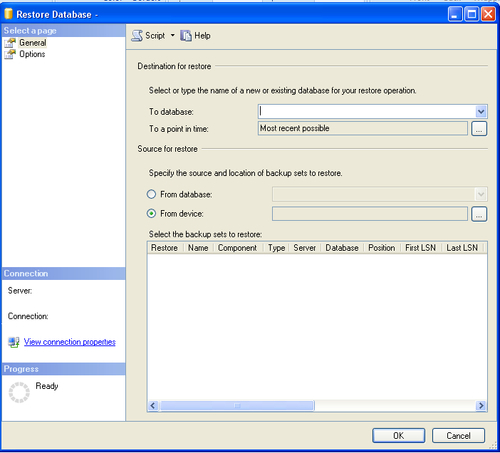
2. Enter the name of the new or existing database in the To database field.

3. In the Source for restore, select the From device option.

4. To select the backup files created in the previous backup process, click on the Assist Edit button in the From device field.
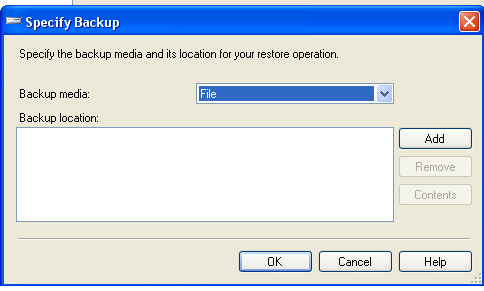
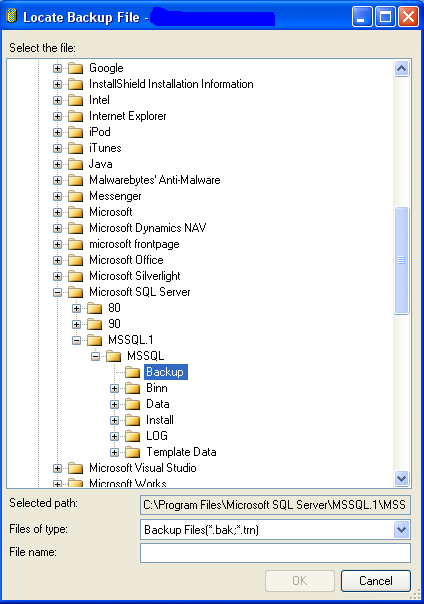
5. Then click Add and select the backup file from the location on the drive.
There are some key differences between the SQL Server backup and the backup done by using the Dynamics NAV client.
The ability to back up
specific Dynamics NAV companies is one of them. The ability to update
only data (not the application objects) is also a key differentiator
available in the Dynamics NAV client-based backup.
SQL Server on the other hand
supports transaction log backup, file/file group backup to back up
individual files, and differential backups, apart from the standard full
database backup. As a SQL Server backup is server-based, it is faster
than the Dynamics NAV client-based backup.
For more detailed information on using SQL backups, it is recommended to review the documentation for Microsoft SQL Server.