The
Big Bang approach to migrate from Windows 2003 to Windows 2008 is the
most straightforward approach to migration. An upgrade simply takes any
and all settings on the domain controllers and upgrades them to Windows
2008. If a Windows 2003 server handles Windows Internet Naming Service
(WINS), domain name system (DNS), and Dynamic Host Configuration
Protocol (DHCP), the upgrade process will upgrade all WINS, DNS, and
DHCP components, as well as the base operating system. This makes this
type of migration very tempting, and it can be extremely effective, as
long as all prerequisites described in the following sections are
satisfied.
The prerequisites are as follows:
The operating system on the domain controllers is Windows Server 2003 SP1 or higher.
The
domain controller hardware exceeds the Windows 2008 requirements and
all software is compatible with Windows 2008, including antivirus
software and drivers.
There
is enough disk space free to perform the operating system and Active
Directory upgrade. Specifically, verify that your free space is at least
twice the size of your Active Directory database plus the minimum 8GB
needed to install the operating system.
The
upgrade from 32-bit goes to 32-bit, and 64-bit goes to 64-bit as an
in-place upgrade from 32-bit Windows to 64-bit Windows is not supported.
The
current domain functional level is Windows 2000 Native or Windows
Server 2003. You cannot upgrade directly from Windows NT 4.0, Windows
2000 Mixed, or Windows Server 2003 interim domain functional levels.
Often, upgrading any
given server can be a project in itself. The stand-alone member servers
in an environment are often the workhorses of the network, loaded with a
myriad of different applications and critical tools. Performing an
upgrade on these servers would be
simple if they were used only for file or print duties and if their
hardware systems were all up to date. Because this is not always the
case, it is important to detail the specifics of each server that is
marked for migration.
Verifying Hardware Compatibility
It is critical to
test the hardware compatibility of any server that will be directly
upgraded to Windows 2008. The middle of the installation process is not
the most ideal time to be notified of problems with compatibility
between older system components and the drivers required for Windows
Server 2008. Subsequently, the hardware in a server should be verified
for Windows 2008 on the manufacturer’s website or on Microsoft’s
Hardware Compatibility List (HCL), currently located at www.microsoft.com/whdc/hcl.
Microsoft
suggests minimum hardware levels on which Windows 2008 will run, but it
is highly recommended that you install the OS on systems of a much
higher caliber because these recommendations do not take into account
any application loads, domain controller duties, and so on. The
following is a list of Microsoft’s minimum (and recommended) hardware
levels for Windows 2008:
That said, it cannot
be stressed enough that it is almost always recommended that you exceed
these levels to provide for a robust computing environment.
Note
One of the
most important features that mission-critical servers can have is
redundancy. Putting the operating system on a mirrored array of disks,
for example, is a simple yet effective way of increasing redundancy in
an environment.
Verifying Application Readiness
Nothing ruins a
migration process like discovering a mission-critical application is not
certified to run in Active Directory 2008 mode. Subsequently, it is
very important to identify and list all applications in an environment
that will be required in the new environment. Typically only
applications that leverage Active Directory schema need to be checked
and tested. Standalone applications that do not query Active Directory
at all typically have no impact whether the organization is running one
version of AD or another.
Note
One
of the most common vendors with application compatibility challenges
with Active Directory 2008 was Cisco and their Unified Communications
platform. Many of the earlier versions of Cisco Unified Messaging (that
is, v4.2(1) or earlier) are not supported with AD 2008, and through most
of 2009, many of the mobile communications solutions required an update
to the latest release. So many organizations migrating to the latest
version of Exchange Server may find remaining on Active Directory 2003
is driven by the vendor support for other applications with versioning
and testing confirmed before migrating Active Directory. Again, AD 2008
is not a requirement for a migration to Exchange Server 2010, so
validate that the addition of the migration to AD 2008 to the project
does not impact the success of the Exchange Server 2010 migration
project.
Backing Up and Creating a Recovery Process
It is critical that a
migration does not cause more harm than good to an environment.
Subsequently, we cannot stress enough that a good backup system is
essential for quick recovery in the event of upgrade failure. Often,
especially with the in-place upgrade scenario, a full system backup
might be the only way to recover; consequently, it is very important to
detail fallback steps in the event of problems. The backup should
include the files and the System State.
Virtual Domain Controller Rollback Option
It is always good to have
several fallback options, in case one of the options is unsuccessful.
Another option to consider, in addition to a full backup, is to create a
virtual domain controller. Using a virtual server platform such as
Hyper-V or VMware Server, you can create a domain controller for little
or no cost.
A virtual machine is
created on the host, which can be an existing installation or even on a
desktop with Virtual PC or VMware Workstation. This virtual machine is
then joined to the domain and promoted to be a global catalog server.
Prior to the upgrade, the
virtual global catalog server is shut down. Backup copies of the
virtual server files can even be made for safekeeping.
In the event of a major
failure in the upgrade process, the virtual global catalog server can be
used to rebuild the domain. If the upgrade is successful, the virtual
sever can either be turned back on and demoted, or simply be deleted and
cleaned from the domain.
Performing an Upgrade on a Single Domain Controller Server
After all
various considerations regarding applications and hardware
compatibility have been thoroughly validated, a stand-alone server can
be upgraded.
The health of
the domain controllers should be verified prior to upgrading the domain
controllers. In particular, the Domain Controller Diagnostics (DCDIAG)
utility should be run and any errors fixed before the upgrade. The
Windows Server DCDIAG utility is part of the Support Tools, which can be
found on the installation media under \support\tools\. The Support
Tools are installed via an MSI package named SUPTOOLS.MSI. After
installing the tools, the DCDIAG utility can be run. Verify that all
tests passed.
The Active
Directory Domain Services forest and the domain need to be prepared
prior to the upgrade. This installs the schema updates that are new to
Windows 2008 Active Directory. The following steps should be run on the
Flexible Single Master Operations (FSMO) role holder, specifically the
infrastructure master role holder. In a small environment or a single
domain, all these roles are typically on the same domain controller. To
prepare the forest and domain, execute the following steps on the domain
controller with the roles:
1. | Insert the Windows Server 2008 DVD into the drive. If the Install Windows autorun page appears, close the window.
Note
Be sure to use the appropriate media for the operating system of the domain controller, specifically 32-bit or 64-bit.
|
2. | Select Start, Run.
|
3. | Enter d:\sources\adprep\adprep.exe /forestprep and click OK, where d: is the DVD drive.
|
4. | A warning appears to verify that all Windows 2000 domain controllers are at Service Pack 4 or later. Enter C and press Enter to start the forest preparation.
|
5. | Enter d:\sources\adprep\adprep.exe /domainprep /gpprep and click OK.
|
6. | Enter d:\sources\adprep\adprep.exe /rodcprep and click OK. This update allows Read-Only Domain Controllers.
|
Now that the schema
updates have been installed and the domain preparation is done, the
domain is ready to be upgraded. Follow these steps to upgrade:
1. | Insert the Windows Server 2008 DVD into the DVD drive of the server to be upgraded.
Note
Be sure to use the
appropriate media for the operating system of the domain controller,
specifically 32-bit or 64-bit. If you have Windows 2003 32-bit, you
cannot do an in-place upgrade to x64-bit Windows 2008. And an x64-bit
version cannot be changed to a 32-bit version of the operating system.
Only 32-bit to 32-bit, or 64-bit to 64-bit upgrades are allowed.
|
2. | The Install Windows page should appear automatically. If not, choose Start, Run and then type d:\Setup, where d: is the drive letter for the DVD drive.
|
3. | Click Install Now.
|
4. | Click
the large Go Online to Get the Latest Updates button. This ensures that
the installation has the latest information for the upgrade.
|
5. | Depending on your license rights, enter your product key if prompted and click Next
|
6. | Select I Accept This Agreement on the License page, and click Next to continue.
|
7. | Click the large Upgrade button.
|
8. | Review the compatibility report and verify that all issues have been addressed. Click Next to continue.
|
9. | The
system then copies files and reboots as a Windows 2008 server,
continuing the upgrade process. After all files are copied, the system
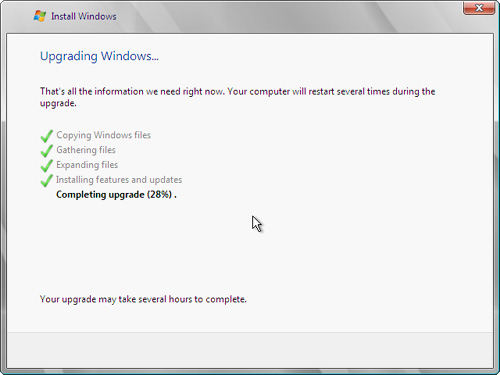
is then upgraded to a fully functional install of Windows 2008 (see Figure 1) and will then reboot again. All this can take some time to complete.

|
10. | After
the final reboot, the domain controller will be at the familiar
Ctrl+Alt+Del screen. After logon, the domain controller will open to the
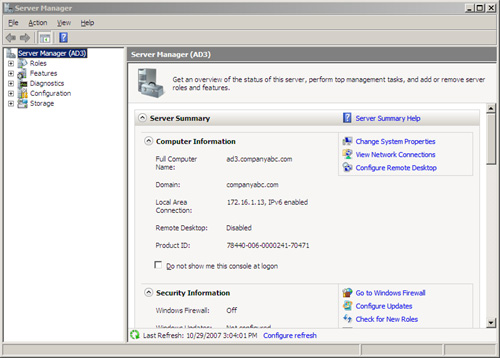
Server Manager console, as shown in Figure 2. The domain controller upgrade is complete.

|
The upgrade process shown in steps 1 through 10 is then repeated for each of the remaining Windows Server domain controllers.