After you have installed or upgraded your environment
to SQL Server 2008, we recommend spending some time configuring your
instance to ensure that SQL Server runs optimally and is secure. There
are many configuration options and different post-installation processes
and procedures utilized across the globe by various database
administrators. We cannot cover every scenario and describe the best
configuration setting for all the different types of applications, but
we would like to discuss the more important options and describe
situations where you can take advantage of the settings.
SQL Server Configuration Manager
SQL Server 2008
Configuration Manager is a tool supplied by Microsoft to set up
connection protocols, determine the connectivity from client computers,
and to mange the service accounts for the installed instances on a
server. This tool allows you to configure all instances of SQL Server
2005 or older installed on your server. Once the tool is launched, it is
fairly simple to navigate through the available options and modify any
configuration options that need to be altered. Figure 1 shows the SQL Server Configuration Manager window.
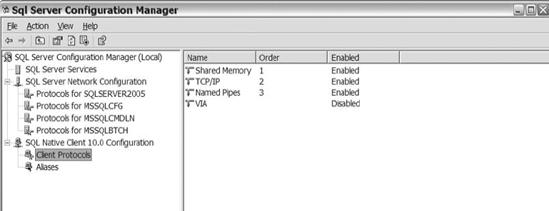
As you can see from Figure 1,
the Configuration Manager allows you to configure multiple instances of
SQL Server, including SQL Server 2005. The figure also shows the three
major configuration setting categories: SQL Server Services, SQL Server
Network Configuration, and SQL Native Client 10.0 Configuration.
1. SQL Server Services
The SQL Server Services section
lists the SQL Server services installed on your server for each
instance. The window displays the name of each service, its current
state, the start mode, the login name that the service starts as, what
type of service it is, and the process ID (see Figure 2).

From the SQL Server
Services section, you can easily start, stop, and restart any service
listed. You can also modify the properties of the services using the SQL
Server Properties dialog shown in Figure 3.
Within the dialog, all services have three tabs: Log On, Service, and
Advanced, which contain configurable options that were set up during the
install. The database engine service actually has an additional tab, FILESTREAM, which is also configurable from the Properties dialog.
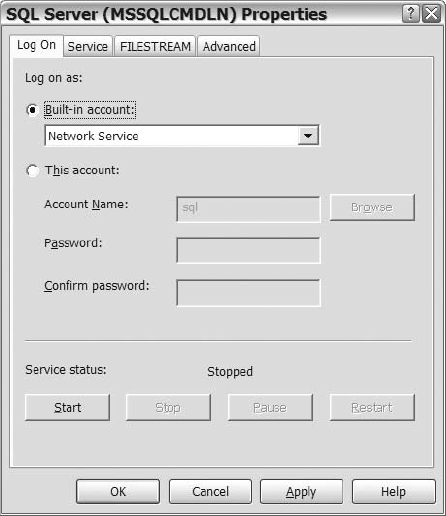
The Log On tab is the location
from which you change the user account that a service uses. That login
name could be a built-in account or a local or domain account. There is a
drop-down list that makes it easy to select any of the system accounts.
The process for choosing domain or user accounts works just as it
always has. You can type the name in or browse the domain or computer
for the username that you are looking for. So if during the install you
selected an account that you do not want to use, or you need to change
the account for any reason, then navigate to the Log On tab to make that
change.
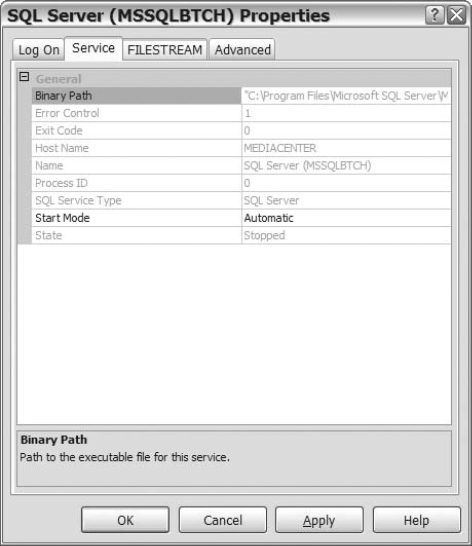
The Service tab (see Figure 4)
provides information about an instance. The Service tab reminds you of
the location in which SQL Server binary files are located, the host
name, the instance name, the service type, start mode, and the current
state. The only changeable option from this tab is the start mode. The
start mode determines the service action after a reboot occurs. The
available options for Start Mode are Automatic, Disabled, or Manual.
Unless you installed an unutilized service, then you probably want to
leave the service in Automatic mode. That way, if the server reboots
unexpectedly, the services needed for your environment to run properly
will start when the server starts.
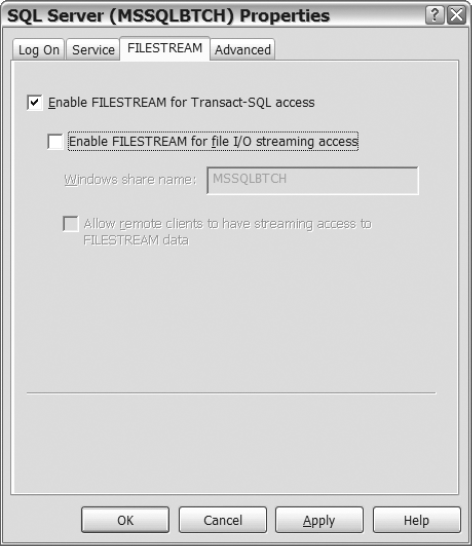
The FILESTREAM tab shown in Figure 5 is almost identical to the FILESTREAM tab in the GUI version of the installation process. The FILESTREAM tab allows you to enable or disable FILESTREAM for Transact-SQL access. After you enable FILESTREAM, you have the option to enable FILESTREAM for file input and output (IO) streaming access. If you select the FILESTREAM
option for file IO streaming access, then you need to add the Windows
share name. The last configuration option that you have to decide is
whether to allow remote clients to have streaming access to FILESTREAM data. For those of you who were not ready to enable FILESTREAM data during the installation process, you enable that option in the Configuration Manager after installation.
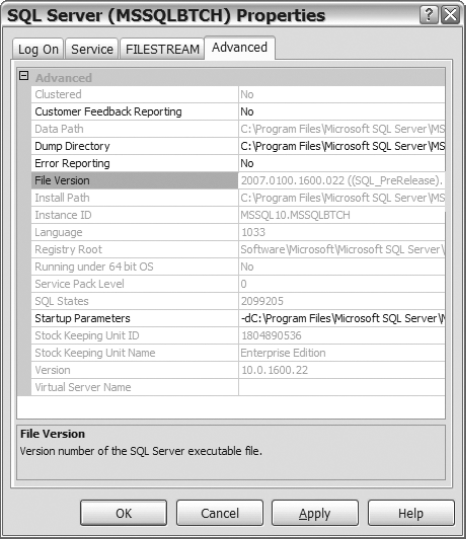
The Advanced tab shown in Figure 6
is a mixture of information about the instance and configurable options
for the instance. This tab provides useful information such as whether
the instance is clustered, the data path, version, service pack level,
and much more. The tab also allows you to enable reporting, change the
startup parameters, and modify the dump directory. When you want to
review instance information about the server without logging into SQL
Server Management Studio, the Advanced tab within SQL Server
Configuration Manager allows you to view many of the common options for
an instance.
