You can publish one or more slides directly from
PowerPoint Professional Plus 2010 to a Slide Library on a network
running Office SharePoint Server or to a folder location on your
computer or network to store, share, track, and reuse later. Before you
can publish slides to a Slide Library, you need to create a Slide
Library on the Office SharePoint Server (with at least Designer
permissions), where you can also identify the online location for the
publishing process. When you publish slides to a Slide Library to a
SharePoint Server, team members can use the Reuse Slides task pane to
quickly insert the ones they want into presentations. When you make
changes to slides in a Slide Library, the next time you open your
presentation locally with the reused slides, PowerPoint notifies you
there is a change.
Publish Slides to a SharePoint Document Library
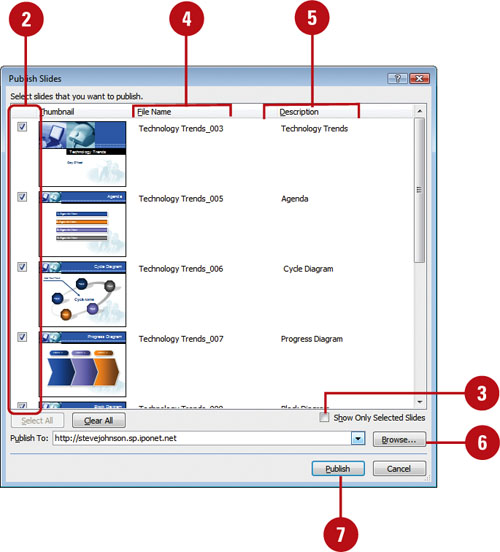
 In PowerPoint Professional Plus 2010, click the File tab, click Save & Send, click Publish Slides, and then click the Publish Slides button. In PowerPoint Professional Plus 2010, click the File tab, click Save & Send, click Publish Slides, and then click the Publish Slides button.
 Select the check boxes next to the slides you want to publish, or click Select All to select all the slides. Select the check boxes next to the slides you want to publish, or click Select All to select all the slides.
PowerPoint automatically names each slide file by using the presentation name and a unique ID number in sequential order.
 To show only selected slides, select the Show Only Selected Slides check box. To show only selected slides, select the Show Only Selected Slides check box.
 To rename a slide file name, click the existing file name, and then type a new name. To rename a slide file name, click the existing file name, and then type a new name.
 To include a description, click in the description area, and then type a description. To include a description, click in the description area, and then type a description.
 Click the Publish To list arrow, click a location, or click Browse to select a SharePoint Slide Library location; display the library on the SharePoint site, click Settings, and then click Slide Library Settings. Click the Publish To list arrow, click a location, or click Browse to select a SharePoint Slide Library location; display the library on the SharePoint site, click Settings, and then click Slide Library Settings.
 Click Publish. Click Publish.
Reuse Published Slides
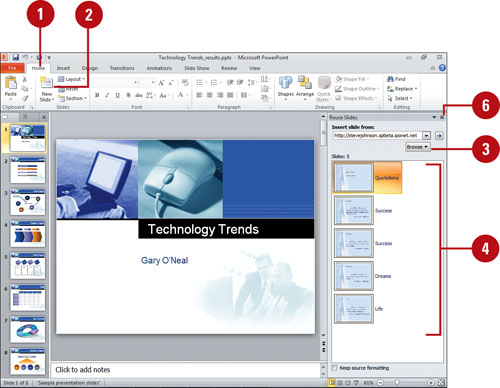
- Open the presentation you want to use, and then click the Home tab.
- Click the New Slide button arrow, and then click Reuse Slides.
- If the presentation you want is not available, click Browse, click Browse Slide Library, locate and select the shortcut to the library you want, and then click Select.
- Click a slide to insert it, or right-click a slide, and then click Insert All Slides.
- To be notified when a slide change happens, select the slide, and then select the Tell me when this slide changes check box.
- When you’re done, click the Close button on the task pane.
Check Reused Slides for Updates
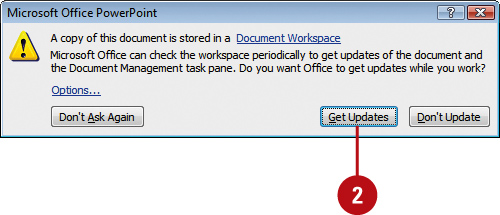
- Open the presentation that contains reused slides.
- In the Alert dialog box, click Get Updates.
If the dialog box doesn’t appear, right-click the reused slide in the Slide pane (Normal view), point to Check for Updates, and then click Check This Slide for Changes or Check All Slides for Changes.
- If no slides in the presentation need to be updated, a message alert appears. Click OK.
- If the Confirm Slide Update dialog box appears, click Replace to replace the local slide with the changed slide from the Slide Library, or click Append to add the changed slide after the outdated one in your presentation
|
