2. Side-by-Side Upgrade
A side-by-side upgrade
consists of installing SQL Server 2008 and moving the databases from the
old instance to the new instance. The side-by-side method gives you a
chance to test the effects SQL Server 2008 will have on an application
before severing the ties with the old version. The new instance can be
installed on a second server, or you can use the same server provided it
meets the install requirements. Generally, you should take advantage of
the upgrade process to upgrade the hardware as well. If the same server
is used, you will need sufficient disk space to store a duplicate copy
of the databases during the upgrade.
Log shipping can also be
useful when performing an upgrade. If you have a large database, you can
set up log shipping in advance to keep the databases in sync on the new
system while the old system is still active. This will keep the
downtime to a minimum, since you can keep your system online while you
wait for a large data file to copy to a new server. You can copy the
database to the new server and perform the upgrade in advance, so the
application will only need to be offline while you restore a few
transaction logs on the new server. More information about this approach
can be found in SQL Server Books Online by searching for the topics
"Migrating a SQL Server 2000 Log Shipping Configuration to SQL Server
2008" or "Migrating a SQL Server 2005 Log Shipping Configuration to SQL
Server 2008."
Once you have installed the new
instance of SQL Server 2008, there are three methods for moving the
databases to the new instance:
Detach the old database and attach it to the new instance.
Back up the old database and restore it on the new instance.
Use the Copy Database Wizard to copy the database to the new instance.
NOTE
You will also need to copy
any objects outside the database, such as logins and jobs, since you
cannot restore system databases to a newer version of SQL Server.
The steps to performing a side-by-side upgrade include the following:
Make sure you have a current backup. (This should be the first step before making any modifications to any databases.)
Copy
the database to the new instance by using one of the methods previously
listed. (These will be described in detail in the subsections that
follow.)
Create the logins on the new instance by running the login script.
Create the jobs on the new instance by running the job script.
Check database connectivity and functionality.
Installing SQL Server 2008 in this side-by-side approach is no different from doing a fresh install.
However, with a side-by-side upgrade, you also have to worry about
migrating your database afterward. The following sections cover the
three ways to perform that migration.
2.1. The Detach/Attach Migration Method
We prefer the detach and
attach method when permanently moving databases to a new instance of SQL
Server. By moving each file itself instead of a copy of the file at any
given point in time, you can be sure you have captured the exact state
of the database as it existed on the previous instance. Since the
database is detached, it will be inaccessible for any transactions,
ensuring that no data will be committed on the old system during the
upgrade. Detaching the database also helps to validate that all the
connections have been reconfigured to point to the new system. If a
connection was missed and is still pointing to the old instance, you
will encounter an error instead of actually making a connection that you
think is pointing to the new instance.
You can use the sp_detach_db
stored procedure to detach a database. You should also set the database
to single-user mode and immediately roll back any transactions before
trying to detach the database. Listing 1 contains a script invoking sp_detach_db that you can use to detach a database.
Example 1. T-SQL Script to Detach a Database
USE [master]
GO
ALTER DATABASE [DatabaseName] SET SINGLE_USER WITH ROLLBACK IMMEDIATE
GO
EXEC master.dbo.sp_detach_db 'DatabaseName'
GO
|
To attach a database in SQL Server 2008, you should use the CREATE DATABASE statement with the FOR ATTACH clause. This statement and clause replace the sp_attach_db stored procedure that was previously used to attach a database. The sp_attach_db
stored procedure has been deprecated and will be removed in a future
release. You will also need to specify the locations of the data files
that are going to be attached. The complete syntax for attaching a
database is shown in Listing 2.
Example 2. T-SQL Script to Attach a Database
USE [master]
GO
CREATE DATABASE [DatabaseName] ON
( FILENAME = N'C:\MSSQL\DATA\DatabaseName.mdf' ),
( FILENAME = N'C:\MSSQL\DATA\DatabaseName_log.ldf' )
 FOR ATTACH
GO
|
Alternatively, you can
detach and attach databases using the GUI in SQL Server Management
Studio. To detach a database using the GUI, you can right-click on the
database you want to detach, select Tasks, and then select Detach from
the context menu. This will bring up the Detach Databases screen. Select
OK to detach the database. To attach a database using the GUI, you can
right-click on the Databases folder and select Attach from the context
menu. This will bring you to the Attach Databases screen. Selecting Add
will bring up the Locate Database Files screen, which will allow you to
navigate to the data file you would like to attach. Once you have
selected the data file, select OK to close the Locate Database Files
screen and OK once again on the Attach Databases screen to close the
screen and attach the database.
2.2. Backup/Restore Migration Method
Using the backup and restore
method is a good way to copy the database to the new instance without
impacting the availability of the current database. All you need to do
is take a full backup of the current database, copy that backup to the
new location, and restore it .
SQL Server will upgrade the database during the restore process. The
result will be a SQL Server 2008 database that you will not be able to
move back to an earlier release.
NOTE
You won't be able to move a
2008 database back to an earlier release, even when you are running
that database in a prior compatibility mode. You cannot back up and
restore to go from 2008 to an earlier release, nor can you detach and
attach. You can only move a database forward. You cannot migrate
backward.
2.3. Copy Database Wizard Migration Method
You can use the Copy
Database Wizard to provide a user-friendly interface to copy your
database to an upgraded instance of SQL Server 2008. You are given the
option to make a copy of the database or completely move the database.
You may also choose to copy the database by using the detach and attach
method, or by using SQL Management Objects (SMO). If you use the detach
and attach method from the wizard, make sure there are no users trying
to access the database before running the wizard. If you use SMO, the
database will remain online during the entire process. You can also
choose to move any database-related objects, such as logins and jobs. We
should point out that while you can copy logins using the Copy Database
Wizard, for security reasons, the wizard creates the login on the
destination server with a random password and then disables the login.
NOTE
The Copy Database
Wizard creates a SQL Server Agent job that executes an SSIS package.
Make sure you have Integration Services installed and the SQL Server
Agent running on the destination server prior to executing the Copy
Database Wizard.
Use the following steps to upgrade a database using the Copy Database Wizard:
Start
the Copy Database Wizard by right-clicking the Management folder in the
SQL Server 2008 Management Studio Object Explorer and selecting Copy
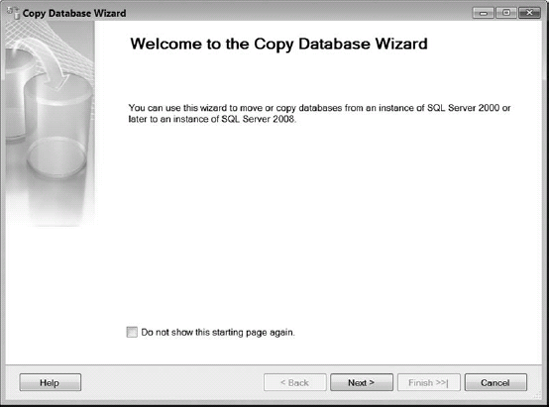
Database. As you can see in Figure 12,
you can use the Copy Database Wizard to move or copy databases from an
instance of SQL Server 2000 or later to SQL Server 2008. Select Next to
continue.
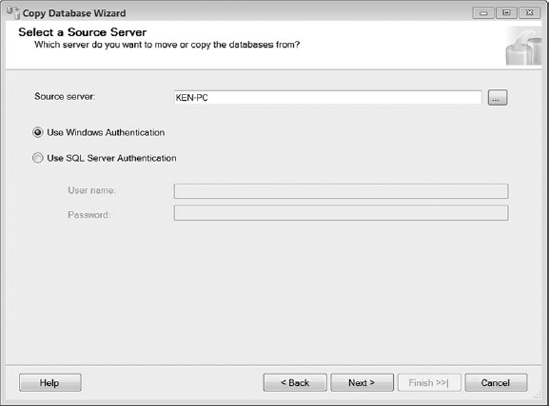
Choose the source server and instance name that contains the database you will be upgrading. See Figure 13 for an example. Provide the appropriate authentication and select Next to continue.
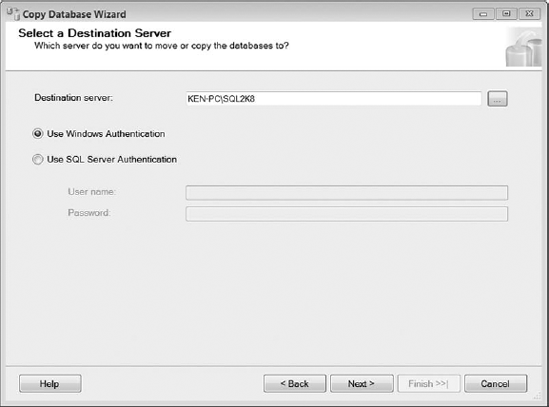
Choose the destination server and instance name that will host the new database. The destination server in Figure 14 is KEN-PC\SQL2K8. Provide the appropriate authentication and select Next to continue.
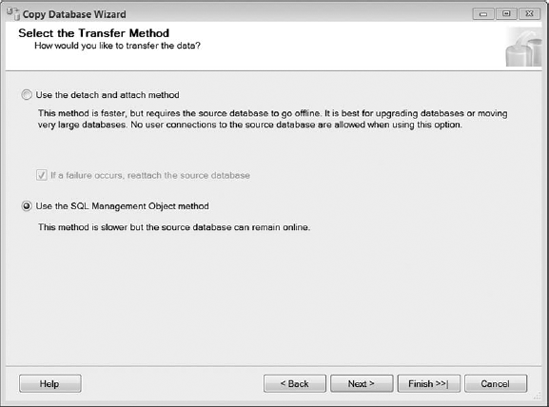
Choose
the method that should be used to transfer the database to the new
server and select Next to continue. If you use the detach and attach
method, the database will be offline during the process. Taking the
database offline can be a good thing if you want to make sure no data is
being processed during the upgrade; but if you are making a copy of the
database for test purposes, you may need to use SMO to ensure that the
database remains online, as shown in Figure 15.
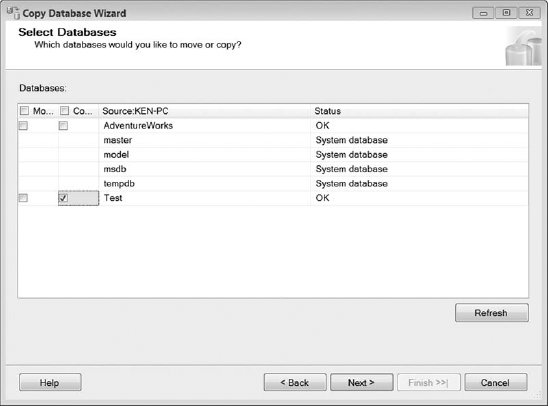
Select the database or databases from the source server that you would like to transfer (see Figure 16),
and select Next to continue. Pay special attention to the option that
you choose to transfer the database. If you select Move, the database
will no longer exist on the source server after the wizard has
completed. Also notice that there is no option to move or copy the
system databases to the new instance.
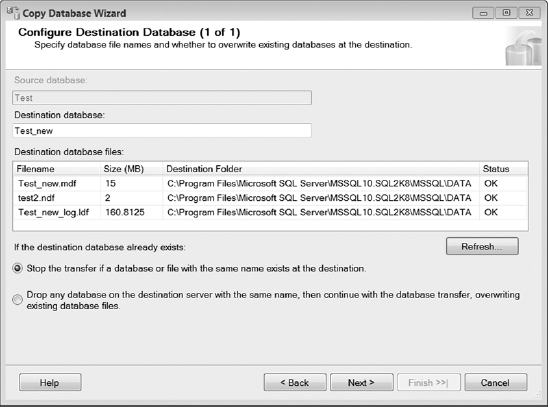
Specify the name and location of the destination database. As you can see in Figure 17,
you have the option of stopping the transfer or dropping the database
if it already exists on the destination server. Select the appropriate
option and select Next to continue. This step will be repeated for each
database that has been selected for transfer to the destination server.
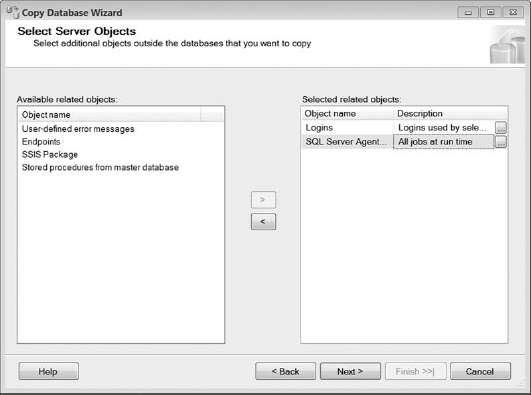
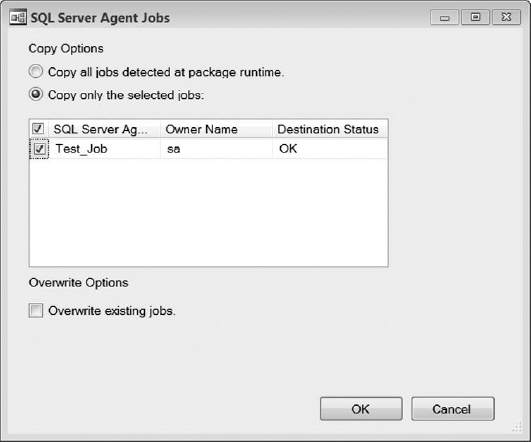
On the left side of the screen, select the related server objects that you would like to transfer to the new instance (shown in Figure 18)
and click the arrow to move them to the right side of the screen. Once
you have selected to move the objects, you can click the ellipsis to the
right of each object to specify detailed copy instructions for each
object type, as shown in Figure 19. Select Next to continue.
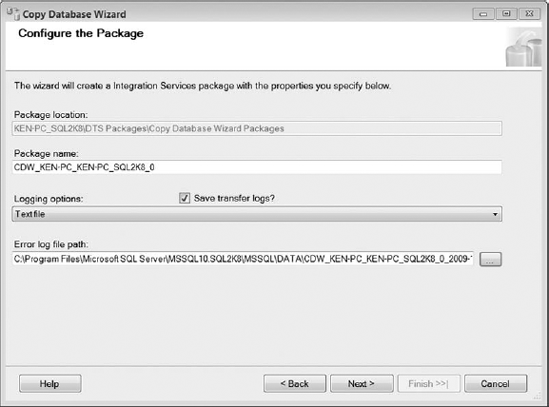
As shown in Figure 20,
specify the name of the SSIS package that will be created to transfer
the databases. (This name will also be used for the SQL Server Agent job
that will be created.) Configure the appropriate logging options by
choosing Windows Event Log or Text File from the drop-down menu. If you
choose to log to a text file, you can also choose the path where you
would like to store the logs. Select Next to continue.
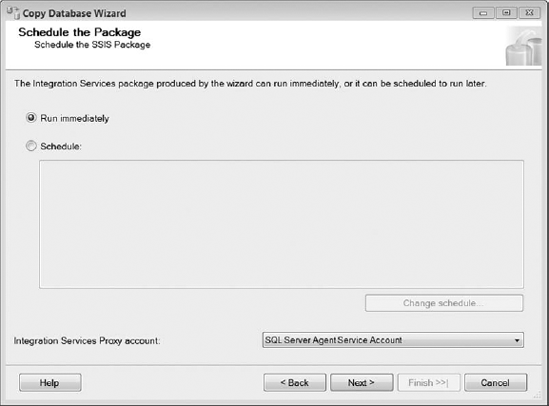
You can choose to execute the package immediately following the wizard or schedule the package to run at a later time. In Figure 21,
we chose to run the package immediately. If you choose to schedule the
package, click the Change Schedule button to open the New Job Schedule
dialog box and specify when you would like to execute the package.
Select the proxy account that will be used to perform the transfer.
There must be a proxy account available to the user with the SQL Server
Integration Services package execution permission on the destination
server. You can create a new proxy account if needed by expanding the
SQL Server Agent, right-clicking on the Proxies folder, and selecting
New Proxy. Select Next to continue.
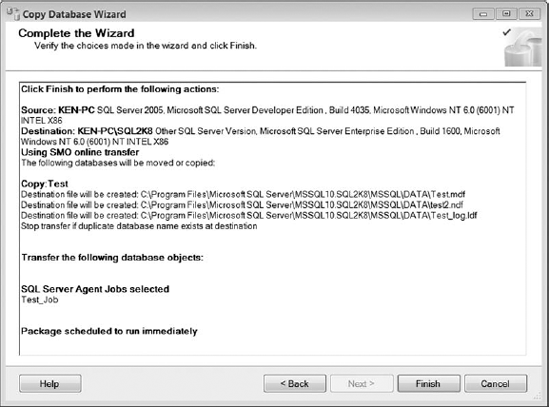
Review the options you have selected on the Complete the Wizard screen (shown in Figure 22) and select Finish to start the transfer.
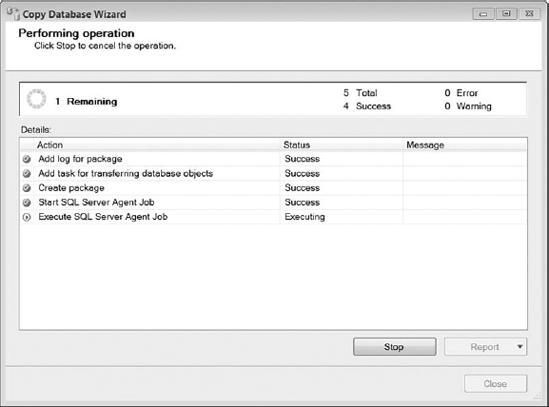
You can monitor the progress on the Performing Operation screen shown in Figure 23.
The time it takes to complete the transfer depends on the size of the
databases being transferred and the options that were chosen during the
wizard process. For example, SMO will take longer than detaching and
attaching the databases. Click Close once the wizard has completed. If
the wizard encounters any errors, you will be able to select the link in
the Message column to help you troubleshoot the issue.
