7. Import a Virtual Machine
One of the things you will love
about virtual machines is that they are really pretty portable. When it
comes right down to it, a virtual machine and a virtual hard disk are
easy to move. It is easy to see some of the reasons you might want to
import virtual machines. Imagine Microsoft is releasing a new operating
system. You decide you would like to try it before you buy it. What if
Microsoft made a VHD file available for you to load in Hyper-V so you
could try the new operating system? This is actually happening today. Or
imagine a situation where you are a software developer, and you have a
standard development environment you use for testing. Why not build that
environment in Hyper-V, export those files from the machine where they
were built, and then import them on other machines throughout your
development network?
You can import virtual
machines using two different methodologies. The method you choose
really depends on what you have to work with to begin with.
If you have a .vhd
file and no settings information, you will create a new virtual machine
using the Virtual Machine Creation Wizard. When you are given the
option for creating a virtual hard disk or using an existing virtual
hard disk, simply locate the VHD file and create the virtual machine.
Now if you are lucky, you will
have more than just the VHD, and you might have the settings files
associated with the virtual machine as well. If this is the case, you
don't need to create a new virtual machine. You already have the virtual
machine, so you just need to get that virtual machine and its settings
associated with Hyper-V Manager and running on this server. It is
important to remember that virtual machines can be reused or imported to
more than a single Hyper-V server. To import a virtual machine more
than once, it is important that when you import, you make a copy of the
virtual machine files so that the VM can be imported again elsewhere. To
accomplish this task, you use the import tool in the Actions pane.
Open the Hyper-V Manager.
Click Import Virtual Machine in the Actions pane.
In the Import Virtual Machine Wizard, shown in Figure 21, browse to the location of the virtual machine.
Select the desired import settings.
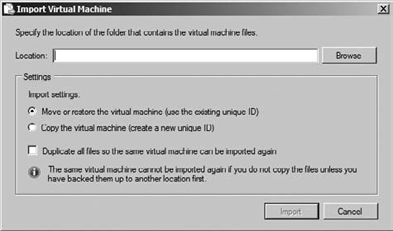
Remember that a virtual
machine will stay in the directory from which it is imported. If you
want the virtual machine to be housed in a specific location on your
server, you need to copy it there before you import it to Hyper-V. Once
you have imported the VM, it cannot be moved. Importing a virtual
machine is a great way to configure a virtual machine with limited
up-front configuration work. What if you had taken the time to build a
great virtual machine and wanted to save it so that it could be used
again, perhaps on another server in your network? You would want to
export that virtual machine.
8. Export a Virtual Machine
The process of exporting a
virtual machine is really the process of saving the name, configuration,
VHD, and snapshots associated with a virtual machine. You have already
seen how virtual machines are named, how the virtual hard disks are
created, and how to make snapshots. The only part of the export process
you have not seen is that although each virtual machine has a canonical
name that you configured, each virtual machine also has a globally
unique identifier (GUID), and each snapshot that you make also has its
own unique GUID. Armed with this information, you can begin the process
of exporting a virtual machine.
Open the Hyper-V Manager.
Select the virtual machine you want to export.
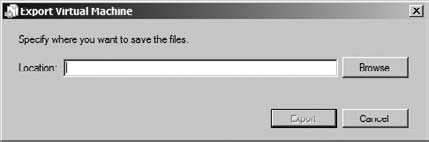
Click Export in the virtual machine section of the Actions pane.
In the dialog box that opens, shown in Figure 22, provide a directory location to save the virtual machine.
Depending on the size of the
virtual machine and its contents, this process can take some time, so be
patient. There is no status bar to tell you how much of the export has
completed.
During the export process, a new
file will be created in the directory you chose for the export
directory. The new file will be named with the name of the virtual
machine. Inside the new file will be a series of subfolders:
Virtual Machines This folder will contain an export (.exp) file named for the GUID of the virtual machine. There is also an additional folder here that can be used for an additional .exp file for machines that were exported in their saved state configuration.
Virtual Hard Disks This folder will contain a copy of each of the virtual hard disks associated with the virtual machine.
Snapshots This folder will contain an .exp
file for each of the snapshots you created in the virtual machine.
There are some additional folders here named after the snapshot IDs for
any saved state snapshot data and a folder named after the virtual
machine ID that will contain the AVHD files for the snapshots.
Once the export has
completed, you can use the files in the export directory at will. You
can copy them, move them, save them to DVDs (if they are small enough),
compress them (if they are not small enough), and of course import them.
While talking about
importing, we said that if you want to import a virtual machine more
than once, you need to copy all the associated files. The reason for
this is that during import Hyper-V will delete the EXP files and replace
them with XML files. If there are no EXP files, then the virtual
machine cannot be imported. If you plan on using a virtual machine more
than once, then you will need to copy the exported virtual machine and
its associated EXP files to be certain it can be imported again.
