Logo
programming4us
programming4us
programming4us
programming4us
Home
programming4us
XP
programming4us
Windows Vista
programming4us
Windows 7
programming4us
Windows Azure
programming4us
Windows Server
programming4us
Windows Phone
 
Windows Server

SharePoint 2010 PerformancePoint Services : Securing a PerformancePoint Installation - Defining Permissions Specific to an Element

- Free product key for windows 10
- Free Product Key for Microsoft office 365
- Malwarebytes Premium 3.7.1 Serial Keys (LifeTime) 2019
4/14/2011 3:52:38 PM
Sometimes you might want to define permissions specific to an element. In other words, you might want to break the 
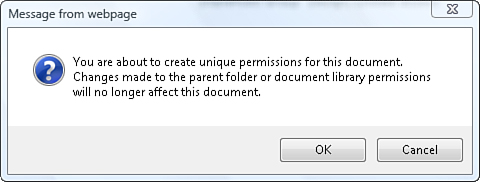
default security inheritance. To do this, open the Manage Permissions page, and then click Stop Inheriting Permissions. You see a dialog box, as shown in Figure 1, informing you that you are about to break inheritance for this specific document.
Figure 1. Use Stop Inheriting Permissions to break the default security inheritance.


Note

Notice that this is called a document even though we are still working with a data source. This is because all items stored in a document library are ultimately considered to be a document.


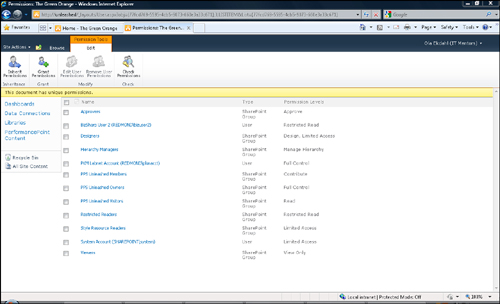
After you break the inheritance, the yellow status bar informs you that you are applying unique permissions to this document.

Here is what happens when we apply unique permissions on a data source. In this example, we work with a data source called The Green Orange. The permissions inheritance has been broken, as explained earlier. An account called BizSharp User 2 has been added with Restricted Read permissions only, as shown in Figure 2.

Figure 2. These are the permission settings for the The Green Orange data source example. In this example, the permissions inheritance has been broken.

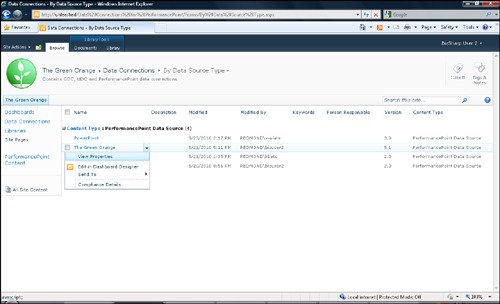
If we log on to the site using the BizSharp User 2 account and open the The Green Orange data source context menu, we can see that because we have only restricted read permission, there is no option to edit properties (see Figure 3). However, we still have an Edit in Dashboard Designer option.

Figure 3. The Edit in Dashboard Designer option enables you to open the element in Dashboard Designer.

If we choose this option, the The Green Orange data source opens in Dashboard Designer. From there, we can look at all property settings, the connection string, comments, and other settings. If we try to make changes and then try to publish the data source back to SharePoint, by right-clicking the data source and then select Save, we get the error message shown in Figure 4.

Figure 4. This is an example of the error message that occurs if users try to perform actions that exceed their security settings.

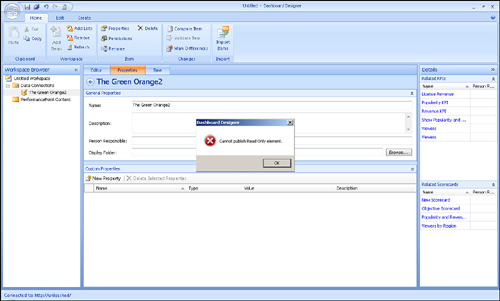
This error message occurs here because BizSharp User 2 has restricted read permission only.

Caution

Users can save any changes they make to a local workspace. This can sometimes be confusing when users think they have published their changes back to SharePoint. Even though the error message provides a warning, users must be educated about how changes are saved and published.


As demonstrated in this section, you can apply permissions on the top-level site collection or you can apply specific permissions on a list or list item. This allows the flexibility of assigning permissions and explicitly specifying what a user can do when creating and viewing PPS elements. Remember that even though this example worked with setting permissions on a data source, the same concept applies to any PPS element. Also remember that a child item will always inherit permissions from its parent unless the inheritance is explicitly broken.

Other -----------------
- SharePoint 2010 PerformancePoint Services : Securing a PerformancePoint Installation - Applying Security to PPS Elements
- Migrating from Active Directory 2000/2003 to Active Directory 2008 : Big Bang Migration
- Migrating from Active Directory 2000/2003 to Active Directory 2008 : Beginning the Migration Process
- Migrating from Active Directory 2000/2003 to Active Directory 2008 : Understanding the Benefits to Upgrading Active Directory
- Windows Server 2008 R2 : Deploying Failover Clusters (part 5)
- Windows Server 2008 R2 : Deploying Failover Clusters (part 4) - Deploying Services or Applications on Failover Clusters
- Windows Server 2008 R2 : Deploying Failover Clusters (part 3)
- Windows Server 2008 R2 : Deploying Failover Clusters (part 2) - Creating a Failover Cluster & Configuring Cluster Networks
- Windows Server 2008 R2 : Deploying Failover Clusters (part 1) - Installing the Failover Clustering Feature & Running the Validate a Configuration Wizard
- BizTalk 2010 Recipes : Orchestrations - Using Nontransactional Orchestration Scopes
 
 
Top 10
- Microsoft Visio 2013 : Adding Structure to Your Diagrams - Finding containers and lists in Visio (part 2) - Wireframes,Legends
- Microsoft Visio 2013 : Adding Structure to Your Diagrams - Finding containers and lists in Visio (part 1) - Swimlanes
- Microsoft Visio 2013 : Adding Structure to Your Diagrams - Formatting and sizing lists
- Microsoft Visio 2013 : Adding Structure to Your Diagrams - Adding shapes to lists
- Microsoft Visio 2013 : Adding Structure to Your Diagrams - Sizing containers
- Microsoft Access 2010 : Control Properties and Why to Use Them (part 3) - The Other Properties of a Control
- Microsoft Access 2010 : Control Properties and Why to Use Them (part 2) - The Data Properties of a Control
- Microsoft Access 2010 : Control Properties and Why to Use Them (part 1) - The Format Properties of a Control
- Microsoft Access 2010 : Form Properties and Why Should You Use Them - Working with the Properties Window
- Microsoft Visio 2013 : Using the Organization Chart Wizard with new data
 
programming4us
Windows Vista
programming4us
Windows 7
programming4us
Windows Azure
programming4us
Windows Server