2. Crawling Users Profiles
Enough cannot be said
about the power of connecting people for business. For most
organizations, their people and those people's expertise are their
biggest assets. Finding people and expertise in a company can be a
challenging task at the best of times, and experience and skills can go
largely unexploited because people with the right knowledge cannot be
found—or worse, their colleagues don't even know they exist.
SharePoint's People Search
is a powerful feature to expose people in an organization and their
expertise, making them findable and accessible. The people search
mechanism, although a simple enough concept, requires the identification
of people in the organization, their expertise, and their contact
information. In order to expose this information and find the relevant
people, SharePoint must first be able to crawl the information about
these people.
People data in
SharePoint comes from indexing user profiles. User profiles are held in
SharePoint and hold the information about all the users of SharePoint as
well as other potential SharePoint users that may have profile data
imported from Active Directory or some other directory server service.
User profile data can be entered manually, either by the administrator
or by the users themselves in their personal site (MySite).
Additionally, other data sources can be used to populate user profile
data.
Usually the starting point for
an organization is to synchronize the existing information they have in
their organization's directory with SharePoint and then allow connected
users to enrich that information on their MySite pages. This will allow
for rich metadata and social search functionality in People Search.
However, this is not strictly necessary, and data from a directory
server is not required to have a rich people search experience as long
as users are aware of the MySite feature and have the time and interest
to keep it up to date.
User profile data is managed
by the User Profile service application in the Service Applications
section of Central Administration. We will
only go into crawling user profiles and synchronizing them with
Directory Servers, but it is important to note that a great deal of rich
user information can be managed from this service application.
Additionally, the User Profile service application makes it possible to
share user data across multiple sites and farms. This can allow for a
rich and effective people search and expose expertise in areas of the
organization not previously accessible to many employees.
The protocol used to crawl
data collected from the User Profile service is called SPS3. It can be
seen set in the default content source for SharePoint sites as sps3://servername. If user profiles are not crawled, check if this site is set in the default content source.
|
If your Mysite
definition uses Secure Sockets Layer or Transport Layer Security
(https), it may be necessary to set the SPS3 protocol to use secure
sockets (sps3s) as well.
|
|
2.1. Synchronizing User Profiles
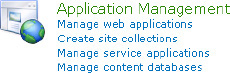
To synchronize user profiles, navigate to the "Manage service applications" page in Central Administration (Figure 3).
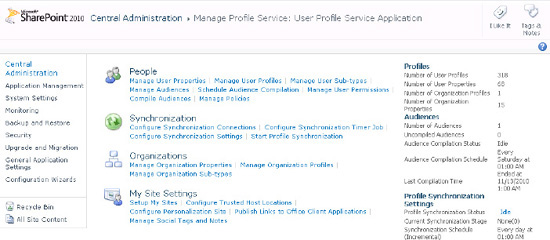
Then choose the User Profile Service Application link (see Figure 4). Check if the service application is started in the right-hand column.

The sources for user
profile information are managed in the Synchronization section, where
different user data sources can be defined and synchronization schedules
defined (Figure 5).
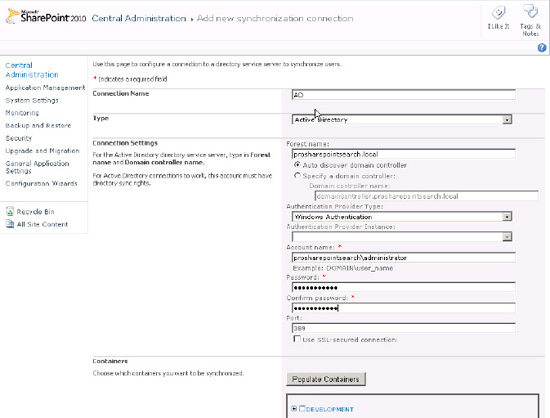
Selecting the Configure
Synchronization Connection menu item will display the page where
additional user profile data sources can be added. To add a new source
to synchronization, select Create New Connection. The following source
types can be selected:
Active Directory
Active Directory Logon Data
Active Directory Resource
Business Data Connectivity
IBM Tivoli Directory Server
Novell eDirectory
Sun Java System Directory Server
NOTE
The Synchronization
Connection page returns relatively good errors if the connection fails,
but the Populate Containers button will still function even if all the
required fields are not filled out. Make sure you have the correct
domain, server, and user information to connect and retrieve the
directory data.
1.1. User Accounts
The synchronization
connection settings should use an account that has access to the data
source. The account should be able to read all the user profile data on
the directory server being synchronized. How this account is set up may
vary depending on the source system. The source systems are defined on
the Add Synchronization page and can be set by choosing the correct
system (listed here) in the Type drop-down menu, shown in Figure 6.
When using Business Data Connectivity Services, an account is not
required as the accounts set in the Business Data Connectivity entity
will be used.
Active Directory:
The user must have Replicate Directory Changes permission on the target
domain. For Windows 2003 Active Directory installations, the user
should be a member of the Pre-Windows 2000 Compatible Access group. For
domains with a different NetBIOS name, the cn=configuration
container in Active Directory should be checked to make sure the user
has Replicate Directory Changes permission. As exporting property values
is also likely, the user should also have Create Child Objects and
Write All Properties permissions.
Novel eDirectory:
Novel eDirectory should be configured to allow the specified user to
browse in the Entry Rights property for the directory tree where the
users to import are listed. Additionally, it should give the user Read,
Write, and Compare rights in All Attributes for the same directory tree.
Sun Java System Directory Server:
In the Sun Java System Directory Server, Anonymous Access to RootDSE
should be enabled with Read, Write, Compare, and Search rights. If the
intention is to incrementally synchronize (recommended for large
directories), the account should also have Read, Compare, and Search
permissions on the cn=changelog object.
IBM Tivoli: The account specified to synchronize with IBM Tivoli should be a member of the administrative group.
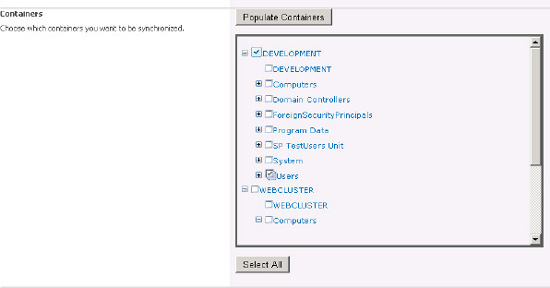
2.2. Excluding Directory Tree Nodes
SharePoint allows the
administrator to choose which levels of the directory and which nodes to
synchronize. All other nodes will be excluded. The administrator can
select the entire directory by choosing Select All or choose each
organizational unit separately. Since, generally, current user data is
interesting only to an organization, it is recommended that care is
taken to select only organizational units that have current users in
them. Exclude former employees, service users, computers, etc. See Figure 7.
NOTE
The User Profile service
must be set to synch before any user profiles can be crawled. Be sure to
initiate an initial synch before crawling and expecting users to be
searchable.
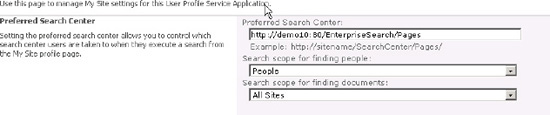
2.2.1. Searching from MySites
Each MySite has its own search
box that is similar to all the pages in a SharePoint site. However, this
MySite search box can have a different target search center.
Designating the target search center for MySites is done in the User
Profile services application under MySite Settings (Figure 8).