Rapid Implementation Methodology (RIM)
tools were introduced in Dynamics NAV with the purpose of providing
powerful tools to automate and expedite implementations. RIM tools can
be used for NAV setups, data migration, importing master data, setting
up industry-specific data, and other data migration requirements.
RIM tools help to bring down
the total cost of ownership for customers, by providing tools for setups
and data migration, which can be used by customer themselves and hence
use partner resources for more specialized and value-added customization
tasks.
RIM comes with
various standard industry templates helpful in setting up
industry-specific master data, including industry-specific
questionnaires, product posting groups, customer posting groups, and
many more.
Using RIM tools to set up a new company
RIM
tools can be used to set up a new company using one of the
industry-specific templates. Currently, RIM comes with the following
industry templates:
Food
Furniture
High Tech
Machinery
Wholesale
Let's take an example of setting up a new Furniture company called "Cronus Furniture Inc.":
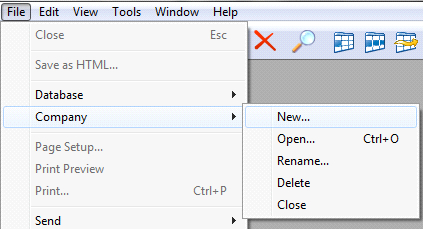
1. From the File menu select Company | New as shown in the following screenshot:
2. Fill in the name "Cronus Furniture Inc." and select OK.
3. Click on the LookUp button to see all available industry templates. Select Furniture from the list as shown in the following screenshot:

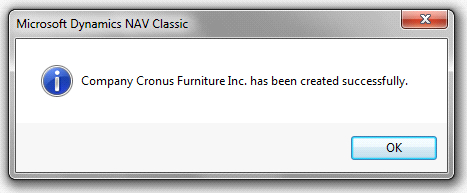
4. After all the data is imported and set up, the new company confirmation message will appear as shown in the next screenshot:
5. To check the setup data, open the newly created company. Under the Application Setup menu, open Company Setup, and then Setup Questionnaire.
6. On the right-side window, choose a category of questions by pressing F5 or List from the Question button at the bottom-right of the screen.
7. Select the code IS (Inventory Setup) to see the inventory setup questions.
8. The header contains the table this questionnaire relates to, such as Table ID, Table Name, and the Details contains the list of all questions related to Inventory Setup.
The following screenshot shows questions related to Inventory Setup:
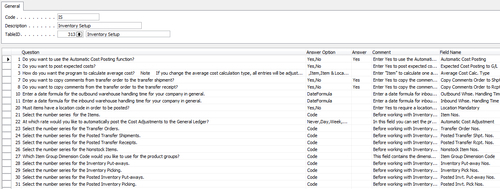
9. The Answer column is used for answering questions and mapping the answer to the Field Name in the right column. The answers should follow the options in the Answer Option column.
10. After all the questions have been answered, press F5 or list to go to another list and fill all questions suggested in the list.
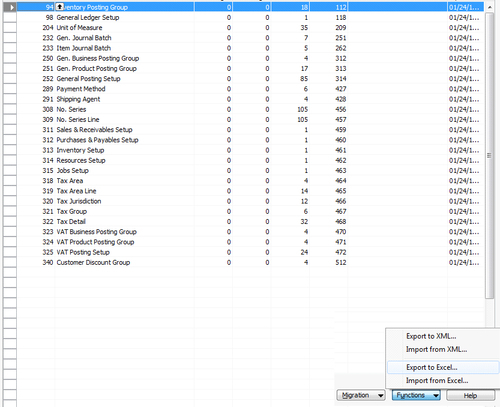
11. To check other setup data, under the Application Setup | Company Setup | Data Migration to see the list of tables and migrated records, open the Inventory Posting Group Table (table 94) and rill into the records to see all inventory posting groups populated.
12. To import more records, we can export the template in either XML or Excel format, by clicking on the functions Export to XML or Export to Excel. Select table 94 and click on the Export to Excel function to export the template in Excel form, as shown in the following screenshot:
13.
Select the path to save the Excel file. Open the Excel file to see the
exported records. Add a new record at the end of the list as shown next
and save the file.
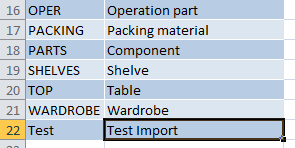
14. Now go back to NAV, on the same Data Migration screen, select table 94 and click on Migration Records from the Migration menu. The newly added record Test will be at the end of records. Click on Apply to commit the record to the table.

In addition to setups, the RIM
data migration tool can be used for other migration records or to
create our own templates. The easy Excel or XML interface can be used to
add new records in predefined templates.