Restoring ConfigMgr Backups
With your
ConfigMgr information backed up, let’s discuss the process of restoring
it. There are two common scenarios where recovering ConfigMgr might be
required:
The next sections discuss these situations.
Site Server Operating System Crash
If a server operating system crashes, the first step is to restore the server from a backup. After installing the OS, the
process can then continue through the steps required to restore from a
ConfigMgr functional crash.
ConfigMgr Functional Crash
In the situation where
ConfigMgr is no longer functional , you can use the Configuration Manager Site Repair Wizard to
recover your ConfigMgr environment. This wizard is installed on the site
server and all computers with the ConfigMgr console and is available by
navigating to Start -> Programs -> Microsoft System Center ->
Configuration Manager 2007 -> ConfigMgr Site Repair Wizard. Perform
the following steps:
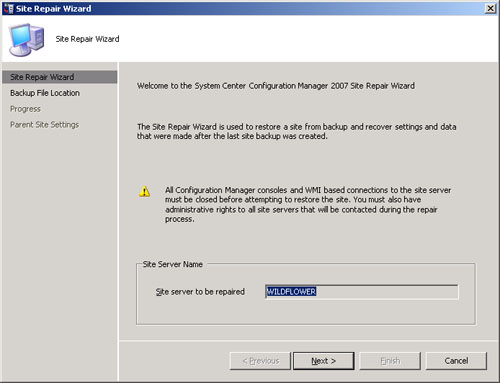
1. | Launch the wizard, which by default runs recovery on the same site server as the wizard. The example displayed in Figure 4 shows repairing (recovering) the Wildflower server.
|
2. | On
the next screen, tell the wizard the location of the backup files it
needs to use for the site restore. You can also choose to repair or
reconfigure a site and specify whether to restore the database when
performing a site restore. This example performs a simple restore of
files stored to a local hard drive in the c:\backup directory, as shown
in Figure 5.
In this case, the database backup is not restored, so leave the Do not
restore database check box in the default configuration, which is
unchecked.
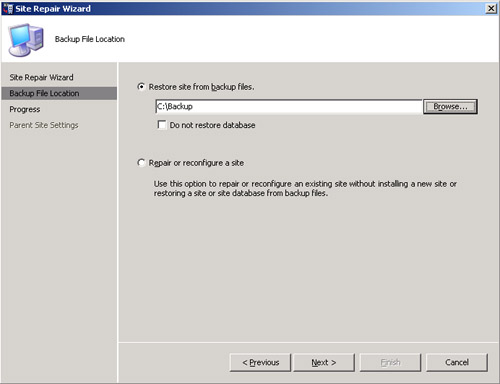
The other option available on this screen provides a way to
either repair or reconfigure an existing site and do so without creating
a new site and without restoring database files from backup.
|
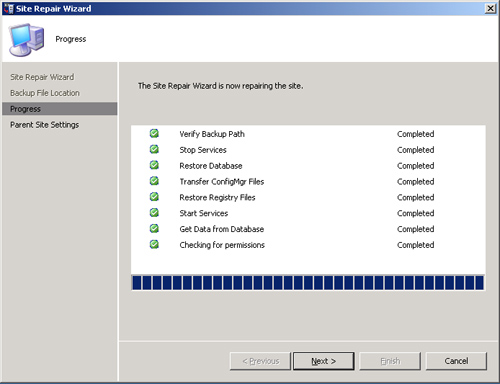
3. | During the repair process, several steps execute and provide status while they are restored, as shown in Figure 6.
|
4. | After
the restore process completes, the next step involves determining if
the system is a central site or the child of another ConfigMgr site.
This example is restoring the CEN site (the central site in the
SCCMUnleashed environment), so the restoration would include checking
the option indicating that This is a central Site, as displayed in Figure 7.
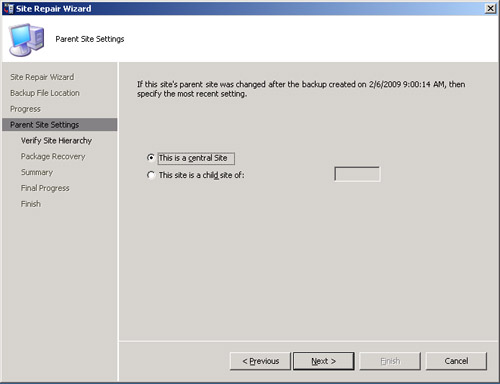
Select this first option for those environments with a single
site or when restoring the central site. If however a child site is
being restored, such as the DAL site in the SCCMUnleashed environment,
choose the second option in Figure 21.7, specifying that this is a child site of and identifying the parent site. (For the DAL site, the parent is the CEN site.)
|
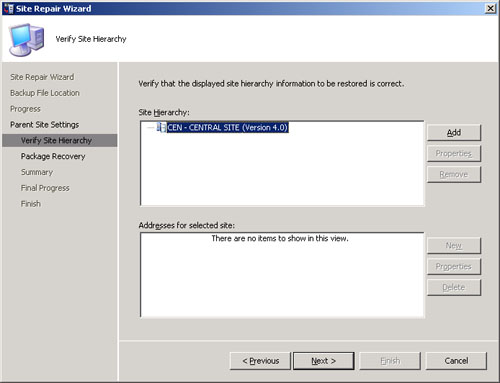
5. | The
following screen, Verify Site Hierarchy, provides the opportunity to
validate the site hierarchy information you are restoring is correct.
You can add additional sites and configure addresses for the selected
sites. For a single site restoration or restoration of a central site,
the only site shown would be the one specified on the previous screen,
as displayed in Figure 8.
|
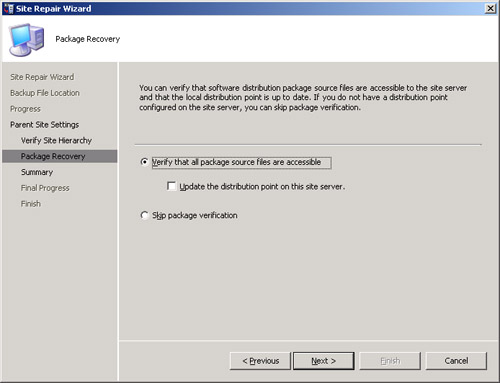
6. | Clicking Next takes you to the Package Recovery step of the Site Repair Wizard. Several options are available:
- You can specify here whether to verify the package
source files are accessible, and if so, whether to update the
distribution point on the site server.
- You can choose to skip package verification completely.
The distribution point in the ConfigMgr SCCMUnleashed
environment is already populated, so accept the default configuration to
verify that the source files are accessible, as shown in Figure 9.
|
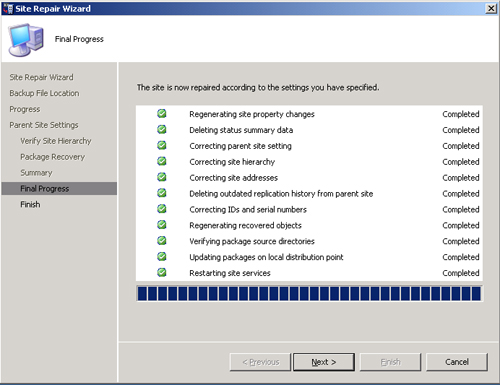
7. | The restoration process continues through a series of processes (displayed in Figure 10), shows a summary of the actions performed, and provides a screen indicating that the restoration process is complete.
 |