Verifying the Server Configuration
When
verifying the DHCP server configuration, you can begin with the DHCP
server address. To provide leases for clients on the local subnet, the
DHCP server computer must be assigned an address whose network ID is
common to that logical subnet. In addition, the DHCP Server service must
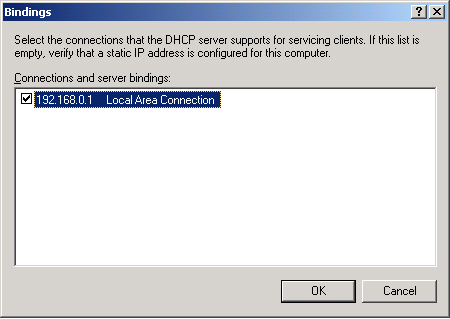
be bound to the connection to that subnet. To verify a DHCP server’s
network bindings, select the Advanced tab in server properties and click
the Bindings button. This procedure opens the Bindings dialog box,
shown in Figure 3.

After you have verified
that the DHCP server is properly addressed and bound, verify that the
DHCP server is authorized in Active Directory. You can determine that a
server is not authorized when a red arrow pointing down marks the server
icon in the DHCP console tree. When the server is authorized, the
server icon is marked by a green arrow pointing up.
Verifying the Scope Configuration
To verify the scope
configuration, begin by verifying that the scope is activated. Active
and inactive scopes are designated by the same up and down arrows that
are used to designate authorized and unauthorized servers.
Once you have
verified that the scope has been activated, make sure the address range
for the scope has been properly configured. For a scope that provides
addresses to computers on the local network segment and logical subnet,
make sure the network ID of the scope matches that of the DHCP server
computer. This matter is simple when you are using default subnet masks,
but when the local network or scope uses a mask other than /8, /16, or
/24, you should use the AND function in Calculator to verify that the
server address and scope addresses contain the same network ID.
Once
the address range has been verified, make sure the available leases
within the scope have not all been assigned. If you need to increase the
number of available leases, you can achieve this task in a number of
ways. First, you might try simply to increase the scope’s address range
if room is available. Second, you can recreate the scope with a
shortened subnet mask (such as /23 instead of /24) and then change the
subnet mask on all computers on the local network. Finally, you might
prefer to deploy multinets with multiple scopes and a router.
As an alternative,
you can attempt to accommodate more computers within your current
available address space simply by decreasing the lease duration in the
scope properties. When the lease duration is shortened, computers that
are shut down or temporarily removed from the network do not keep their
addresses for long. These addresses are then made available for use by
other computers.
Tip
Look
for questions in which you need to shorten the lease duration within a
scope to accommodate many users within an address space. Typically,
these scenarios involve many users on laptops or telecommuters dialing
in from remote locations. |
As you continue to
verify the scope configuration, check the exclusions defined in the
address pool. Are all of the statically assigned addresses on the
network being excluded if they lie within the scope range? Are any
addresses being excluded unnecessarily?
Next, move to the
configured reservations. If clients with reserved addresses are not
properly obtaining address leases, verify that the reserved addresses
are not simultaneously being excluded. Also verify that the reserved
addresses lie within the scope’s defined address range. Finally, verify
that the MAC addresses have been properly registered for each address
reservation.
Next, for DHCP servers
that have deployed multiple scopes for use with remote subnets, verify
that each scope is properly defined. For a scope to serve a remote
subnet, the scope’s configured address range must match the network ID
of the DHCP relay agent or RFC 1542-compatible router deployed on that
subnet.
Finally, for
networks on which multiple DHCP servers are deployed within a given
broadcast range, verify that superscopes are configured and that the
address ranges leased by each server are excluded by the other DHCP
servers.
To
configure an address reservation, you need to know the hardware address
of the computer whose address you want to reserve. The basic graphical
user interface (GUI) way to get the hardware address of a local
computer—or of a remote computer over a Remote Desktop connection—is
through the Local Area Connection Status dialog box. In the dialog box,
select the Support tab and then click the Details button. This procedure
opens the Network Connection Details dialog box, which includes summary
information such as the computer’s MAC address, its IP address, its
DHCP server address, its DNS server address, and other useful nuggets.
The Ipconfig /all output also includes the MAC address of the local
computer. These methods
are nice, but there is actually a much faster way to obtain MAC
addresses of local and remote computers. Windows Support Tools includes a
utility called Getmac, which, when used with the /s switch, allows you
to obtain the physical address of any computer on the network—even those
on a remote subnet. By piping the Getmac output into the clipboard, you
can paste the MAC address of the remote computer into the New
Reservation dialog box. For example, type the following command at a command prompt: getmac /s computer2 | clip Then
open Notepad and press Ctrl+V. This operation pastes the output from
the previous Getmac operation. From Notepad, you can then copy
Computer2’s hardware address and paste it into the New Reservation
dialog box. |
|
.