Auditing Resource Access
Object
access can be audited, although it is not one of the recommended
settings. Auditing object access can place a significant load on the
servers, so it should only be enabled when it is specifically needed.
Auditing object access is a two-step process: Step one is enabling
“Audit object access” and step two is selecting the objects to be
audited. When enabling Audit object access, you need to decide if both
failure and success events will be logged. The two options are as
follows:
Audit object access
failure enables you to see if users are attempting to access objects to
which they have no rights. This shows unauthorized attempts.
Audit object access success enables you to see usage patterns. This shows misuse of privilege.
Enable the appropriate
policy setting in the Group Policy Object. It is a best practice to
apply the GPO as close to the monitored system as possible, so avoid
enabling the auditing on too wide a set of systems.
Note
Monitoring both success and
failure resource access can place additional strain on the system.
Success events can generate a large volume of events.
After enabling the object
access policy, the administrator can make auditing changes through the
property pages of a file, folder, or a Registry key. If the object
access policy is enabled for both success and failure, the administrator
will be able to audit both successes and failures for a file, folder,
or Registry key.
After object access auditing is enabled, you can easily monitor access to resources such as folders, files, and printers.
Auditing Files and Folders
The network
administrator can tailor the way Windows Server 2008 R2 audits files and
folders through the property pages for those files or folders. Keep in
mind that the more files and folders that are audited, the more events
that can be generated, which can increase administrative overhead and
system resource requirements. Therefore, choose wisely which files and
folders to audit. To audit a file or folder, do the following:
1. | In Windows Explorer, right-click the file or folder to audit and select Properties.
|
2. | Select the Security tab and then click the Advanced button.
|
3. | In the Advanced Security Settings window, select the Auditing tab and click the Edit button.
|
4. | Click the Add button to display the Select User or Group window.
|
5. | Enter the name of the user or group to audit when accessing the file or folder. Click the Check Names button to verify the name.
|
6. | Click OK to open the Auditing Entries window.
|
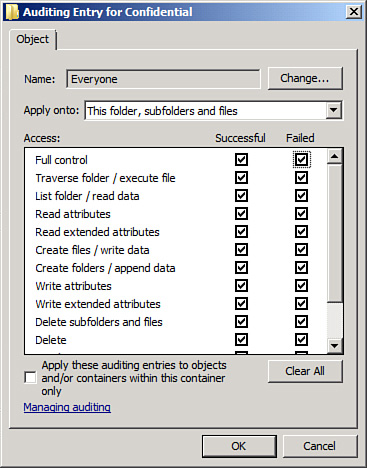
7. | In the Auditing Entry window, shown in Figure 2, select which events to audit for successes or failures.
|
8. | Click OK four times to exit.
|
Note
This step assumes that the audit object access policy has been enabled.
When the file or folder is
accessed, an event is written to Event Viewer’s security log. The
category for the event is Object Access. An Object Access event is shown
in the following security log message:
Log Name:      Security
Source:        Microsoft-Windows-Security-Auditing
Date:          9/28/2009 6:22:56 PM
Event ID:      4663
Task Category: File System
Level:         Information
Keywords:      Audit Success
User:          N/A
Computer:      DC1.companyabc.com
Description:
An attempt was made to access an object.

Subject:
        Security ID:             COMPANYABC\Administrator
        Account Name:            Administrator
        Account Domain:          COMPANYABC
        Logon ID:                0x2586e

Object:
        Object Server:   Security
        Object Type:     File
        Object Name:     C:\Confidential\Secret.txt
        Handle ID:       0xec

Process Information:
        Process ID:      0xfd8
        Process Name:    C:\Windows\System32\notepad.exe

Access Request Information:
        Accesses:        WriteData (or AddFile)
                         AppendData (or AddSubdirectory or CreatePipeInstance)

        Access Mask:     0x6
The
event is well organized into Subject (whom attempted the access),
Object (what was acted on), Process Information (what program was used),
and Access Request Information (what was done). If the event was Audit
Success, the attempt was successful. If the event was Audit Failure, the
attempt failed. You can see from the event that the administrator wrote
to the file Secret.txt at 6:22:56 p.m. and even that the program Notepad was used.
Auditing Printers
Printer auditing operates on
the same basic principles as file and folder auditing. In fact, the same
step-by-step procedures for configuring file and folder auditing apply
to printers. The difference lies in what successes and failures can be
audited. These events include the following:
Print
Manage printers
Manage documents
Read permissions
Change permissions
Take ownership
These events are stored in Event Viewer’s security log, as are all audit events.
To audit a printer, do the following:
1. | In the Printers Control Panel applet, right-click the printer to audit, and select Properties.
|
2. | Select the Security tab and then click the Advanced button.
|
3. | In the Advanced Security Settings window, select the Auditing tab, and click the Edit button.
|
4. | Click the Add button to display the Select User or Group window.
|
5. | Enter the name of the user or group to audit when accessing the file or folder. Click the Check Names button to verify the name.
|
6. | Click OK to open the Auditing Entries window.
|
7. | In
the Auditing Entry window, select which events to audit for successes
or failures. The objects to audit will be different than the auditing
available for files and folders, as the printer is a different class of
object.
|
8. | Click OK three times to exit.
|
Now access to the printer will generate security log events, depending on the events that were selected to be audited.
