In this section, we will discuss creating
and managing VMs deployed to a Hyper-V server. This involves creating a
new VM, configuring VM settings, and installing an operating system.
1. Virtual machine files
Before
creating new VMs, you will want to have a basic understanding of what
makes up a VM on the Hyper-V host. The following are the basic files
used by a VM:
Virtual machine configuration file
—The VM configuration file is an XML file that stores all the
configuration information related to the VM. This file contains
information such as amount of memory used, CPU configuration, virtual
disk drive configuration, and the virtual network used by the VM.
Virtual machine disks (VHD)
—The VHD files make up the actual disk drives used by the VM. All the
data, including the operating system and applications, are stored within
the VHD files.
Snapshot files
—When you take a snapshot of a VM, snapshot files are used to track all
changes to the VM. This gives you the ability to roll back to the point
where the snapshot was taken.
2. Virtual machine disk types
When creating new virtual disks for VMs, you will be asked to choose a disk type. The three different VM disk types are:
Fixed size
—Fixed-sized disks allocate all space required for the disk upon
creation. This means that a 40 GB VHD will use 40 GB of physical disk
space from the start. This option should be used when the disk will be
used with a VM running applications with heavy disk I/O. Fixed size
provides the best performance.
Dynamically expanding
—Dynamically expanding disks allocate only a small portion of the
maximum disk size upon creation. As more virtual disk space is used, the
disk drive will expand in increments. For example, you may create a
dynamically expanding disk with a maximum size of 120 GB. Upon creation,
you will notice that the VHD consumes only a small amount of physical
disk space (less than 1 GB). As data are added to the dynamic disk, the
disk will expand as needed until the max disk size is reached. The
dynamic expansion uses much less disk space initially but does not
perform as well as Fixed-size disks because of the resources required to
expand as data are added.
Differencing
—A Differencing disk is based upon a parent Fixed of Dynamic disk. The
differencing disk keeps track of differences made to a disk so that
changes can easily be reversed.
Creating and configuring a virtual machine
In
this section, we will look at the process of creating and managing VMs.
We will be using the Hyper-V Manager from within Server Manager to
perform all administrative functions. To create a new VM, perform the
following:
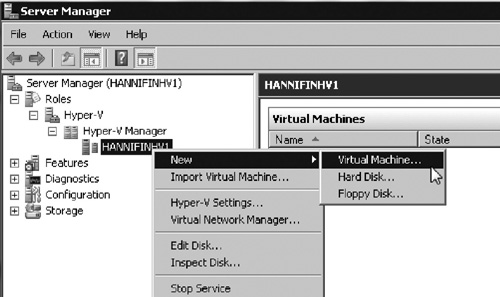
1. | Open Server Manager and select the node Roles | Hyper-V | Hyper-V Manager | <your hyper-v server name>.
|
2. | Right click the server name and select the option New | Virtual Machine as seen in Figure 1. This will launch the New Virtual Machine Wizard. Click Next to begin.
|
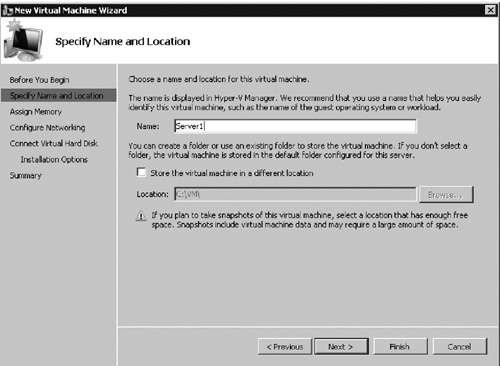
3. | The first step is to enter a name for the server (see Figure 2).
This is how the VM will be displayed within Hyper-V Manager. If you
want to change the default location to store the VM configuration files,
you can do that here. Then click Next.
|
4. | Enter the amount of memory you want to allocate to the VM (see Figure 3). You will want to ensure that you give the VM enough memory to support the guest operating system and applications running
within the VM. When the VM is started, that amount of memory will be
unavailable to other VMs and applications running on the Hyper-V host.
After the VM is turned off, that memory will become usable memory by the
host operating system. After selecting the amount of memory to dedicate
to the VM, click Next.

|
5. | Select the virtual network that you want the VM to be connected to (see Figure 4). Then click Next.

|
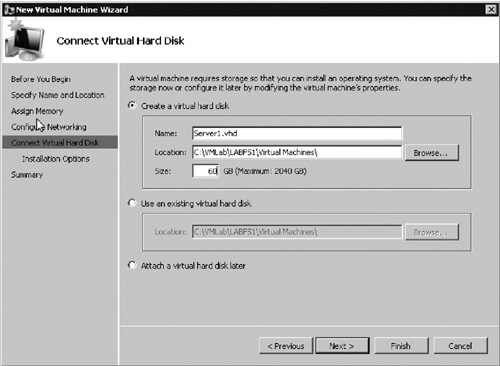
6. | Select whether you want to connect an existing VHD disk drive to the VM or create a new disk drive (see Figure 5). If you have an existing VHD, you can connect it here; otherwise, choose the option to Create a new virtual disk drive. Select the maximum size for the disk drive, and then click Next. By default, a new disk selected here will be dynamic.
|
7. | Now select how you want to install the guest operating system. Choose one of the following options:
- Install an operating system later
—Selecting this option will configure the VM to not configure boot
options and allow you to manually install an operating system. Select
this option if you are not sure how you plan to install the OS.
- Install an operating system from a boot CD/DVD ROM
—Selecting this option will configure the VM to boot off of a CD or DVD
in the host computer’s optical drive, or from an ISO file located on
the host computer. This will allow you to install an operating system
from the CD/DVD media provided by the manufacturer or an ISO image
downloaded to the host computer.
- Install an operating system from a boot floppy disk —Selecting this option will configure the VM to boot off of a virtual floppy disk saved in a file on the host computer.
- Install an operating system from a network-based installation server
—Selecting this option will configure the VM to PXE boot from the
network allowing you to install the operating system via a network-based
install.
After selecting how you want to install the operating system click Next.
|
8. | Verify the VM settings and click Finish to create the VM.
|
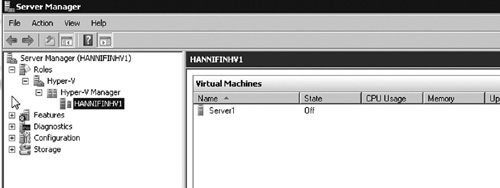
The VM will be created and can be accessed from the Hyper-V host within Hyper-V Manager as seen in Figure 6.
3. Supported virtual machine operating systems
Prior
to installing a guest operating system on a VM, you should be aware of
those that are supported. Hyper-V supports the following guest operating
systems:
Windows Server 2008 R2
Windows Server 2008 (×86 and ×64)
Windows Server 2003 R2 (×86 and ×64)
Windows Server 2003 (×86 and ×64)
Windows 2000 Server
Windows 7 (×86 and ×64)
Windows Vista (×86 and ×64)
Windows XP (×86 and ×64)
SuSE Linux Enterprise Server 10
SuSE Linux Enterprise Server 11
RedHat Enterprise Linux 5.2
Redhat Enterprise Linux 5.3
Hyper-V unsupported operating systems
That an operating system is not supported by
Hyper-V does not mean that it will not run on a Hyper-V VM. Supported
guest operating systems are those that have been verified by Microsoft
to function properly on Hyper-V and have configurations officially
supported by Microsoft professional support services.
