Testing the VPN Connection
The next step in the working
with a VPN connection is to test the configuration to make sure the
system can properly VPN into the network. To test the VPN connection, do
the following:
1. | On the client, right-click on the Company ABC VPN Connection, and select Connect.
|
2. | Click the Connect button.
|
3. | Click OK to accept the credentials. The connection will be established.
|
The connection can be tested
by pinging the domain controller dc1.companyabc.com. Because the system
passed the health validation checks, the connection is granted full
access to all intranet resources. To test the connection, complete the
following steps:
1. | With the Company ABC VPN Connection connected, select Start, All Programs, Accessories, and click on Command Prompt.
|
2. | Enter ping dc1.companyabc.com and press Enter.
|
3. | You should get a reply from the IP address of DC1.
|
4. | Select Start, Connect To and choose to open the Connections window.
|
5. | Select the Company ABS VPN Connection, and click Disconnect.
|
6. | Click Close.
|
The NPS system presents a
wealth of information on the connection that was sorely lacking in
previous versions of Windows. With Windows Server 2008 R2,
troubleshooting traditional VPN connection issues is a straightforward
endeavor.
Controlling Unhealthy VPN Clients
The previous example had
everything going smoothly with no health issues. However, if the client
had failed the health validation checks, the failing items will be
remediated. The health validation check that was configured was to check
for Windows Firewall being enabled. To test the health remediation
capabilities, we’ll turn off the Windows Firewall and then connect
again:
1. | On the VPN client, select Start, Control Panel.
|
2. | Click on Security.
|
3. | Click on Windows Firewall.
|
4. | Click on Change Settings.
|
5. | Select the Off (Not Recommended) option button, and click OK.
|
The client is now in an
unhealthy state, as defined by the health policy. Let’s see what
happens when the client connects to the VPN:
1. | On the client, select Start, Connect To, and then choose to open the Connections window.
|
2. | Right-click on the Company ABC VPN Connection, and select Connect.
|
3. | Click the Connect button.
|
4. | Click OK to accept the credentials.
|
5. | The client firewall will be enabled by the NAP client and then connected to the VPN.
|
The NAP client
continues enforcing the health policy even after the initial connection.
You can test this by leaving the connection active and then turning off
the Windows Firewall:
1. | On the VPN client, select Start, Control Panel.
|
2. | Click on Security.
|
3. | Click on Windows Firewall.
|
4. | Click on Change Settings.
|
5. | Select the Off (Not Recommended) option button, and click OK.
|
The Windows Firewall will be off
briefly and then be turned back on. Just like magic, the EAP agent will
fix the problem to ensure that the client stays compliant with the
health policy even after the initial connection.
If the client should
fall out of compliance with the health policy in such a way as to be
irremediable, the connection will drop to a reduced connectivity state
as defined by the health policies. For example, if an intrepid user
disables the Windows Firewall, the EAP agent will detect that condition
and take the appropriate action. The following example illustrates this:
1. | On the client, connect to the Company ABC VPN Connection.
|
2. | Select Start, Run.
|
3. | Enter services.msc and click OK.
|
4. | Select the Windows Firewall service in the list of services.
|
5. | Select Action, Properties.
|
6. | Change the startup type to Disabled, and click OK.
|
7. | Select Action, Stop to stop the Windows Firewall.
|
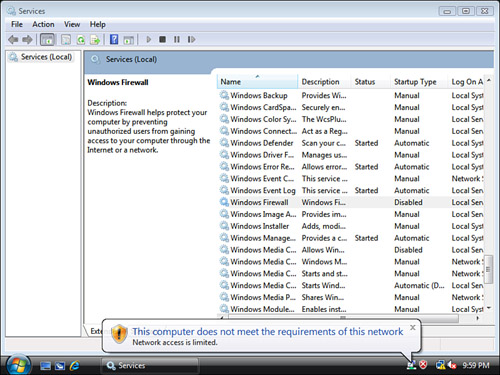
The connection icon will
change to show a yellow warning triangle with an exclamation point to
indicate limited connectivity. As shown in Figure 8,
a NAP agent icon will appear in the system tray with the message: “This
computer does not meet the requirements of this network. Network access
is limited.”
Thus, even if the
remediation steps fail, the internal network is protected from
noncompliant systems. Even better, when the client returns to
compliance, the EAP agent detects that and reestablishes full
connectivity. To illustrate that, complete the following steps:
1. | Select the Windows Firewall service in the list of services.
|
2. | Select Action, Properties.
|
3. | Change the startup type to Automatic, and click OK.
|
4. | Close the Services MMC.
|
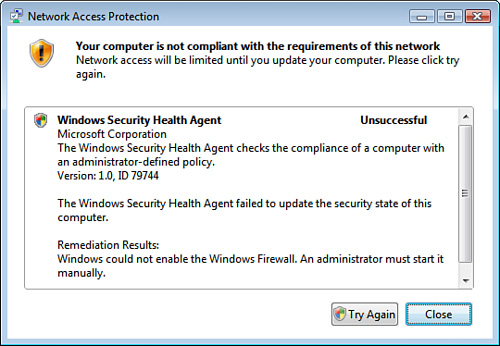
5. | Click
on the NAP agent icon in the system tray. A message will appear,
indicating that remediation had previously failed, as shown in Figure 9.
|
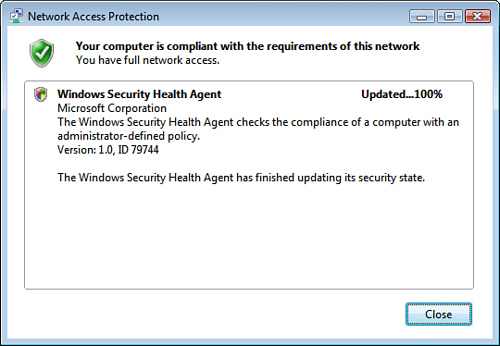
6. | Click on the Try Again button to attempt the remediation.
|
7. | The NAP agent will restart the service and update the compliance of the client, showing a message similar to the one shown in Figure 10.
|
8. | Click Close to close the NAP agent window.
|
The NPS and NAP
combination is a very powerful tool for ensuring the health of the
systems that are connecting to the VPN infrastructure.
