1. | Log
on to a domain controller or a member computer that has Windows Server
2008 Remote Server Administration Tools (RSAT) installed.
|
2. | Click Start, and click Command Prompt.
|
3. | In the Command Prompt window, type the following command and press Enter:
|
4. | You will receive a notification that schmmgmt.dll was registered successfully, as shown in Figure 1. Click OK and close the Command Prompt window.

|
5. | Click Start, click Run, type mmc /a, and click OK.
|
6. | On the File menu, click Add/Remove Snap-In.
|
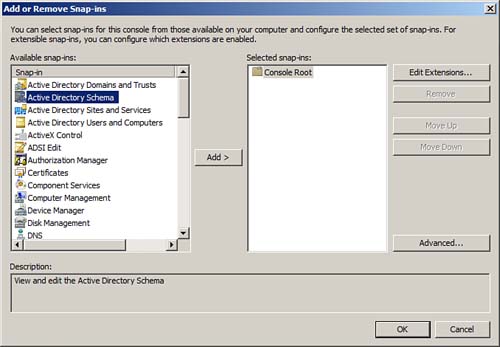
7. | In the Add or Remove Snap-ins window, shown in Figure 2,
select Active Directory Schema under Available Snap-ins, click Add, and
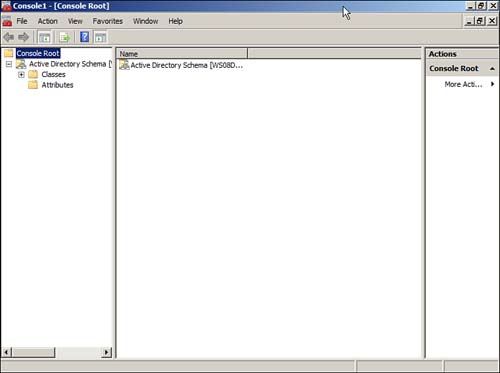
then click OK. The Active Directory Schema snap-in is added to the MMC
console, as shown in Figure 3.
|
8. | On the File menu, click Save As.
|
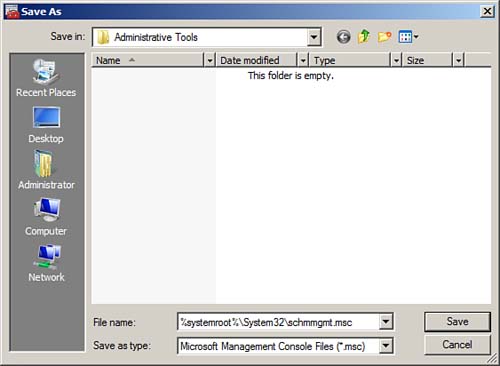
9. | In the Save As window, shown in Figure 4, type systemroot%\System32\schmmgmt.msc in the File name field, and click Save.
|
10. | Close the console.
|
11. | Right-click Start, and click Open All Users, shown in Figure 5.

|
12. | Double-click Programs and double-click Administrative Tools.
|
13. | On the File menu, click New; then click Shortcut.
|
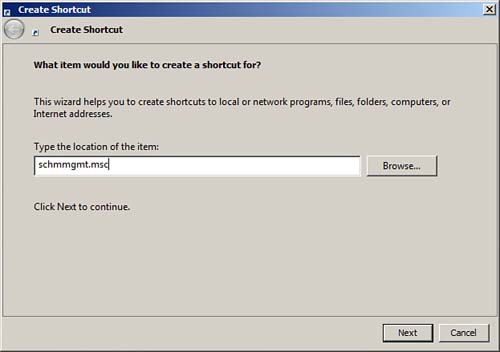
14. | In the Create Shortcut Wizard, shown in Figure 6, in the Type the Location of the Item box, type schmmgmt.msc; then click Next.
|
15. | On the Select a Title for the Program page, in the Type a name for this shortcut, type Active Directory Schema; then click Finish.
|
16. | To
verify that the Active Directory Schema shortcut was created
successfully, click Start, click Administrative Tools, and verify that
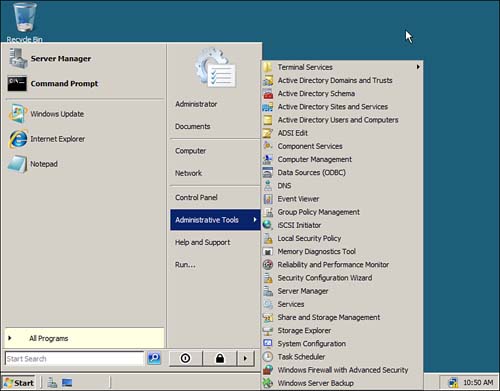
Active Directory Schema is listed, as shown in Figure 7.
|