One of the cool things you can do with the new RemoteApps
capability is add an application directly to the RWA landing page.
This allows a user working remotely to directly and securely access an
application on the SBS network without having to log on to take a full
Remote Desktop session.
The basic process is
Create an .rdp file for the application.
Save the .rdp file to the path where Remote Web Access
resides on your SBS server.
Create a new MIME type in Internet Information Services
(IIS) for RDP.
Add a link to the .rdp file to the RWA page using the SBS Console.
Let’s go through the process to add a link to Microsoft Word
2010 to the RWA page. If you don’t have Microsoft Office installed on
your RD Session Host, you’ll need to use a different program in these
steps, but the result will be the same.
First, follow these steps on the terminal server to create an
.rdp file for Microsoft Word 2010:
Open RemoteApp Manager if it isn’t already open (remoteprograms.msc).
If you already have an entry in the RemoteApp Programs
section for Microsoft Word 2010, skip to step 6. If not, select
Add RemoteApp Programs from the Actions menu to open the RemoteApp
Wizard.
Click Next to open the Choose Programs To Add To The
RemoteApp Programs List page.
Scroll down and select Microsoft Word 2010 from the list, as
shown in Figure 1.

Click Next and then click Finish to add Microsoft
Word 2010 to the list of RemoteApp programs.
Select Microsoft Word 2010 in the
list of RemoteApp Programs, and then click Create .RDP File in the
Actions pane to open the RemoteApp Wizard.
Click Next to open the Specify Package Settings page of the RemoteApp Wizard.
Type in the UNC path to the Public share on your SBS server
for the location to save, as shown in Figure 2.
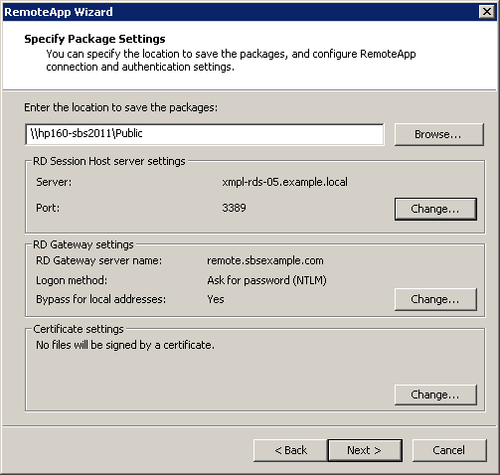
Verify that the RD Gateway Server Name is shown as the
public DNS name of Remote Web Access. If it isn’t, click Change
and adjust as required.
Click Next and then click Finish to create the file.
Next, let’s log on to the SBS server and move that .rdp file
over to where we need it by following these steps:
Log on to the main SBS server with a Network Administrator
account.
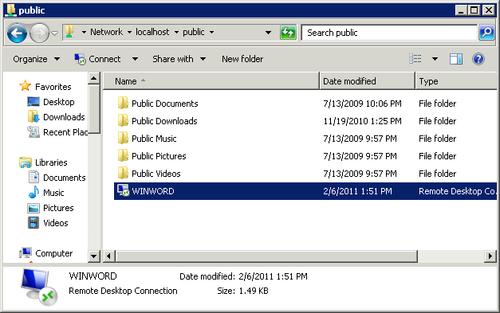
Open Windows Explorer, and navigate to \\localhost\public,
as shown in Figure 3.
Highlight the WINWORD .rdp file, and copy it to the
clipboard.
Navigate to the main directory for Remote Web Access. The
default location is C:\Program Files\Windows Small Business
Server\Bin\WebApp\RemoteAccess. Paste the WINWORD .rdp file.
You’ll be prompted for permission because this is a protected
folder.
Next, we need to create a new MIME type for the .rdp extension
by following these steps:
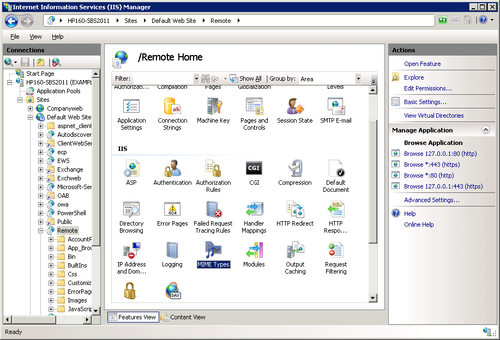
Open the Internet Information Services (IIS) Manager from
the Administrative Tools menu.
Highlight the server name in the left pane, navigate to
Sites, then to Default Web Site, and finally to Remote. Click MIME
Types in the center pane, as shown in Figure 4.
Click Open Feature on the Actions menu to open the MIME
Types in the center pane, as shown in Figure 5.
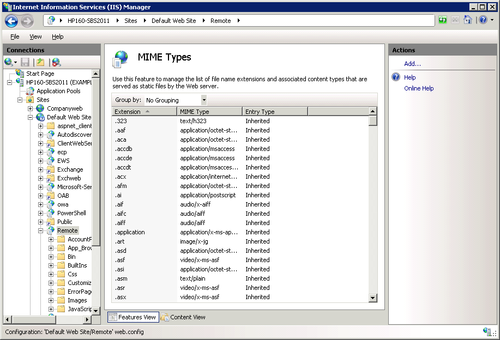
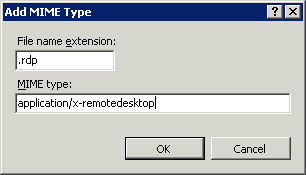
Click Add in the Actions pane to open the Add MIME Type
dialog box. Type .rdp in the File
Name Extension field, and type application/x-remotedesktop in the MIME
Type field, as shown in Figure 6. Click OK.
Right-click the server name in the left pane and select Stop
from the Actions menu.
Right-click the server name again and select Start.
Close the Internet Information Services (IIS) Manager
console.
Note:
It doesn’t actually matter what Mime type you create here.
We’ve chosen application/x-remotedesktop for consistency with
standard Mime naming conventions, but Windows and IIS are actually
smart enough to make this work with pretty much any Mime
type.
Finally, we need to add the Microsoft Word 2010 link to the RWA
page by following these steps:
Open the Windows SBS Console if it isn’t already
open.
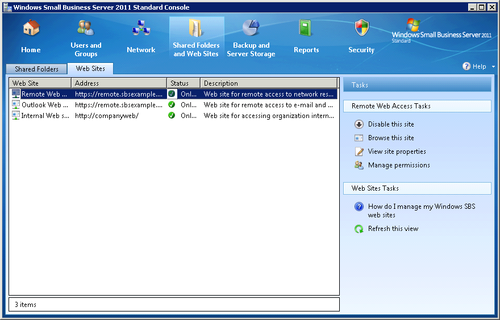
Click Shared Folders And Web Sites in the navigation pane,
and then click the Web Sites tab as shown in Figure 7.
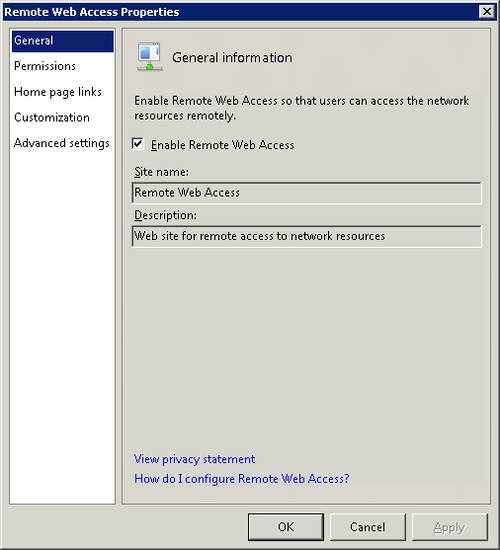
In the Remote Web Access Tasks section, click View Site
Properties to open the Remote Web Access Properties dialog box as
shown in Figure 8.
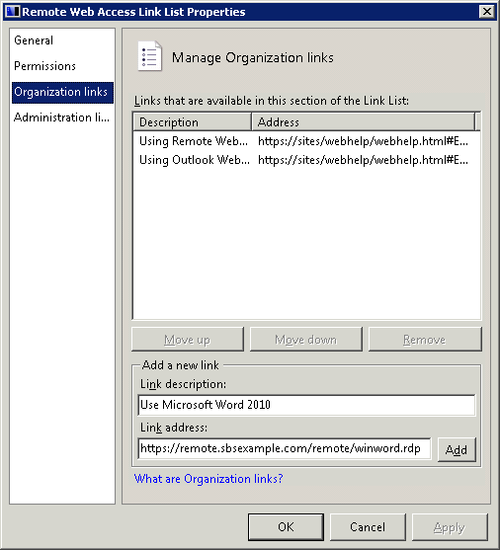
Click Home Page Links in the left pane, and then click Manage
Links to open the Remote Web Access Link List Properties dialog
box, shown in Figure 9.
Click Organization Links in the left pane to open the Manage
Organization Links page in the right pane..
Click Add and then click OK twice to close the Remote Web
Access Link List Properties dialog box and return to the Windows
SBS Console.
Highlight Remote Web Access, click Disable This Site in the
Tasks pane, and then click Enable This Site in the Tasks
pane.
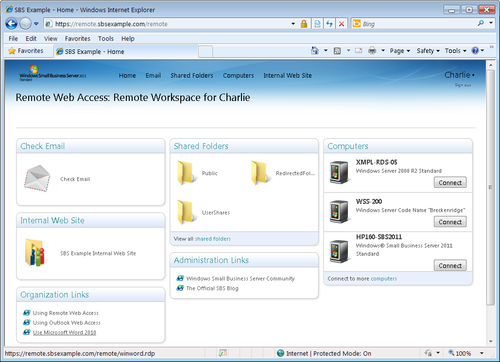
Log on to Remote Web Access, and you’ll see the new link, as
shown in Figure 11.

The first time you run this or any other RemoteApp, you’ll
have multiple prompts to provide credentials and confirm you
really want to do this. You can save your selections so that
you’re not prompted again, if you choose.
Microsoft Word 2010 probably isn’t the most important
application that you’ll want to be able to run remotely, but it
provides a simple example for our purposes. Each business has a
different application set that it needs to make available remotely,
but any application that currently requires logging on to a remote
desktop or using a virtual private network (VPN) connection is an
obvious choice.
