4. Preparing a reference computer
At this point, you are
ready to automate the installation of the machine that will become your
baseline image for deployment. Most labs today make extensive use of
virtual machines for the money and time it saves. Because the image of
Windows Vista you create is not hardware dependant, you may generate it
on a virtual machine without fear of issues regarding Hardware
Abstraction Layer (HAL) compatibility.
Copy the LiteTouchPE_x86.iso image from the directory structure created in the previous step to your local computer (for example, \\server\distribution$\ Boot\LiteTouchPE_x86.iso). Configure
your virtual machine to boot from this ISO file by mounting it as a CD
image. Alternatively, you could burn the ISO image to a CD. Boot
the virtual machine from the mounted ISO image. Alternatively, if you
burned the ISO to a CD, you may boot from it in order to load the Lite
Touch image. Accept the default Run the Deployment Wizard to install a new operating system option.
The menu provided lets you choose if you want to run the Deployment
Wizard or exit to the command prompt. After you have made your choice,
click Next to continue. On
the User Credentials page, enter the User Name, Password, and Domain of
the account to be used for accessing the distribution share and click
OK to proceed. On the Select a task sequence to execute on this computer page, you can choose the deployment task you want to execute.
If following these directions, there will be one choice for the
installation of Windows Vista Business. Accept this default choice and
click Next to continue. The next page of the Windows Deployment Wizard is Configure the computer name.
The name will not remain once it is generalized for imaging with
Sysprep, so leave the automatically generated default name in place and
click Next to continue. You
can Join the computer to a domain or workgroup. You can choose a domain
name and credentials, but as you are generating an image for
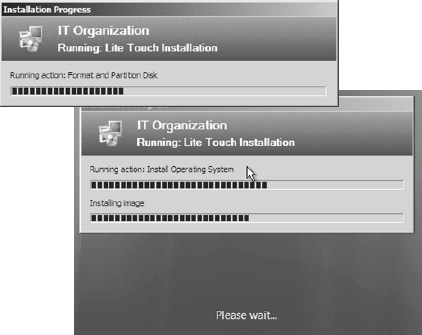
deployment, you may simply accept the default Join a workgroup option and click Next to continue. The next page prompts you to Specify whether to restore user data. Again, this is not a production deployment, so accept the default Do not restore user data and settings option and press the Next button to continue. The next page prompts for Locale Selection. If you wish to specify an alternate locale and keyboard setting, you may do so here and press the Next button to continue. The next parameter requested in the wizard is to Set the Time Zone. Here, you may select you local time zone and press the Next button to continue. The next page allows you to Select one or more applications to install. Check the box by any of the applications you wish to have incorporated in this build and press the Next button to continue. You are then prompted to Specify whether to capture an image. By default, it will be set to Capture an image of this reference computer, with two fields to specify the filename and path: Location and File name. By default, the path will be your Distribution$ share and the filename will be that of your Task ID. Press the Next button to review your settings. Finally, the next window of the wizard states Ready to begin. You may optionally click Details to view the settings you have chosen, and then press the Begin button to start the process. Figure 2 shows the progress dialog shown to advise you of the current status.
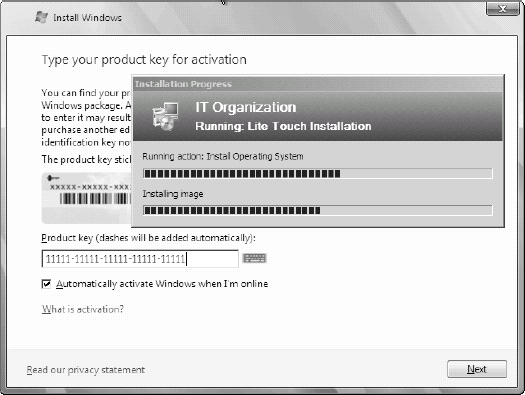
You may be prompted to Type your product key for activation
if it was not specified earlier. The progress dialog will be on top, so
you may need to drag the window out of the way to enter the product key
(see Figure 3). If prompted, enter a valid product key and press Next to continue.
The automated
process installs Vista, reboots, automatically logs on, and continues
the installation process including the installation of applications and
Windows PE. Sysprep is used to generalize the system, and it then
reboots to Windows PE and creates the image (WIM) over the network on
the server share.
5. Adding the custom image to the distribution share
When the image was
created in the previous step, it was saved directly to the distribution
share, but there are a couple more steps required to make it available
as a custom image.
Choose Deployment Workbench =>
Distribution Share =>
Operating Systems and click the New option from the actions pane on the right. On the OS Type page, choose Custom image file from the menu and click Next to continue. On the Image page, fill in the Source file field with the path to your newly created image. By default this will be \\servername\distribution$\Captures\<task sequence id>.wim. On the Setup page, you may accept the default Setup and Sysprep files are not needed option.
This is due to the fact that Windows Vista contains Sysprep and the
files needed to perform an automated installation. Click Next to
continue. On the Destination page, you can specify the target directory name for the operating system files.
By default this will be filled in using the same name specified as your
task sequence ID. If you have chosen meaningful names for task sequence
IDs as suggested, take advantage of it by accepting this default and
clicking Finish to complete the addition of the custom image to the
Deployment Workbench.
6. Creating a deployment build for a custom image
As you had
previously created a deployment build for establishing the reference
computer, you now need to establish one for the deployment of your
custom image.
Choose Deployment Workbench =>
Deploy =>
Deployment Points and click the New option from the actions pane on the right. On the Choose Type page, select the default Lab or single-server deployment option and then click Next. On the Specify Deployment Point Name page, enter Image Deployment for Deployment point name and click Next. On
the Application List page, deselect the option to Allow users to select
additional applications on Upgrade as the applications you wish
included in your image have already been installed within the image and
click Next. On the Allow Image Capture page, deselect the Ask if an image should be captured option and click Next. On
the Allow Admin Password page, you may select the Ask user to set the
local Administrator Password option if you wish installers to be
prompted. Click Next to continue. If
you want the installer to prompt the user, you may select Allow Product
Key presents an option to Ask user for a product key; then click Next. The Network Share page lets you change the default share name if you want.
In most cases, the default "Distribution$" share name is fine, but you
may specify an alternate name if you want. Click Next to continue. On the Configure User State page, you can specify user data defaults.
If you want to handle the migration of user data, you may choose one of
the following options and then click the Finish button to complete the
creation of the deployment point. Available options include: Automatically determine the location on the network. This instructs the deployment process to browse the local network to determine the location for storing the user-state data. Automatically determine the location on the Local System. This instructs the deployment process to browse the local system to determine the location for storing the user-state data. Specify a location. Lets you dictate manually specify the location to save user-state data.
Choose Deployment Workbench =>
Deploy =>
Deployment
Points, right-click the newly created Image Deployment point, and
choose Update to create the file structure that represents this newly
created deployment point.
|
