9. Setting Video Options
Windows Movie Maker allows you to encode your video using
an aspect ratio for widescreen or standard screen, and to format your
video using either NTSC or PAL video format. In Windows Movie Maker, you can set
these and other options by completing the following steps:
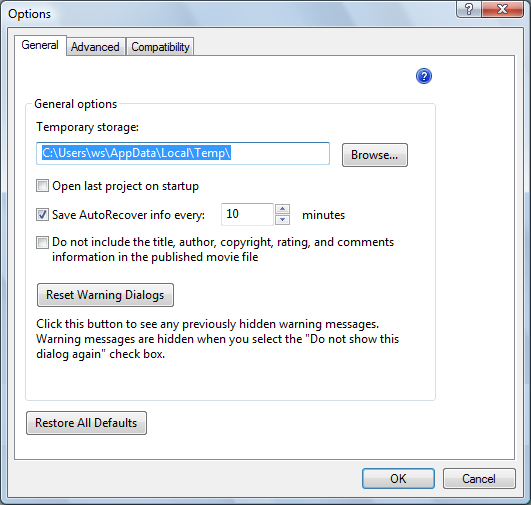
Click Tools and then click Options to display the Options
dialog box shown in Figure 23.
By default, Windows Movie Maker creates a working version of
the DVD in a temporary folder within your profile. Because your
profile is stored on the system drive, which typically is the
C: drive, this drive must have
at least 5 GB of available disk space when you are creating a
single-sided single-layered DVD, and 10 GB of available disk space
when you are creating a single-sided double-layered DVD. If you want
to choose a folder on another drive for the temporary files, click
Browse and then use the Browse for Folder dialog box to select the
new folder to use.
By default, AutoRecover data for your video project is saved
every 10 minutes. Similar to Microsoft Office applications, such as
Word, this allows you to recover to the last saved position should
something unexpected happen while you are making your movie. If
Windows Movie Maker freezes or the power goes out, the last saved
position will be loaded automatically the next time you restart
Windows Movie Maker. If you want to use a different AutoRecover
interval, enter the desired interval in the text box provided, such
as five minutes.
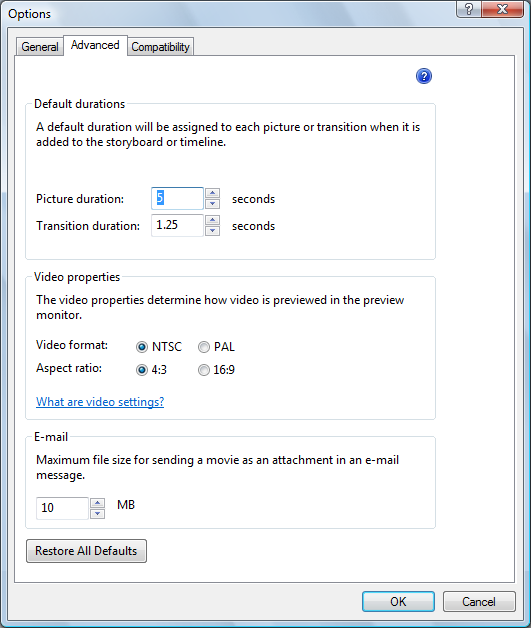
Click the Advanced tab, as shown in Figure 24.
By default, pictures are displayed for 5 seconds and
transitions are displayed for 1.25 seconds. You can change the
display time for pictures by entering a new display time in the
“Picture duration” text box. You can change the
display time for transitions by entering a new display time in the
“Transition duration” text box.
NOTE
When deciding on the duration of pictures and transitions, keep
in mind the prospective audience and the tempo of your music. If your
music has a relatively fast beat, you may want to use a shorter
display duration. If your music has a slower beat, you might want to
use a longer display duration. In most cases, you’ll want pictures to
be displayed for between 3 and 10 seconds, with transitions of 1 to
1.5 seconds.
Under “Video format,” select either NTSC or PAL as the video
format. If you are unsure of which format to use, don’t change the
default format, because this is set based on the Regional and
Language Options in the Control Panel. You will need to change the
format only when you plan to share your video with a friend who
lives in another country or region.
Under “Aspect ratio,” choose the aspect ratio. The aspect
ratio is expressed as the relation of the video width to the video
height. For widescreen, choose 16:9 as the aspect ratio. For
standard (full) screen, choose 4:3 as the aspect ratio.
Click OK to save your settings.
10. Previewing and Finishing Your Movie Project
When you are finished fine-tuning your movie, you’ll want
to preview it to ensure that the movie is exactly as you want it to be.
You can preview the movie at full-screen size by clicking View and then
selecting Full Screen. Alternatively, press Alt-Enter. To exit
full-screen preview mode, press the Esc key. You can also preview at
alternative display sizes by clicking View, pointing to Preview Monitor
Size, and then selecting the desired display size.
When you are ready to continue, you can save your video as a
Windows Movie Maker Project. Project files are saved with the file extension .mswmm. Although Windows Movie Maker Project
files can run multiple megabytes in size, they are still considerably
smaller than your final movie file.
You can save as a project file by
completing the following steps:
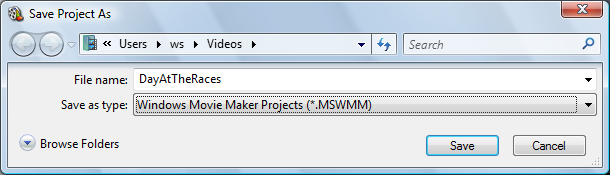
Click File and then select Save As.
In the Save Project As dialog box, shown in Figure 25, the last folder location you
used for saving project files is opened by default. If this isn’t
the folder you want to use, browse to the folder you want to
use.
Type a descriptive name for your video and then click
Save.
NOTE
Although you can use spaces in the video name, I’ve
chosen not to use spaces in the example to make it easier to work with
the file. With this project name, if you were to click Start and then
type dayat into the Search box,
you’d see this project file in the Files list and could then
double-click the filename to open the movie in Windows Movie Maker. Of
course, you could also click Start and then type mswmm into the Search box to see a list of
all movie project files.
By default, your project is saved in your personal My
Videos folder. If you don’t want to use this folder, click
the Browse for Folders button to expand the dialog box and include
additional folder browsing features. You can then select a folder in
which to save your project.
After you save your project, you can publish your movie.
Publishing your movie creates the finished video file. In
most cases, you’ll want to publish the movie to your computer or to a
DVD. If you publish the movie to your computer, you’ll select the
encoding settings as shown in Table 2.
Table 2. Movie encoding settings for Windows Movie Maker
| File
type | File extension | Aspect ratio | Bit
rate | Display
size | Frames per
second |
|---|
| DV-Video | .avi | 4:3 | 28.6 Mbps | 720 × 480 | 30 |
| Windows Media Portable
Device | .wmv | 4:3 | 1.0 Mbps | 640 × 480 | 30 |
| Windows Media DVD
Quality | .wmv | 4:3 | 3.0 Mbps | 720 × 480 | 30 |
| Windows Media DVD
Widescreen Quality | .wmv | 16:9 | 3.0 Mbps | 720 × 480 | 30 |
| Windows Media HD
720p | .wmv | 16:9 | 5.9 Mbps | 1,280 ×
720 | 30 |
| Windows Media HD for Xbox
360 | .wmv | 16:9 | 6.9 Mbps | 1,280 ×
720 | 30 |
| Windows Media HD
1080p | .wmv | 16:9 | 7.8 Mbps | 1,440 ×
1,080 | 30 |
| Windows Media Low
Bandwidth | .wmv | 4:3 | 117 Kbps | 320 × 240 | 15 |
| Windows Media VHS
Quality | .wmv | 4:3 | 1.0 Mbps | 640 × 480 | 30 |
To publish your movie to a video file on your computer, complete
the following steps:
Click Publish Movie on the toolbar. This starts the Publish
Movie Wizard.
On the “Where do you want to publish your movie?” page, click
“This computer” and then click Next.
On the “Name the movie you are publishing” page, type a name
for the movie file. A default name is set for you based on the name
of your project.
Using the “Publish to” list, select Videos to publish the
movie to your personal Videos folder, or Public
Videos to publish the movie to the shared Public
Videos folder. Alternatively, click Browse to display the
Browse for Folder dialog box and select a different folder.
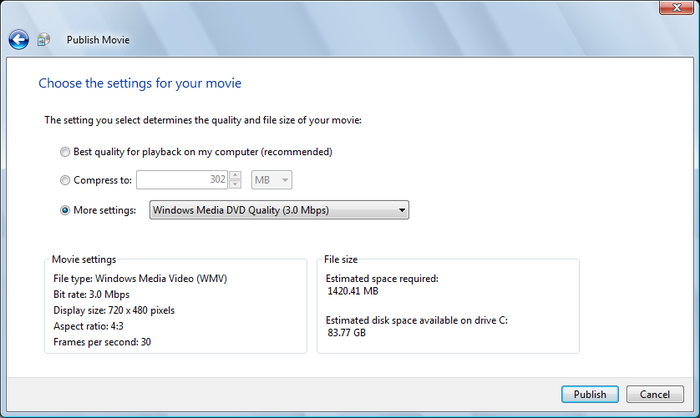
Click Next. On the “Choose the settings for your movie” page,
shown in Figure 26, choose
“More settings” and then choose the desired movie setting. Note the
estimated space required and ensure that you have enough free space
for this setting.
NOTE
When choosing a format, keep in mind the quality and
resolution of the original media items. Windows Movie Maker will let
you create a full-length video in DV-AVI for a whopping 60 GB of
space, but if your original media isn’t high-quality, you’ll be
wasting a lot of disk space.
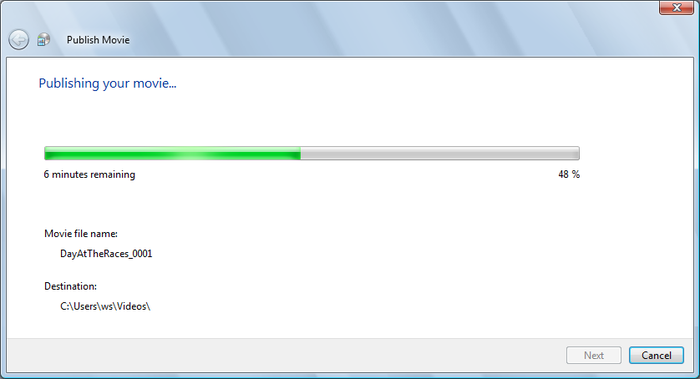
Click Publish to publish the movie to the previously selected
folder. As shown in Figure 27, you can track the
progress of the publish process by minutes remaining and percent
complete. The bit rate of the movie setting you choose will largely
determine how long it takes to publish the movie.
When Windows Movie Maker finishes publishing the movie, click
Next and then click Finish.
To create a finished DVD with your
movie, complete the following steps:
Click Publish Movie on the toolbar. This starts the Publish
Movie Wizard.
On the “Where do you want to publish your movie” page, click
DVD and then click Next.
Windows 7 will save and close your project and then open
Windows DVD Maker. At the warning prompt, click OK to
continue.
In Windows DVD Maker, you can produce the finished DVD as
discussed previously.
11. Opening and Producing Saved Projects
You can open saved projects using the Search box on the
Start menu. Click Start and then type mswmm into the Search box to see a list of all
movie project files. Double-click the .mswmm project file you want to open. Windows
7 will then start Windows Movie Maker and open the selected project file
for editing.
Alternatively, in Windows Movie Maker, you can open saved projects
by completing the following steps:
Click File and then click Open Project file. This displays the
Open Project dialog box.
In the Open Project dialog box, the last folder location you
used for saving project files is opened by default. If this isn’t
the folder you want to use, browse to the folder containing the
saved project file.
Click the project file and click Open. Windows Movie Maker
will then read the project file and begin adding the items it
references.
When Windows Movie Maker finishes adding items, review the
movie storyboard and timeline.
After you make any necessary changes, click Publish Movie to
start the Publish Movie Wizard and produce your movie.
Windows Movie Maker tracks the location of resources you use in
your projects. If you move resources to a new location, you’ll see
grayed-out frames in your project. You’ll need to double-click each
grayed-out frame in turn to locate each missing resource. Each time when
you are prompted to confirm that you want to locate the missing
resource, select Yes and then use the “Browse for...” dialog box to
locate the resource.
