A Visio drawing can contain any number of pages and
each page can have its own dimensions, measurement units, and other
characteristics. In addition, the on-screen drawing page can have
different dimensions from the physical printer page.
Setting the drawing page size to be different from the physical page lets you do things like:
Compress a large drawing to fit on a smaller sheet of paper. Print a drawing on a very large sheet of paper. Print a drawing across multiple sheets of paper.
Indeed, Visio gives you
remarkable flexibility in setting page attributes that are useful for
virtually any diagram type and any form of printed or electronic output.
Visio drawings also support two types of drawing pages:
By associating a
background page with a foreground page, all text and graphics on the
background page appear on the foreground page. One common use for
background pages is to add consistent borders or titles to a set of
foreground pages. Another is to include the company logo, a legal
notice, or any other graphic or text on multiple pages.
In this exercise, you will add,
delete, and reorder pages as well as change various page settings. You
will work with background pages in the next exercise.
Note:
Click the File tab, and then click New. In the Template Categories
section, click General, and then double-click the Basic Diagram
thumbnail to create a new drawing. Save the drawing as Pages and Page Setup.
Blank Page

On the Insert tab, in the Pages group, click the Blank Page button. Visio
adds a page called Page-2. Clicking the Blank Page button is equivalent
to clicking the Insert Page button (it’s the button to the right of Page-2 in the following graphic).

Next you’ll change some of the attributes of Page-2 using convenient new features of Visio 2010.
Landscape
On the Design tab, in the Page Setup group, click the Orientation button, and then click Landscape. Clicking this button changes the orientation of both the drawing page and the printer page.
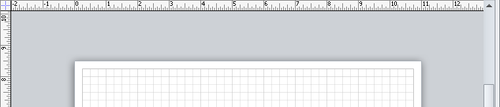
Zoom Level

On the status bar, click the Zoom Level button, and set the zoom level to 50%. You are changing the zoom setting so you can see the entire drawing page plus part of the surrounding drawing canvas for use in the next step.
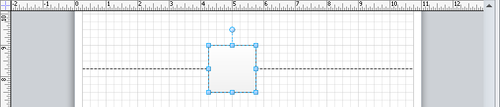
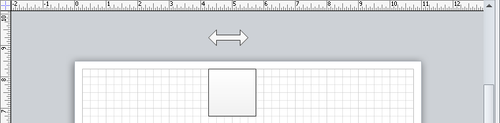
Drag a Square from the Basic Shapes stencil onto the top edge of the page so that part of it is on the page and part is on the canvas. The
Visio 2010 Auto Size feature is on by default in many templates. As you
can see in the following graphic, if you place a shape partly or
entirely off the drawing page, Visio adds a page for you. The dashed
line is the boundary between tiles, each of which represents the portion of the drawing page that will print on a single physical page.
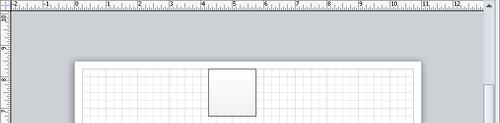
Drag the square down so it is below the dashed line. Visio removes the added page because it is no longer needed.
You can turn off the Auto Add
feature if you want to use the drawing canvas to store shapes
temporarily that you don’t want to be on the drawing page.
Auto Size

On the Design tab, in the Page Setup group, click the Auto Size button. The
Auto Size button, which was illuminated to indicate that the Auto Size
was enabled, is no longer illuminated after you click it.
Tip:
The Auto Size option is applied per page. Consequently, changing the setting for the current page does not affect other pages.
Drag a 45 degree double arrow from the Basic Shapes stencil onto the canvas just above the square. The arrow remains on the canvas and Visio does not expand the drawing page.
Tip:
Items on the drawing canvas do not print.
Size

The remaining
button on the Design tab in the Page Setup group is the Size button.
Selecting a new page size from the list resets both the drawing page and
printer page sizes. On the Insert tab, in the Pages group, click the Blank Page button. Visio adds a new page.
Warning:
Important
When you added a page in Step
1, the new page had portrait orientation; however, this time the new
page has landscape orientation. The difference demonstrates an important
point: when you add a page, Visio copies all of the characteristics of
the active page.
Consequently, if the pages in your drawing have different attributes,
be sure to activate a page with the desired attributes before adding a
new page.
On the Design tab, in the Page Setup group, click the Auto Size button. This action turns Auto Size behavior back on for this page. You’ve
now used three buttons in the Orientation group on the Design tab that
simplify some page-related functions. There are times, however, when you
need to make more sophisticated changes to page attributes. The Page
Setup dialog box, which will be familiar to users of previous Visio
versions, is still available for that purpose. Right-click on the page name tab for Page-3, and click Page Setup. The Page Setup dialog box opens to the Page Properties tab.
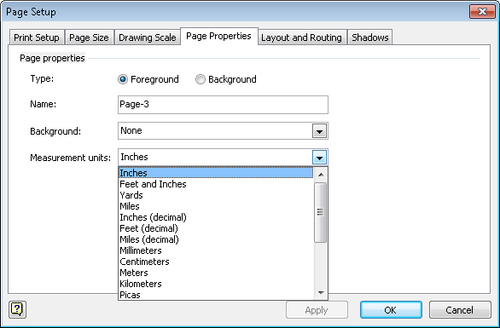
In
addition to selecting the page type and changing the page name, you can
assign a background page (refer to the next exercise) and select from a
large number of measurement units. Be sure to notice the scroll bar in
the measurement units menu—you have a total of 20 choices. If you change
the measurement units, you will see the result in the rulers on the top
and left of the drawing page. In the Page Setup dialog box, click the Print Setup tab.
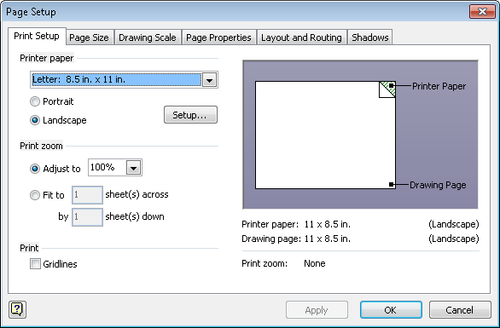
You
use the options on the Print Setup tab primarily to affect the size and
layout of the physical page, although the zoom settings on this tab
also affect the drawing page size. The
Print Setup tab contains three configuration sections on the left and a
preview pane on the right. The preview pane changes dynamically to
reflect your current print settings and displays them in both visual and
text form: Printer paper
Choose the paper size for your desired printer. Most U.S. Units
templates default to letter-sized paper as shown in the previous
graphic. Metric templates typically default to A4. Regardless of the
default, there is a long list of alternate, predefined paper sizes
available in the list at the top of this section. You can also select
Portrait or Landscape orientation. The Setup button opens the printer setup dialog box for the current printer. Print zoom
Adjust To 100% is the default zoom for many templates but you can
select a different zoom level if you want your drawing to print larger
or smaller than normal. Choosing a zoom setting greater than 100% causes
your drawing to be split across multiple sheets of paper; choosing a
setting less than 100% scales your drawing down to fit onto a portion of
the printer page. Fit To provides an alternate way to scale your drawing for printing. Print
The single setting in this section includes or excludes Gridlines from
printed output. The default in most templates is to exclude gridlines.
In the Printer paper section, click Portrait. The preview section reflects your choice. In the Page Setup dialog box, click the Page Size tab.
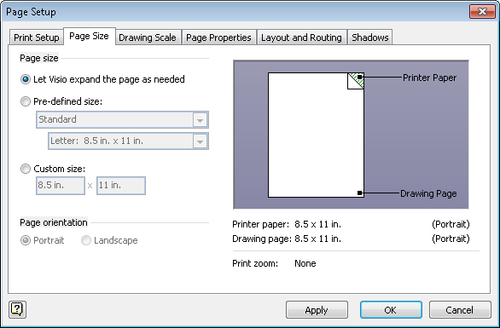
You
use the Page Size tab to change attributes of the drawing page; changes
you make on this tab do not directly affect the printed page. The Page Size tab includes two configuration sections plus a preview pane: Page size
The first option in this section enables the dynamic Auto Size behavior
you used in Steps 6 and 9. As an alternative, the second and third
options let you set a fixed page size, either from a list of preset
sizes or by typing specific dimensions. Page orientation
The options in this section are only active if you choose Pre-defined
Size or Custom Size in the Page Size section. You can use these options
to set a different orientation for the physical page than the one that
is set for the drawing page.
Click OK. The dialog box closes and Page-3 now has portrait orientation. Double-click the page name tab for Page-2 (not Page-3), type Landscape with Square, and then press Enter.

As you saw in Step 10, you can
change the page name on the Page Properties tab in the Page Setup dialog
box, but double-clicking the page name tab is usually more convenient. In addition to changing page names, you can also change the sequence of pages in a drawing. Drag the page name tab for Page-3 to before Page-1. As you drag the page name tab, the cursor displays a page icon and a black down arrow points to the junctions between pages.

When you release the mouse button, the page tabs reflect the new page sequence.

Tip:
Dragging page name tabs is an
easy way to resequence pages when the destination tab location for your
page is visible. When the destination is not visible, it’s often easier
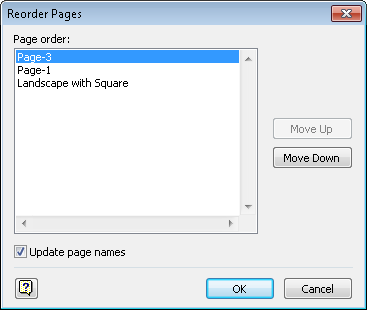
to right-click on any page name tab and select Reorder Pages. In the
Reorder Pages dialog box that opens (shown in the following graphic),
use the Move Up or Move Down buttons.
Note:
Save your changes to the Pages and Page Setup drawing, and then close it.
Note:
Visio provides two
convenient shortcuts for navigating back and forth among the foreground
pages in your drawing: Alt+Page Up and Alt+Page Down.
|
