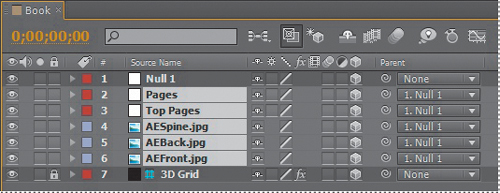
A null object is an invisible
layer that has all the properties of a visible layer, so that it can be
a parent to any layer in the composition. You’ll use a null object to
scale the layers of the 3D object down to a more manageable size. If you
began to scale each of the individual layers, you’d have to reposition
each of them again. This way, you can parent all the layers to a single
null layer, and then as you scale the null layer, all the other layers
follow, maintaining their relationship to each other.
1. | With the Timeline panel active, choose Layer > New > Null Object. After Effects names the layer Null 1.
|
2. | Select the 3D Layer switch ( ) for the Null 1 layer to make it three-dimensional. ) for the Null 1 layer to make it three-dimensional.
|
The null object moves to the
origin point of the composition, at the center of the grid. Though you
can see the null object in the Composition panel, remember that there
isn’t really anything there—it’s an invisible layer. The representation
of the object is to help you keep track of it as you work with it.
3. | In
the Timeline panel, select the Pages layer, and then Shift-click the
AEFront.jpg layer to select all the layers in between. (Only the 3D Grid
and Null 1 layers should not be selected.)
|
4. | Select
1. Null 1 from the Parent pop-up menu for the Pages layer. The same
selection is automatically applied to all selected layers.
|

Because the 3D object layers are now parented to the Null 1 layer, any changes to the null object also affect them.
Note
Because the Scale property values are linked, you need only enter the value once to affect all three axes.
5. | Select the Null 1 layer in the Timeline panel, and press S to reveal its Scale property. Then change the Scale amount to 20, 20, 20%.
|

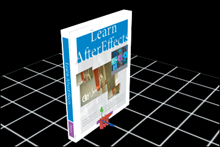
The entire book is smaller, and each of the elements retains its relationship with the others.
6. | Select the Track Z Camera tool ( ), hidden behind the Orbit Camera tool ( ), hidden behind the Orbit Camera tool ( )
in the Tools panel. Then drag to the right in the left view of the
Composition panel to zoom in so you can see the book more clearly. )
in the Tools panel. Then drag to the right in the left view of the
Composition panel to zoom in so you can see the book more clearly.
|
7. | Select
the right view in the Composition panel to make it active. Then choose
Active Camera from the 3D View pop-up menu at the bottom of the
Composition panel.
|
8. | Choose File > Save to save your work so far.
|
