Illustrator refers to effects as live effects.
There are several reasons for this. First—and most important—any effect
you apply from the Effect menu is added as an attribute in the
Appearance panel. Second, all effects can be edited at any time, even
after the file has been closed and reopened at another date. Finally,
when an object’s path is edited, any effects that are applied to that
object are updated as well. Because these effects are nondestructive,
they are considered “live” and are always editable.
The way that Illustrator accomplishes this behavior
is by keeping the underlying vector object intact, while changing just
the appearance of the object by adding the effect. Think of those 3D
glasses you used to get at the movie theater. Without the glasses, the
movie is nothing special, but once you don the glasses, the movie
appears to be 3D. You can think of the Appearance panel as a pair of 3D
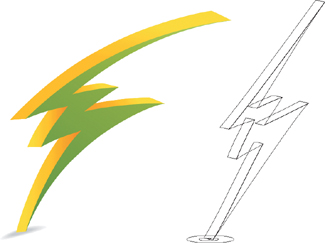
glasses in this sense—once you add an effect, the object changes in appearance, but the original untouched vector paths remain beneath the hood (Figure 1).
Tip
Just as adding a second fill or
stroke categorizes an object as having a complex appearance, adding a
live effect to an object also produces an object with a complex
appearance. |
You can choose from many live effects in Illustrator,
including those that are vector-based (such as Scribble) and those that
are raster-based (such as Gaussian Blur).
Applying a Live Effect
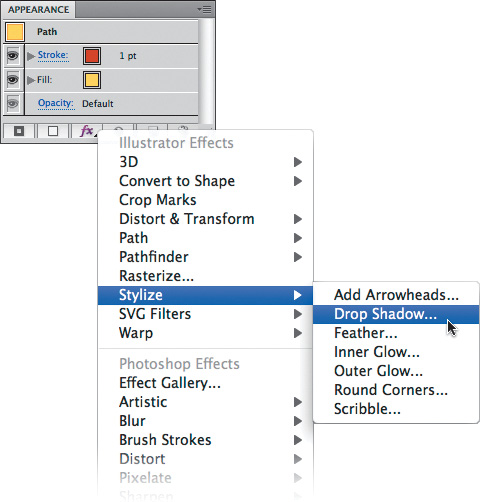
You can apply a live effect, such as a drop shadow,
to a target in two ways: choose Effect > Stylize > Drop Shadow or
click the Add New Effect button at the bottom of the Appearance panel
and choose Stylize > Drop Shadow (Figure 2,
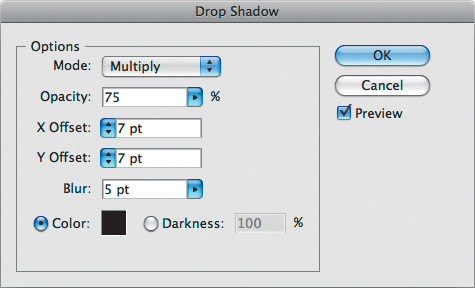
on the next page). The Drop Shadow dialog box appears, where you can
specify the exact settings for the drop shadow including the blending
mode, opacity, offset (the distance between the object and its shadow),
and blur amount (the softness of the shadow). Additionally, you can
choose a color or darkness value for your drop shadow (Figure 3,
also on the next page). Note that the dialog box has a Preview option,
which, when selected, lets you see your shadow update as you make
changes to the settings. Once you’re happy with the appearance of your
drop shadow, click OK to apply it.
Tip
To choose a spot color for your drop shadow, you must first define the desired color as a swatch . Click the color swatch in the Drop Shadow dialog
box, and then click the Color Swatches button, where you’ll find your
custom color in the list of swatches. |
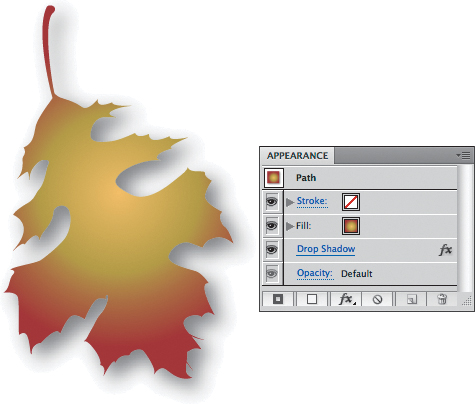
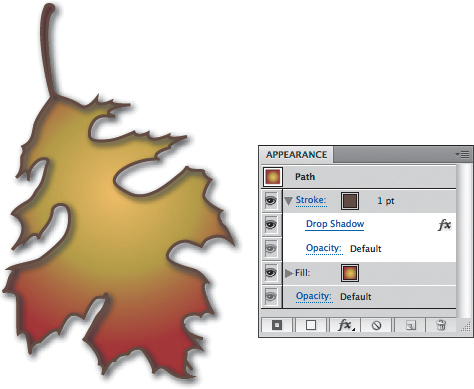
Now, let’s take a look at the Appearance panel. Note
that the path is listed as the target, and then examine the attributes
in the object itself. Reading from the bottom up (the order in which the
attributes are drawn), you have the default opacity, the Drop Shadow
effect you’ve just applied, the fill, and finally the stroke of the
object (Figure 4).
The drop shadow appears beneath the fill and the stroke of the object
because it wouldn’t be much of a drop shadow if it were painted above
the fill and stroke, would it?
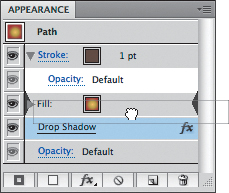
The
truth is, you can use the Appearance panel to control exactly how and
where your drop shadow—or any live effect—is painted. You can target the
Fill or Stroke attribute in the Appearance panel and then
add the drop shadow. In this way, you can add a live effect to just the
fill or just the stroke of an object. If your object contains multiple
fills or strokes, you can apply live effects to each of them
individually (Figure 5).
Even though you’ve already applied a live effect to an object, you can
drag the effect within the Appearance panel to change its place in the
stacking order or to apply it to a specific fill or stroke (Figure 6, on the next page).
Editing a Live Effect
Tip
You can duplicate an effect by dragging it in the Appearance panel while holding the Option (Alt) key. |
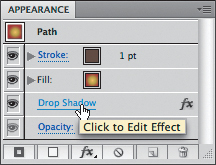
One of the important benefits of live effects is that
you can edit them at any time. Clicking the blue underlined name of an
effect that is listed in the Appearance panel opens the dialog box for
that effect, where you can view the current settings and change them at
will (Figure 7).
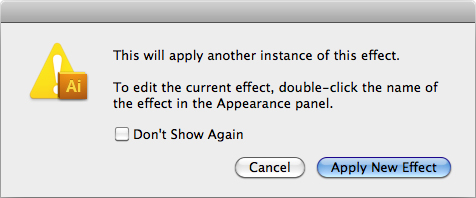
This may be confusing initially, because you’d think that in order to
change an effect, you’d return to where you first applied the effect
(that is, the Effect menu). Doing so actually adds a second effect to the selected object (Figure 8). Illustrator allows you to apply an effect to an object as many times as you’d like, you will explore when that might be beneficial. The important thing to remember is that when you want to add a new effect to an object, you do so by using the Effect menu or by clicking the Add New Effect button. To edit an effect that already exists, click its name in the Appearance panel.
You
can use the Eyedropper tool in Illustrator to load the attributes of
existing objects quickly. This can be useful in two ways. First, if you
already have an object selected when you click another object with the
Eyedropper tool, your selected object changes to match the object you
clicked. Second, you can click once with the Eyedropper tool to sample
the attributes of an object, and you can then Option-click (Alt-click)
to apply those attributes to other objects in your file without actually
having to select them.
You can configure the Eyedropper tool to sample just
the basic appearance of an object (the topmost fill and stroke) or
complete complex appearances. To control what the Eyedropper tool can
sample, double-click the tool in the Tools panel.
Shift-click with the
Eyedropper tool to sample colors from the pixels of raster images (or
even the visual appearance of vector objects). In this way, the
Eyedropper tool works much like the one in Photoshop.
