1. Restricting User Rights
One
of the surest ways to protect your computer from either malicious or
accidental damage is to assign everyone who uses the computer to the
Standard group, and allow only one Administrator account for use in
executing system changes. Often, however, several people are assigned
administrative accounts. You can easily switch those administrative
accounts to the Standard group. If you want to further restrict access
to specific people, don’t assign them user accounts at all; instead, ask
them to sign in to the Guest account. Of course, you’ll need to
activate the Guest account before anyone can use it.
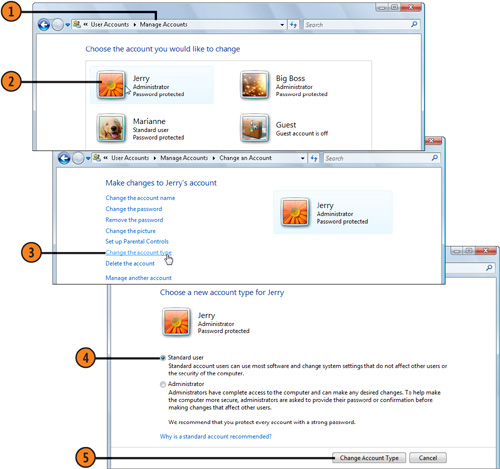
Change the Type of Access
- 1. Click the Start button, and click your account picture to display the
User Accounts window for your account. Click Manage Another Account to
display the Manage Accounts window.
- 2. Click the account you want to manage.
- 3. In the Change An Account window, click Change The Account Type.
- 4. Select the Standard User option if it isn’t already selected.
- 5. Click the Change Account Type button.
Use the Guest Account
- 1. In the Change An Account window, click Manage Another Account to display the Manage Accounts window.
- 2. Click the Guest account.
- 3. In the Turn On Guest Account window, click the Turn On button.
- 4. Close the Manage Accounts window when you’ve finished.
- 5. If necessary, inform those who want to use the computer that they don’t
have Standard access, and advise them to log on using the Guest
account.

Tip
If
you’d prefer someone who has an account on the computer to log on as a
Guest, you can easily delete his or her account. To do so, click the
account in the Manage Accounts window, and click Delete The Account.
Windows Vista will give you the options of saving any of this user’s
files (but not their e-mails) to a folder on the Desktop that’s
accessible only by the person who deleted the account, or of deleting
the files. |
2. Protecting Your Account
One
of the easiest ways for someone to access your private files is waiting
until you leave your computer unattended for a while and then jumping
onto the computer using your already logged-on account. To prevent this,
you can lock out any access to the computer by other people via your
account. However, you can allow other people to log on using their own
accounts and to have network access to the computer. When you lock the
computer, all your programs and open files remain running but
unavailable until you enter your password.
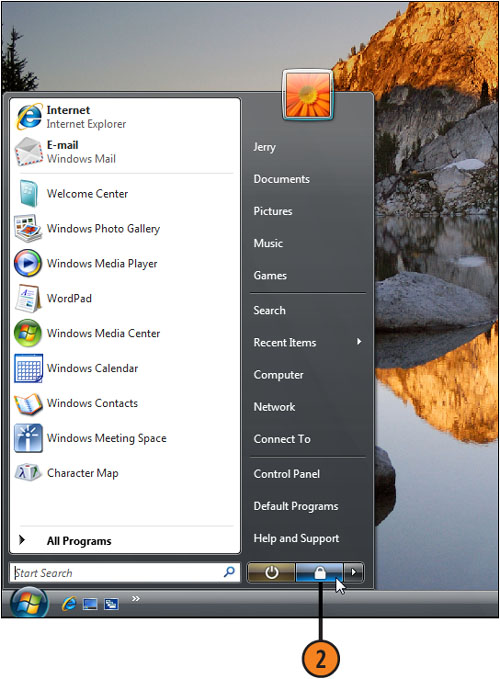
Lock the Computer
- 1. Make sure that you have a password assigned to your account.
- 2. Click the Start button, and then click the Lock This Computer button. The logon screen appears.
- 3. When you want to resume your work on the computer, type your password,
and press Enter. If someone else logged on using his or her account, and
your user account isn’t already displayed, click your user name, and
then enter your password to unlock your user account on the computer.
Tip
You can also quickly lock the computer by pressing the Windows key+L. |
