Configure Advanced Printer Settings
The printer settings
you configure as an administrator are applied network-wide. This means
if you configure your shared printer preferences to make the printer
available only during
specific times of the day, then users can access the printer only during
those times (unless they have additional permissions or administrator
credentials). Additionally, you can configure spool settings, keep all
printed documents, turn on or off advanced printing features, and more.
What is available to
configure depends somewhat on what your printer offers, though. For
instance, you may be able to change how many copies to make for each
print by default, the print quality, the scaling options, and Adobe
PostScript options such as optimizing for speed or creating a negative
output, as well as toner darkness, smoothing, and image quality. You’ll
need to browse through your printer options to find out exactly what’s
available.
Configure Advanced Printer Settings
Advanced printer settings,
those available on the Advanced tab in the printer’s Properties dialog
box, are the same no matter what printer is installed. See Figure 1.
The printing defaults and additional printer settings for printers
differ from manufacturer to manufacturer and from model to model.
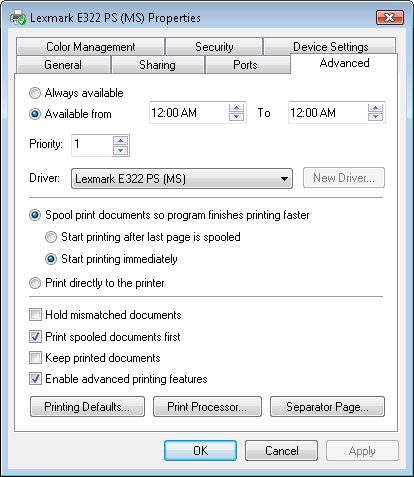
To
make a change to any setting, simply apply the change by selecting or
deselecting the appropriate radio button or option. You can also select
Available From and configure when the printer can and cannot be used.
A few concepts you may not be familiar with include the following:
Spooling
In print spooling, documents are loaded into a buffer (usually an area
on a hard disk) and are held until the printer acquires the data and
readies it for print. Spooling lets you send a number of print jobs to
the queue instead of waiting for each one to finish before sending
another.
Mismatched documents
The printer holds the print jobs in the queue that don’t match the
setup for the printer, such as not having the right tray of paper
attached to the printer.
Keep documents after they have printed The printer keeps documents that have printed in the queue in case you need to print them again.
Separator page
The printer inserts a blank page at the beginning of each document to
make it easier to find documents at the printer when multiple documents
have printed.
For the most part, the default settings are the best, with the exception of limiting the times the printer can be used.
Configure Printing Defaults
As noted, printing defaults differ from printer to printer. In Figure 1,
shown in the previous section, note the Printing Defaults button. Click
this button to access and change the shared printer’s defaults. You’ll
likely be able to change the following:
Orientation
Page order
Paper quality
Paper source
Paper size
Print quality
More expensive
printers have additional options. Browse the options available for your
printer, and configure the settings as desired.
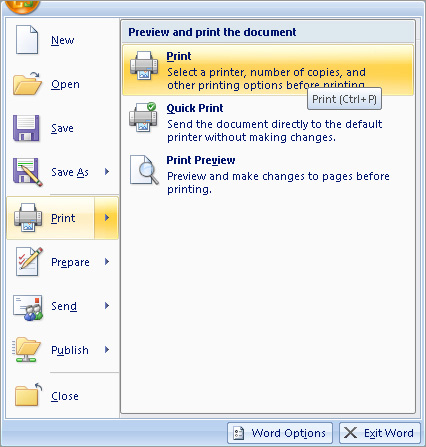
Access a Local Printer
Generally
you’ll print to a printer from an application such as a word
processing, spreadsheet, database, or graphic imaging program. The
option to print is frequently in the File menu, and often, an icon
exists on a menu bar, a toolbar, or a separate pane in the interface. Figure 2 shows the Print option in Microsoft Office Word 2007.
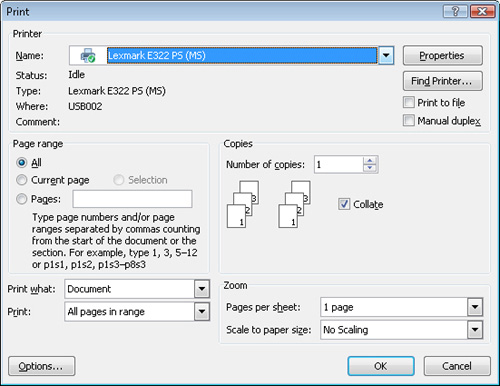
Clicking Print almost always offers a Print dialog box (unless you perform a “quick” print), an example of which is shown in Figure 3.
With administrator credentials, a user can change everything about the
printer, including the printer properties and other options. Users with
the ability to only print do not have these privileges, and
administrator credentials are required to make changes.
It doesn’t really
matter what operating system you’re using when accessing a printer; what
matters is the ability to locate it. Shared printers will appear listed
in the drop-down list and are easily accessible. Figure 4 shows an example. Here, Fax is selected.
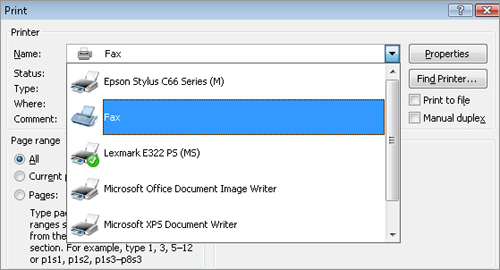
You can also access shared printers that are connected to other PCs on the network by using the drop-down list shown in Figure 4, but you must manually add them first by using Control Panel. I detail how to do this next.
