2. Editing and Saving Your Snips
After you’ve captured a snip, the Snipping Tool window
changes to Edit Mode. In this mode, you can mark up a snip by using the
pen, highlighter, or eraser tool. By default, snips you capture of the desktop are formatted
using the Portable Network Graphics (PNG) format and snips you capture
within a web browser are formatted using the single-file HTML (MHT)
format. The MHT format is used for browser snips because the web page
URL is included below the snip by default. You also can save snips as
JPEG or GIF image files so that the entire snip is handled as a single
picture.
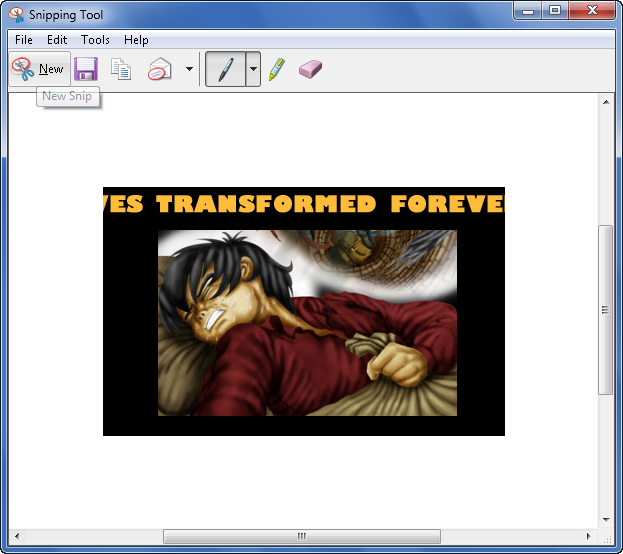
Figure 3 shows the Snipping Tool in
Edit Mode. From left to right, the buttons on the toolbar are used as
follows:
New Snip
Switches to New Snip Mode and discards the current snip. If
you click New Snip before saving a snip, the current snip is
lost.
Save As
Allows you to save the current snip as a single-file HTML
document or as a JPEG, PNG, or GIF image.
Copy
Copies the current version of the snip to the Windows
clipboard. You can then paste it into documents or email messages
using Ctrl-V.
Send Snip
Allows you to send the snip to someone in an email
message. Click the Send Snip Options button to see additional send
options, such as “Send to e-mail recipient (as
attachment).”
Pen
Selects the pen so that you can use it to add notes to the
snip. Obviously, this feature works best when you have a pen input
device. If you click the Pen Options button, you can set the
pen color. The default pen color is blue. To change
the ink thickness, change the pen tip type. To select a custom
color, click the Customize option.
Highlighter
Selects the highlighter so that you can use it to highlight
areas of the snip.
Eraser
Allows you to erase pen ink and highlights by clicking on
them.
After you edit your snip, you can copy it to the clipboard by
clicking Copy and then paste it into a document or email message by
accessing the document or message and then pressing Ctrl-V. To save your
snip to a file, click Save As. In the Save As dialog box, type a
filename for the snip, use the “Save as type” list to select the file
type, such as JPEG or PNG, and then click Save.
3. Setting Snipping Options
By default, any snips you capture are copied to the
Windows clipboard as well as to the Snipping Tool. This allows you to
paste snips into programs that support images simply by pressing Ctrl-V.
Other default options are used to prompt you to save snips before
exiting, show a screen overlay when the Snipping Tool is active, and to
include web page URLs when you capture snips from web pages.
Any snips you capture can have a thick red selection line around
them. The selection line is meant to help you distinguish snips from
other content if you later add the snips to other documents. You can
change the color of the line, start or stop using the selection line by
following these steps:
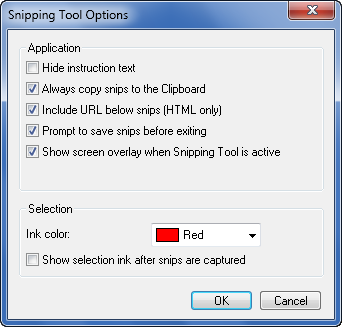
In the Snipping Tool, click Tools and then click Options. This
opens the Snipping Tool Options dialog box, shown in Figure 4.
To set the ink color for the selection line, click the “Ink
color” list and then choose the color to use.
To start or stop using the selection line, select or clear the
“Show selection ink after snips are captured” checkbox as
appropriate.