2. Managing Backups
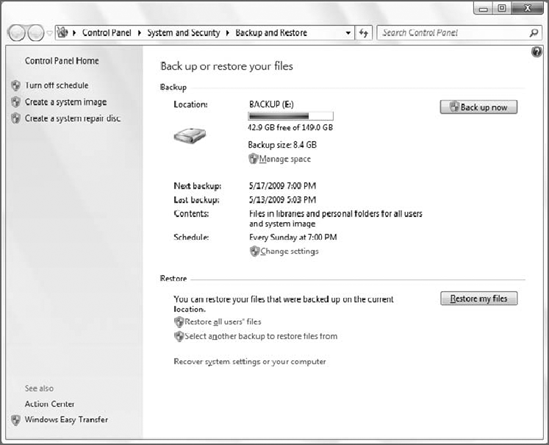
Once you have created your first
data backup, a few things in the user interface change. First, Backup
and Restore indicates that you've configured a backup location, as shown
in Figure 8,
and notes when the last and next backups occur. You can also change the
automatic backup settings and restore all of the files for the current
user.
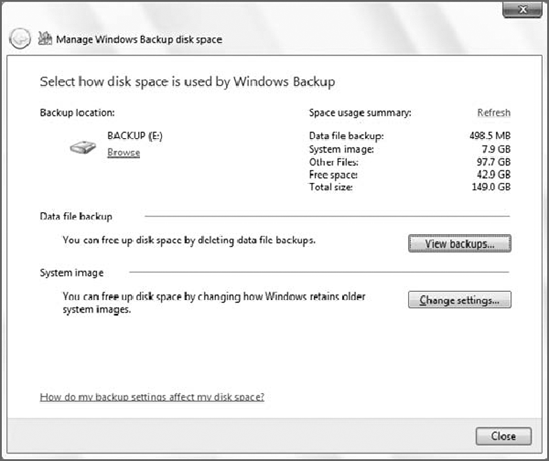
You can also manage the disk
space used on your backup device. When you click the Manage space link
in Backup and Restore, the Manage Windows Backup disk space window will
appear, displaying information about the currently selected backup
device. As shown in Figure 9,
you can browse the file system of the backup location, view backups
stored on that device, and change settings associated with system image
backups.
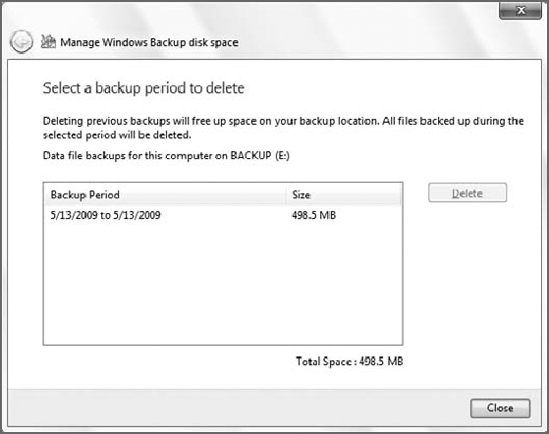
If you do click View
backups, you can't actually navigate around inside of the backups you
have made so far. Instead, you're provided with the window shown in Figure 10. From here, you can view the backups and delete them, but not get into them in any meaningful way.
|
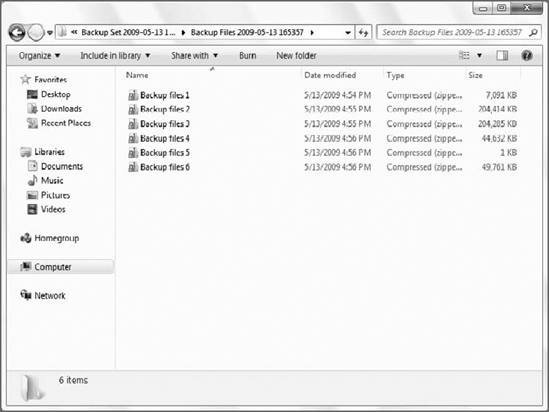
Want to see what's in a
backup? You can do it, but not from this interface. Instead, go back to
the previous window and click Browse. This will open Windows Explorer,
pointing at the location of your backup. At this location, you will see a
special folder with a Windows Backup icon and the name of your PC. If
you try to double-click this folder, a Windows Backup window will
appear. Instead, right-click the folder and choose Open. Then, click
Continue in the permission folder that appears. You'll be presented with
a folder structure representing your various backups. Inside of each of
these folders is a number of standard ZIP files (see Figure 11)
containing your original directory and file structure. If worse comes
to worst and you lose everything, at least these files will always be
accessible.
|
|
3.3. Restoring Files
Backup and Restore can also be
used to restore files you have previously backed up. There are three
general file restore methods:
Restore my files: Restore your own files and folders.
Restore all users' files: Restore your own files and folders as well as those of other users.
Select another backup to restore files from: Perform more advanced restoration tasks, such as restoring files from a different PC.
These all work similarly. You can follow these steps to trigger a restore of your own data:
Open Backup and Restore and click the Restore my files button.
The Restore Files window, shown in Figure 12, appears.
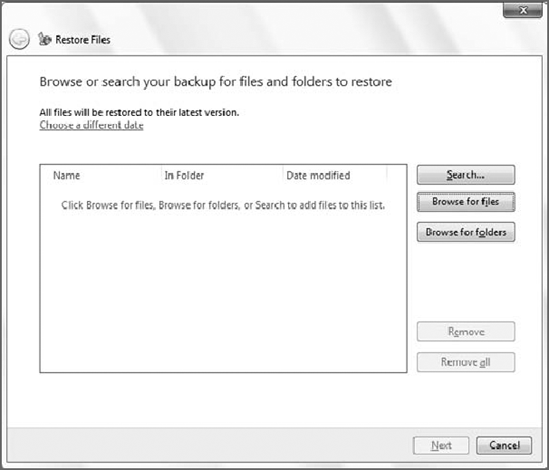
From here, you have three options:
Search:
If you know exactly what you're looking for, and need only one or a
handful of files, you can use the Search button to search your existing
backup sets.
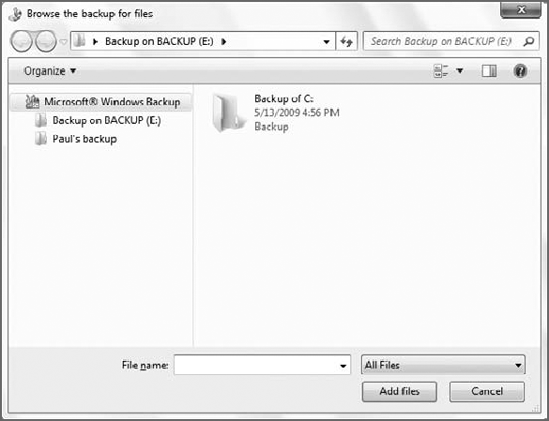
Browse for files:
If you'd like to manually browse around the backup set to find a file
or any number of individual files, click Browse for files. You'll be
presented with a modified File Open dialog (see Figure 13),
from which you can browse the various backups you've created, diving
into the full backup or just the files in your user account.
Browse for folders: Choose this option to recover entire folders full of files (and other folders).
Whichever method you choose, you can mark files and folders for restoration as you go and then continue looking for more.
When
you're ready to go, click the Next button in the Restore Files window.
Windows Backup will prompt you to specify where you want to restore the
files to: either their original location or a different location (see Figure 14).
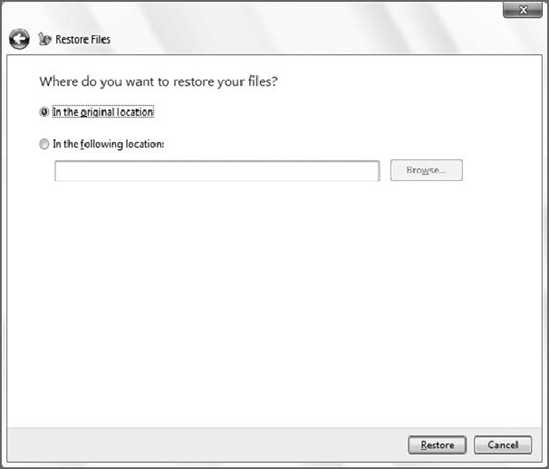
Choose one and then
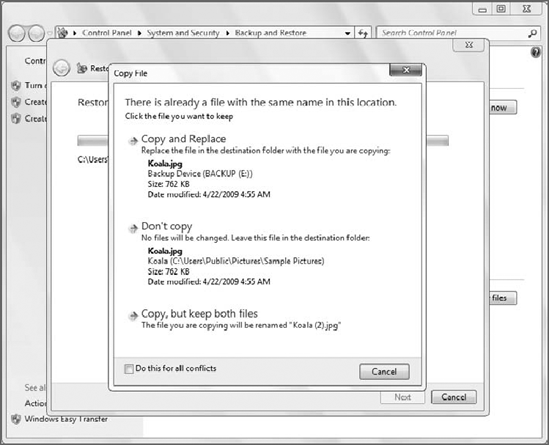
click Restore. Windows Backup will begin restoring your files. If any
of the backup files will overwrite an existing file, you'll see the
normal Copy File window shown in Figure 15, which offers you a chance to overwrite, copy but keep both files, or not copy.
When the restore is
complete, Windows Backup will let you know that the files have been
restored and give you an opportunity to view a list of restored files.
