2.4. Extending the MDT Database with Custom Settings
In addition to working with the default tables and
views in the database, you can extend the schema of the MDT database so
that you can add custom values. In this scenario, you are going to add
the name of an application server that differs for each location, so
that you can automatically use this name when you configure the custom
application during the installation of the workstation.
Before extending your MDT database, make sure that
you have created a backup of the database in case something goes wrong.
To create the new ApplicationServer variable, you must add a
new column to the settings table called ApplicationServer, which will
contain the name of the application server you are going to use in a
specific location:
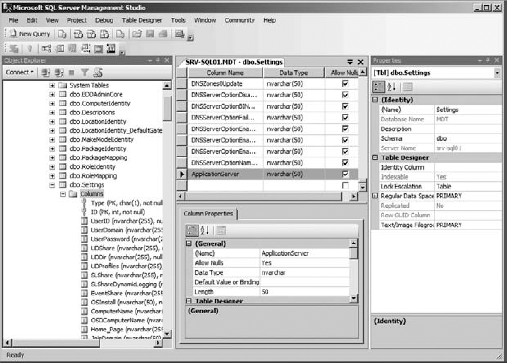
Open SQL Server Management Studio, and in the Object Explorer browse to the MDT database => Tables => dbo.settings => Columns (Figure 5).
Right-click Columns and select New Column.
Type the name of the new column you want to define (in this case, ApplicationServer), select nvarchar(50) as the data type, and make sure that Allow Nulls is selected.
Refresh all views that have a reference to the settings table by running the sp_refreshview stored procedure. You can do this by defining a new query in SQL Server Management Studio that contains the following lines:
Execute sp_refreshview ComputerSettings
Execute sp_refreshview LocationSettings
Execute sp_refreshview MakeMode1Settings
Execute sp_refreshview Ro1eSettings
Execute this query against the MDT database by clicking "! Execute" on the main toolbar.
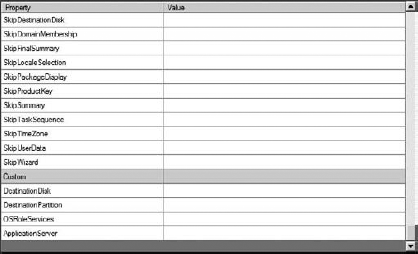
You
should now have a new option available on the Details tab of your
computer settings, in your location settings, in your make and model
settings, and in your role settings. Figure 6 details this.
Next you must provide the name of the application server in the location settings:
Select the Details tab and scroll all the way down to the ApplicationServer setting.
Open the location for which you want to set the ApplicationServer setting.
Modify its value with the name of the application server for that location.
Before you can use the new ApplicationServer value, you need to create a reference in your CustomSettings.ini file so that this value is queried:
Open the CustomSettings.ini file using a text editor and find the Settings section. Find the Properties setting and modify its value from MyCustomProperty to App1icationServer, as follows:
[Settings]
Priority=CSettings, CPackages, CApps, CAdmins, CRo1es, Locations, LSettings,
LPackages, LApps, LAdmins, LRo1es, MMSettings, MMPackages, MMApps, MMAdmins,
MMRo1es, RSettings, RPackages, RApps, RAdmins, Defau1t
Properties=App1icationServer
You can now use the %App1icationServer% variable in your MDT task sequence step to install the application, providing %App1icationServer% as an argument for the installation procedure.
