Like some of the other programs in the Microsoft
Office 2010 suite, OneNote 2010 includes a Research task pane that
provides web search integration and basic translation
services. This tool can be helpful whenever you want to quickly look up
information while typing your notes or if you want to translate a
selection of text in another language.
OneNote 2010 also includes the Mini Translator,
which provides a more interactive way to translate text in a foreign
language in your notes.
Setting Options for the Research Task Pane
To display the Research task pane in OneNote 2010 and set options for it, do the following:
1. | On the ribbon in OneNote 2010, click the Review tab, and then, in the Spelling group, click Research.
|
2. | In the Research task pane that opens, click the Research Options link at the very bottom of the task pane (see Figure 1).
|
3. | In
the Research Options dialog box, select any of the available reference
books and sites that you want to use with this feature and deselect any
that you do not want to consult. For example, if you’re traveling on
business to the United Kingdom, you might want to temporarily change
your Thesaurus selection from the U.S. to the U.K. version. |
4. | Click OK when you’ve set the options that you want.
|
Searching with the Research Task Pane
If, while taking notes, you suddenly need
clarification about something, you can use the Research task pane to
look it up without having to switch to your web browser.
To search with the Research task pane, follow these steps:
1. | If
you dismissed the Research task pane after the previous steps, you can
return to it by clicking the Review tab on the ribbon and then clicking
Research in the Spelling group.
|
2. | In
the Research task pane that opens, type a word or phrase into the
Search for box. From the drop-down menu just below it, select the
reference book or research site you want to use for your search, and
then click the green Start Searching arrow.
|
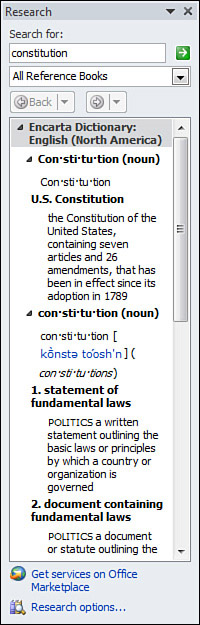
For example, entering the word constitution
in the Search for box and choosing Bing as the search engine will
define the term you’ve searched for, yield a Wikipedia article about
the U.S. constitution, and much more. You can click the blue link below
each search result to fetch and display the full text of web articles
in your browser. For results in books and dictionaries, you can click
and select and then copy any of the text to paste it in your notes.
|
For a faster way to look up a word or phrase, select
it in your notes, right-click it, and then click Lookup on the shortcut
menu that appears.
|
To modify a search (for example, to change from a
Bing search on the Web to an Encarta Dictionary search), click the
green Back button just above the search results list and then modify
where OneNote should look for the word or phrase you previously entered
(see Figure 2).

For
best results when searching with the Research tools, start with a broad
search of a single or simple term and then slowly narrow the search
with additional keywords, if need be. If you start by being too
specific in your search (for example, “white fuzzy bunnies in the
snow”), you might not find what you’re looking for. Beginning with a
much simpler search (“bunnies”) is a better starting point from which
to narrow your results.
|
When you’re done using the Research task pane, you
can dismiss it by either clicking the small X in its upper-right
corner, or by clicking its command on the ribbon once more (Review tab,
Research button).
|
