Visio provides a Report Definition wizard so you can
create new reports or modify existing reports. In this exercise, you
will create a new report for the Recruiting Process.
Shape Reports

On the Review tab, in the Reports group, click the Shape Reports button. The Reports dialog box opens.
In the Reports dialog box, click the New button. The Report Definition Wizard opens.
The Report Definition Wizard lets you select a set of shapes to include in the report.
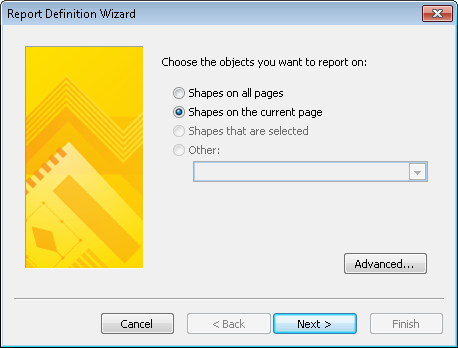
Click Shapes on the current page if it’s not already selected, and then click Next.
This
page of the Report Definition Wizard shows the fields that you are most
likely to want in your report. If you don’t see the field you’re
looking for, select the Show All Properties check box.
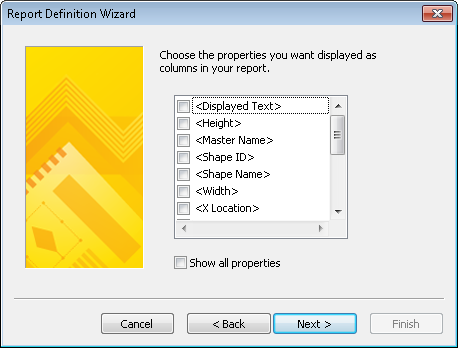
Select the <Displayed Text> check box, scroll down and select the check boxes for Owner, Process Number, Start Date and Status, and then click Next. The next wizard page opens.
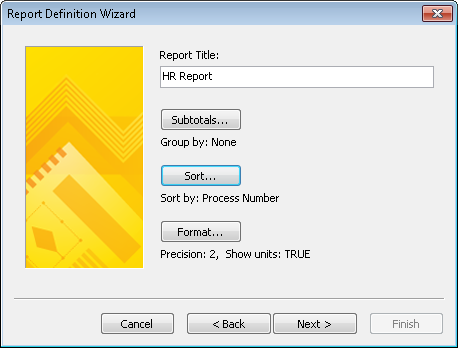
Type HR Report in the Report Title text box.
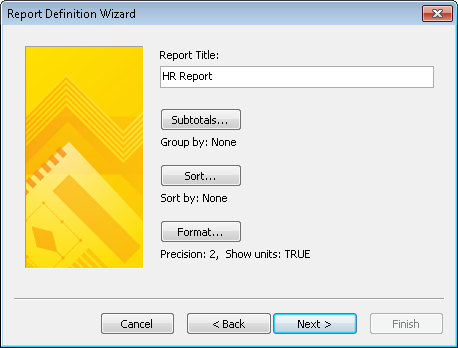
Click the Sort button so you can specify the order in which you want the data to appear in the report.
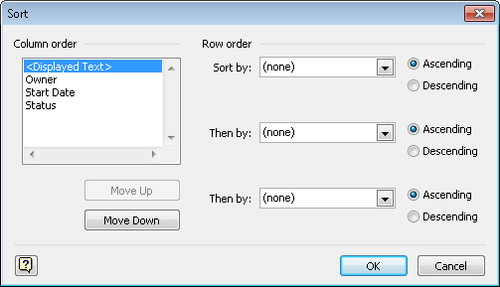
In the Sort dialog box, in the Row Order section, click the arrow next to Sort by, and then select Process Number.
Tip:
You can sort by as many as three fields in the Row Order section.
In the Column Order section, click once on Process Number, and then click the Move Up button twice to set the column sequence as shown in the following graphic.
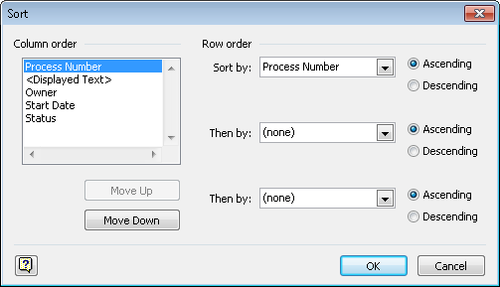
Click OK to close the Sort dialog box.
Tip:
The text under the Sort button identifies the sort field(s) you selected.
Be sure to note the
Subtotals and Format buttons that allow you to customize the report
output in additional ways beyond what you will use for this sample
report.
Click Next to open the final page of the Report Definition Wizard.
Type Custom HR Report in the Name text box.
Type HR Process report showing task number, task description, owner, start data and status in the Description text box.
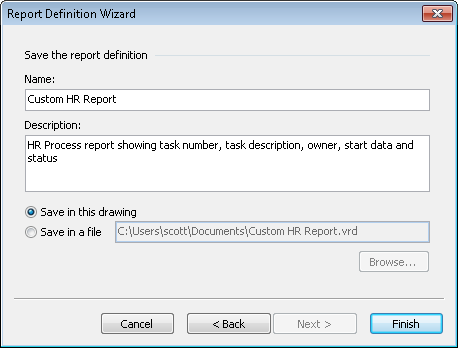
You can save the report definition in the current Visio drawing, which is the default, or you can save it to an external file.
Tip:
Save the report
definition to an external file if you think you’ll want to use it with
multiple drawings. If you do, you can retrieve the report definition by
clicking the Browse button in the Reports dialog box shown in the
following graphic.
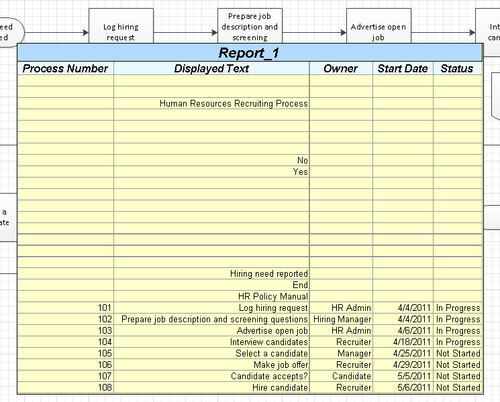
Click Finish. Your report appears in the list of available reports in the Reports dialog box and you can run it in the usual way.
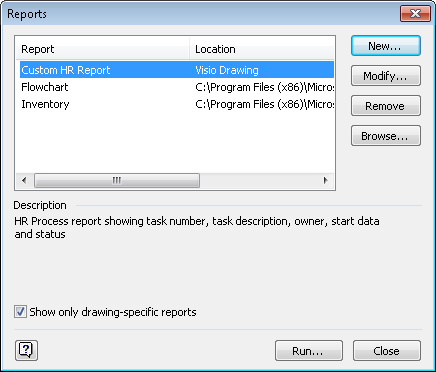
Click Run in the Reports dialog box.
Double-click Visio shape in the Run Report dialog box. Your custom report appears on the drawing page.
When you save the changes to this file, your report definition will be saved with your drawing.
Note:
Save your changes to the HR Process Map Reports drawing but leave it open if you are continuing with the next exercise.
The report you’ve just
created is interesting, but needs some fine tuning. For example, there
are blank rows because some shapes on the page, the arrows, do not
contain any data. To modify the report, continue reading in the next
section.
