3. Managing Toolbars
To show or hide any
toolbar, click Tools, click Toolbars, and finally select the name of the
toolbar in the menu; a check mark indicates that the toolbar is
currently visible.
Internet Explorer does
not require you to stick with the default spatial layout of its
toolbars. To rearrange the toolbars, you first have to unlock them:
click Tools, click Toolbars, and finally clear the check mark to the
left of the Lock The Toolbars option. When toolbars are unlocked, a
dotted handle appears to the left of each toolbar. Drag a handle to move
the associated toolbar. When you have things the way you want them,
lock the toolbars again.
|
To make the most
efficient use of the browser window, press F11. This action puts
Internet Explorer into a full-screen mode, in which only the Status bar
is normally visible. While working in full-screen mode, you can move the
mouse pointer to the top of the screen to display the address bar,
search box, tabs row, and Command bar. If you click in the search box or
address bar, these interface elements remain visible while you type. As
soon as you move the mouse pointer away or click in the page itself,
they slide away again. In full-screen mode, Internet Explorer is
maximized, even if it was previously not maximized, and the Windows
taskbar is covered. You can still display the taskbar by pressing the
Windows logo key, and you can return Internet Explorer to its normal
display style by pressing F11 a second time.
|
To make more efficient use of space, you can put two or more toolbars on a single line. If all buttons or menu choices on a toolbar don't fit in the space allotted to them, Internet
Explorer displays a chevron to indicate that additional options are
available. Click the chevron to display the remaining choices in a
drop-down list.
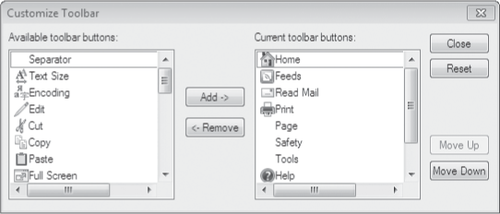
To change the contents of the Command bar, select Tools, Toolbars, Customize to display the dialog box shown in Figure 3.
To add a button, select it from the Available Toolbar Buttons list and
click Add; to remove a currently visible button, select its entry in the
Current Toolbar Buttons list and click Remove. Select any button and
click Move Up or Move Down to change the button's order in the list.
This option allows you to move the buttons you use most often to the
left, where they're most likely to be visible even if a portion of the
toolbar is truncated.
|
Internet Explorer 8 now
makes it easy for developers and other curious parties to see how any
webpage is built or use compatibility settings to adjust its display.
Choose Tools, Developer
Tools (or press F12) to open the Developer Tools window. Here, among
other things, you can read the HTML code, style sheet, and scripts
associated with the current webpage. The toolkit includes a script
debugger and a profiler.
|
4. Managing and Troubleshooting Add-ons
Browser add-ons—toolbars,
browser helper objects, and ActiveX controls—can be a mixed blessing.
On the plus side, browser helper objects and toolbars allow you to
greatly extend the capabilities of Internet Explorer. The down side is
that a poorly written (or deliberately hostile) add-on can be
deleterious to performance and security and, in extreme examples, can
cause the browser to crash or become unstable.
If you happen to start Internet Explorer with an add-on that is known to cause problems, you will typically see a message similar to the following:
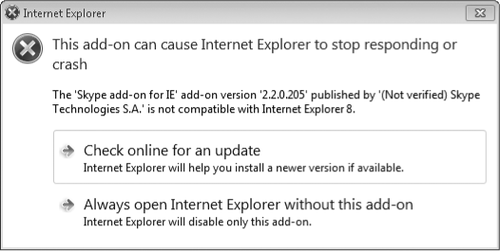
This can happen if the
add-on was designed to run with an earlier version of Internet Explorer
but is incompatible with the current version. (In this case, for
example, the add-on was installed by version 3.8 of the popular
communications program from Skype Technologies; replacement with version
4.0 solved the problem.) You can open the browser with the add-on
disabled by choosing the second option in this dialog box.
If Internet
Explorer does not detect a troublesome add-on at startup but you suspect
that an add-on is causing problems—sluggish performance, for example,
or unwanted behavior of some kind—you might be able to verify your
suspicion by starting Internet Explorer with all add-ons disabled. To do this, open the Start menu and choose All Programs, Accessories, System Tools, Internet Explorer (No Add-Ons). (It might be quicker to type iexplore.exe – extoff in the Start menu search box.)
From within Internet
Explorer (running normally or with add-ons off), you can inspect the
browser's current list of add-ons by choosing Tools, Manage Add-Ons. In
the Manage Add Ons dialog box, select Toolbars And Extensions, and then
choose one of these options:
Currently Loaded Add-Ons
Add-ons that have been called by a website during your current browsing
session (this choice is not available if you run Internet Explorer with
add-ons disabled)
Run Without Permission
Add-ons that were installed without your active participation,
typically by the operating system, your hardware vendor, or an
application
Downloaded Controls ActiveX controls that you have downloaded
All Add-Ons All of the above
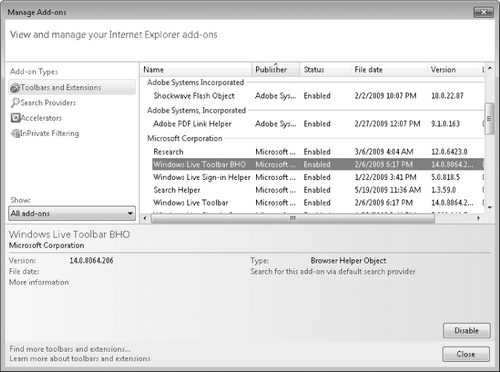
Figure 4 shows an example of what you might see with all add-ons
displayed. Note that the list includes many columns (right-click a
heading and choose Columns to see a list of possibilities) and is sorted
by publisher (right-click a heading and choose Sort By to see other
sorting options). If you sort by publisher and have any add-ons that have not been digitally signed, the unverified add-ons
appear at the top of the list. If you're not sure what add-on is
causing trouble, you might want to begin your investigation with these.
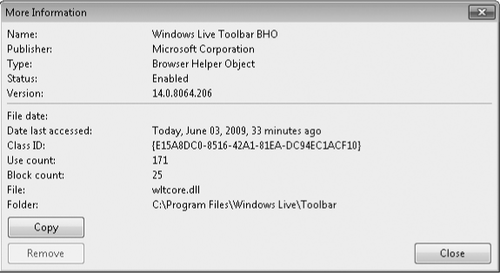
In the bottom portion
of the dialog box, you can click Disable (or Enable, if the selected
add-on is currently disabled), or click More Information to see
additional details and recent usage data:
By selectively disabling suspicious add-ons,
you can usually ferret out any bad passengers that might have come
aboard. Unfortunately, the only items that you can actually delete via
Manage Add-Ons are
ActiveX controls that you have downloaded. To remove another kind of
add-on, you need to find the program that originally installed it and
then remove that program.
5. Using (or Refusing) AutoComplete
Internet Explorer's AutoComplete features can help reduce keystrokes by remembering URLs you type, data you enter into web forms,
logon names, and passwords. As you begin entering data in a field on a
web form, AutoComplete consults its list of previous entries and
proposes possible matches—thereby reducing the amount of typing you have
to do. Likewise, when Internet Explorer detects matching user name and
password fields on a webpage, it asks if you want to save the data as a
matched pair. If you click Yes, the values you enter are encrypted and
saved in the registry.
Not everyone welcomes
this kind of assistance, though. Depending on your preferences and your
level of caution, you might want to use all, none, or only some of the
browser's AutoComplete services.
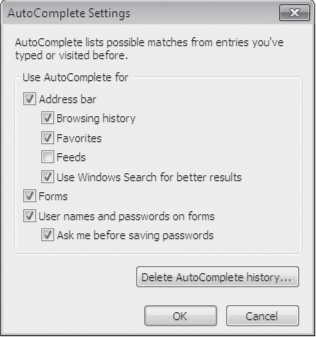
To enable or disable AutoComplete
options, click Tools, Internet Options, click the Content tab, and then
click Settings in the AutoComplete section of the dialog box. In the
ensuing dialog box (shown in Figure 5), you can select any or all of the following check boxes:
Address Bar This option, with its subordinate options, controls the Smart address bar .
Forms
This option enables auto-completion of data that you type into
webpages, such as the names and shipping addresses that you supply on
e-commerce sites.
User Names And Passwords On Forms When this option is selected, Internet Explorer remembers logon credentials for various sites that you visit.
Warning:
If you select User
Names And Passwords On Forms, Internet Explorer always prompts you
before collecting a new password. The password itself appears on screen
as a string of asterisks and is encrypted for storage on your disk. A
person reading over your shoulder or prowling your hard disk will
therefore not be able to pick up your password when AutoComplete
supplies it. However, anyone who has physical access to your computer
when you are logged on to your user account could interact with
websites for which you have AutoComplete user name and password data,
effectively impersonating you. Unless you are sure that no one else will
ever use your account, you might want to decline the browser's offer to
remember logon credentials.
If you want
Internet Explorer to remember logon credentials for new sites that you
visit, be sure to select Ask Me Before Saving Passwords, as well as User
Names And Passwords On Forms. If you clear this suboption, the AutoComplete feature will retain entries that it already has recorded but will not record new ones.
