11. Staying in Sync with Windows Live Sync
Windows Live Sync, formerly known as Foldershare,
allows you to synchronize and share up to 20 folders. You can create
personal folders for synchronization, accessible only to computers
logged on with your own Windows Live ID, as well as shared folders for
synchronization, accessible to whomever you permit. Folders can contain
as many as 20,000 files each, with an individual file-size limit of 4
GB. With Live Sync, you can also browse remote computers logged on with
your Live ID. (You cannot, however, operate such computers remotely, as
you can with Live Mesh.)
To get started with Live Sync, you need to visit sync.live.com
and download the Live Sync software. (Versions of the software are
available for Windows and Macintosh.) Repeat these steps on each
computer that you want to synchronize with.
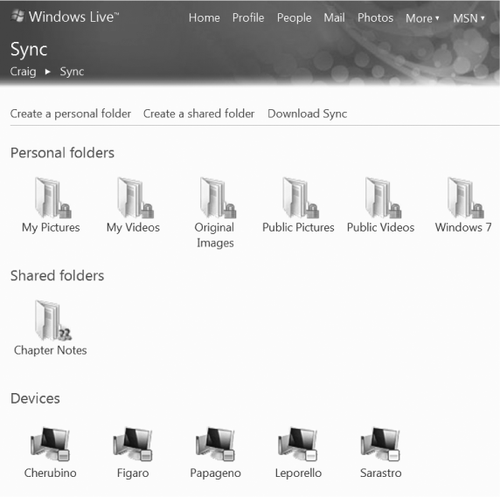
With the software in place, a visit to sync.live.com
will let you see which folders you have set up for synchronization, as
well as the names of all computers that have logged on with your Live ID
(see Figure 5).
You can create a personal sync folder or a shared sync folder by
clicking the appropriate command at the top of the window. With either
command, the software responds by asking you to select a computer from
the list of available devices. To share the article Notes folder that is
stored on Figaro, for example, you would select Figaro and then
navigate to that folder. After setting up a shared folder, the system
prompts you to enter e-mail addresses of those with whom you want to
share.
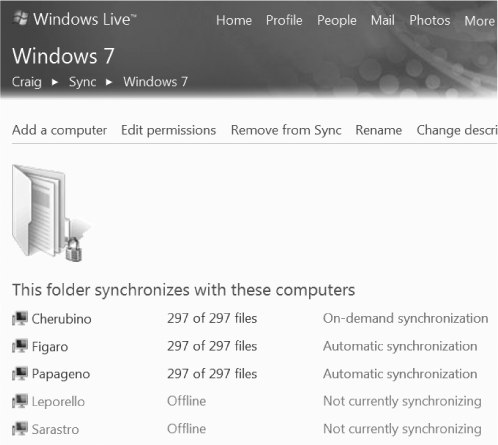
Synchronization
can be automatic (Live Sync synchronizes whenever it detects changes) or
on demand. Live Sync lets you decide when you establish the sync
folder, but you can always revisit the issue. To see what the current
setting is for a folder, go to sync.live.com and click the folder name (see Figure 6).
To change the synchronization mode, click it.
However and whenever you
synchronize, Live Sync presents an audit trail of its activity. To see
what files have been added, changed, or deleted on a computer,
right-click the Live Sync icon in the notification area and choose
Activity.
To browse the file resources of a remote computer, go to sync.live.com, click the device name, and then choose Browse. Following these steps with Figaro in Figure 10-8, for example, might reveal the following:

You can open and save files from here, just as you would in the remote computer's Windows Explorer.
12. Synchronizing Web Favorites with Windows Live
To keep web favorites in
sync on any computer where you access the internet, you don't need
offline files, Live Mesh, or Live Sync. All you need is the Windows
Live toolbar and, of course, your Live ID.
On the Windows Live toolbar, if you haven't already set up favorites synchronization, a Sync button appears near the right edge of the toolbar:

Click the gold star, click
Sync in the ensuing dialog box, and you're set. Windows Live copies
your favorite shortcuts into the Favorites folder of your SkyDrive,
where, even if you are the most prolific of favorite creators, they will
consume a completely negligible fragment of your allotted 25 GB.
