8. Managing Disk Space
Because careless
caching of large network shares could overwhelm the storage capacities
of a mobile computer, Windows by default limits the size of the offline cache to something under 25 percent of the client computer's disk space. (The cache
is stored, by default, in hidden system folders under %SystemRoot%\CSC.
To see how much cache space you're using and how much is still available, open Control Panel, type offline files in the search box, and click Manage Offline Files. The Disk Usage tab of the Offline Files dialog box provides the statistics:
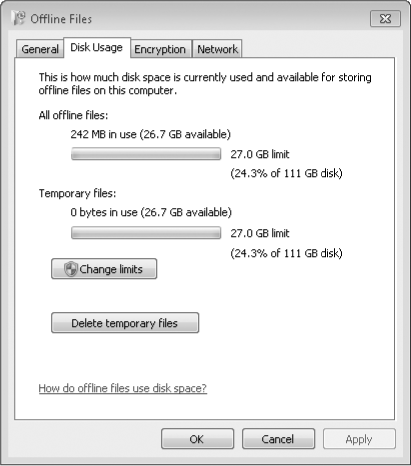
Note that the Temporary
Files portion of this report is relevant only if you are using the All
Files And Programs That Users Open From The Share Are Automatically
Available Offline option, described in the previous section (see Figure 4).
Windows will delete files from the temporary cache when necessary, but
you can do the job yourself by clicking Delete Temporary Files. To
increase or decrease the amount of space available for offline files,
click Change Limits. The Offline Files Disk Usage Limits dialog box will
appear:
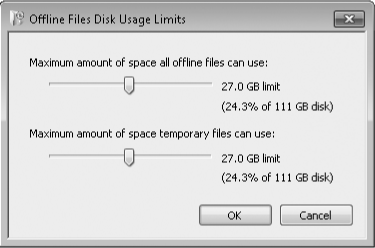
Note that the second slider in this dialog box cannot be moved to the right of the first slider.
9. Removing Offline Access to Files and Folders
When you no longer need
offline access to a network resource, open the sync item in Windows
Explorer, right-click, and clear Always Available Offline. If the share
involved is set for manual caching (the Only The Files And Programs That
Users Specify Are Available Offline option described on Section 7), Windows purges the items from your cache
in addition to removing the offline access attribute. If the share is
set for automatic caching, items that are currently in the temporary cache
remain there. To delete those files, open the Offline Files option in
Control Panel. On the Disk Usage tab, click Delete Temporary Files.
Note, however, that this option does not affect files you have marked to
be Always Available Offline.
To eliminate all items
from the Offline Files cache so that you can start over, you'll need to
make a small edit to the registry. Before taking this drastic step, make
sure you synchronize all sync items that contain changes you made that
haven't yet been copied to the server location. The following steps
completely erase all files from your Offline Files cache:
Using
an administrator's account, open Registry Editor (Regedit.exe) and
navigate to HKLM\System\CurrentControlSet\Services\CSC\Parameters. (This
key is not created until you use Offline Files for the first time.)
Right-click the Parameters key and click New, DWORD (32-Bit) Value.
For the name of the new value, type FormatDatabase. (Note there's no space in that name.)
Double-click the new DWORD value and assign it a value of 1.
After you restart and log on to your account again, you'll notice that there are no longer any sync items in the Offline Files section of Sync Center.
