2. Using the Tablet PC Input Panel
Back in the original version
of Windows XP Tablet PC Edition, the Tablet PC Input Panel, or TIP, was
typically docked to the bottom of the screen, just above the taskbar,
and you toggled its display by clicking a TIP icon next to the Start
button. In Windows XP Tablet PC Edition 2005, Microsoft enhanced the TIP
by enabling it to pop up in place, where you needed it. That is, if you
wanted to input some text into the address bar of an Internet Explorer
window, for example, you could tap the address bar with the pen and the
TIP would appear in a floating window right under the tap point. That
way, you wouldn't have to move the pen up and down across the entire
screen in order to enter text or other characters.
That said, the TIP could
still be manually launched by clicking that special icon next to the
Start menu; and the TIP in Windows XP Tablet PC Edition 2005 was a
pretty big bugger, occupying a large swath of onscreen real estate.
These issues were first
fixed in Windows Vista and remain fixed in Windows 7. Instead of a
special taskbar button, the TIP is now always accessible, but mostly
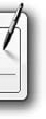
hidden, on the edge of the screen. As shown in Figure 12, only a small portion of the TIP is visible by default.

NOTE
Don't see the TIP? Just open the Start menu and type tablet pc in Start Menu Search: the Tablet PC Input Panel will be the first item in the search results.
If you're not even sure you're
seeing the TIP, you can mouse over it (using either the mouse or the
pen/stylus). When you do so, the TIP peeks out a bit more, as shown in Figure 13.
To activate the TIP, simply click it with the pen or stylus. The TIP will then appear in the center of the screen, as shown in Figure 14.

So what does the TIP do?
The TIP is designed to help you interact with applications that aren't
natively Tablet PC (or Touch) aware. (That is, virtually every single
application on the planet.) Therefore, if you want to enter a URL in the
Internet Explorer address bar, search for an application in Windows 7's
Start Menu Search, or perform similar actions, the TIP does all the
work. It enables your pen (or finger) to work with any application.
What's nice about the TIP is
that you don't really have to worry about where it is on the desktop, or
whether it's enabled. Just tap a text-entry area in any application,
even those not made by Microsoft, using the pen or stylus that came with
your Tablet. When you do, you'll see a mini-TIP pop-up appear, as shown
in Figure 15.
To see (and use) the full TIP, just tap this mini-TIP. You'll then get the full TIP, exactly where you need it.
Compared to the TIP in
previous versions of Windows, the Windows 7 TIP offers very similar
functionality with a slightly reworked user interface. The Quick Launch
icons for the Writing Pad (the default) and Touch Keyboard modes have
been moved to the top of the window, next to the Tools and Help menus.
(And the Character Pad interface from Windows Vista has been
unceremoniously made less accessible: you get to it by tapping Tools and
then Write character by character.)
Microsoft has also added
new "Show me" buttons to the top right of the TIP button that help you
learn how to correct mistyped text, delete text, split text, and join
text. Each of these triggers a mini video, like that shown in Figure 16, showing you how it's done.
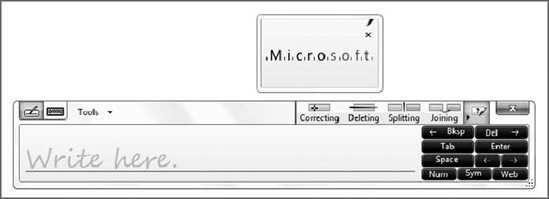
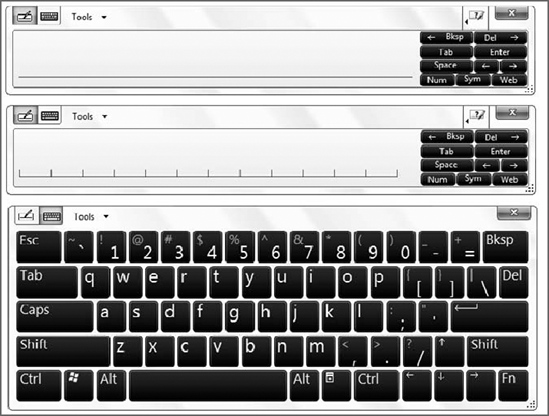
The TIP's three different modes are shown in Figure 17.
To close the TIP (which
really just returns it to its near-hidden location on the side of the
screen), just tap the Close window button.
If you want to return the
TIP to its previous behavior of docking at the top or bottom of the
screen, click the Tools button and choose the appropriate option:
Docking and then Float, Dock at top of screen, or Dock at bottom of
screen. Float is the default behavior.
NOTE
In the previous
version of Microsoft's Tablet PC operating system, the TIP included
dedicated buttons for Web shortcuts such as http://, www., and so on.
These can now be accessed through the Web button, which expands to show
these and other related options, as shown in Figure 18.
Likewise, the Sym button expands to show various symbols (!, @, #, and
so on), while the Num button expands to show numbers. The Web button
expands automatically when you select the address bar in Internet
Explorer.

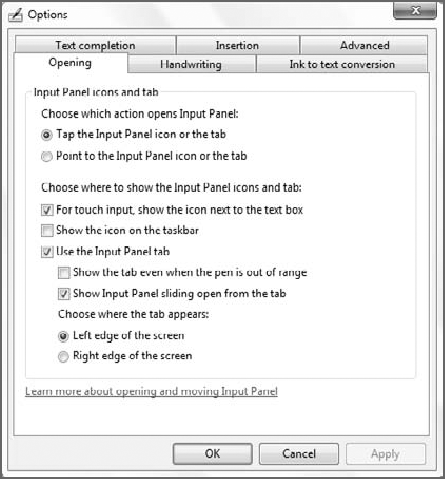
Be sure to spend some time meandering around the TIP's Options dialog, shown in Figure 19.
The TIP supports an amazingly rich collection of configurable options,
including such things as to which side of the screen it docks, whether
it's configured for left- or right-handed users, and how the Writing Pad
and Character Pad recognize handwriting (as you write, the default; or
after you pause).
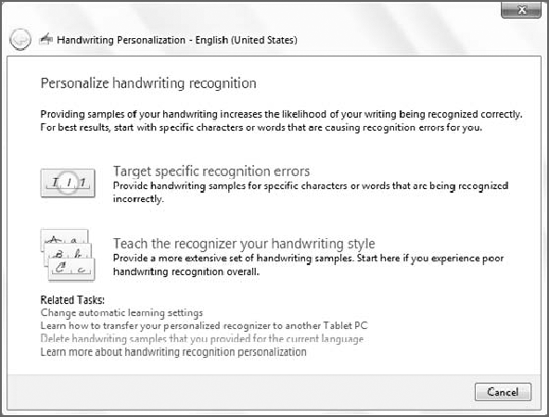
Finally, while
Windows 7 does enable handwriting recognition personalization by default
so that the system learns your handwriting style as it goes, you could
and probably should take the time to engage in a little handwriting
recognition training if you think you're going to be using a pen to
interact with Windows 7 regularly. You can open the Handwriting
Personalization tool right in the TIP: Click Tools => Personalize handwriting recognition to launch the Handwriting Personalization tool, shown in Figure 20.