Although being able to manually explore the Windows
Azure Marketplace DataMarket data is interesting, it’s arguably a
little more interesting to consume that data programmatically from
within other applications such as SharePoint Web Parts. Consuming the
data in a Web Part involves data aggregation, creating custom filtering
options, and of course, making other parts of SharePoint more meaningful
through richer data sets.
In this section, you’ll create a WCF service that will retrieve the DATA.gov crime
data from the Windows Azure DataMarket data programmatically. The
reason for using a WCF service is that you can repurpose the service
across different applications, thus mitigating the amount of disparate
code you need to manage. (Note that you can also deploy the WCF service
to Windows Azure and then use the data for Microsoft Office
365/SharePoint Online applications.) For example, you can build a
SharePoint Visual Web Part and a Microsoft Silverlight application; both
can use a common WCF service but consume and interact with it in
different ways within the Microsoft .NET platform. For example,
Silverlight application events must be fired and managed asynchronously.
Here’s the procedure to create a WCF service that retrieves the DATA.gov crime data.
Create a WCF Service to Retrieve DATA.gov Crime Data
1. Create a WCF Service to Retrieve DATA.gov Crime Data
Open Microsoft Visual Studio 2010.
Click Create | New Project | WCF, and select WCF Service Application. Name the project GetDallasData, and then click OK.
After the project has been created, right-click the project in the Solution Explorer, select Add, and then select Class.
Name the new class CrimeData, and add the properties in bold to the newly created class as shown in the following code:
using System;
using System.Collections.Generic;
using System.Linq;
using System.Web;

namespace GetDallasData
{
    public class CrimeData
    {
        public string City { get; set; }
        public string Year { get; set; }
        public string Population { get; set; }
        public string ViolentCrime { get; set; }
        public string Robbery { get; set; }
        public string PropertyCrime { get; set; }
        public string Burglary { get; set; }
    }
}
The preceding code represents the structure of your in-memory
data object. The properties will be used to store specific elements of
the incoming data stream. Note that you will not use every element or
property in the incoming XML stream—you will use only certain parts of
the DATA.gov data. That’s why this in-memory object (the class) does not
directly map to all the properties that were displayed when you
explored the data via the Marketplace DataMarket site.
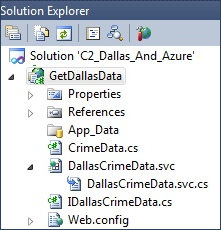
Right-click the default Service1.svc file in the Solution Explorer, and rename it to DallasCrimeData.svc. Also, rename the IService1.cs interface file to IDallasCrimeData.cs.
Note:
Rename the service and service interface references in the Visual Studio project by clicking the reference in code (for example, Service1), and then click the Refactor menu option and select Rename. Provide the new name for the service and service interface.
Your project folders should now look like the following image.
Double-click the DallasCrimeData.svc file, delete the starter methods that Visual Studio creates for you, and update the code as shown in bold in the following code. This will retrieve the Windows Azure data from the DataMarket by using a WebRequest object. You need to pass your Windows Live ID (for example, [email protected]) and your account key (which looks something like asaaKe8kisiK8leE+JkkswjSv2okwWy3zYAIcsbvC4TT=) with the WebRequest:
using System;
using System.Collections.Generic;
using System.Runtime.Serialization;
using System.ServiceModel;

using System.ServiceModel.Web;
using System.Text;
using System.Net;
using System.IO;
using System.Xml.Linq;
using System.Linq;

namespace GetDallasData
{
    public class DallasCrimeData : IDallasCrimeData
    {
        string myAccountKey = "[email protected]";
        string myUniqueUserId = "your key here";
        string myDallasURL = "https://api.datamarket.azure.com/Data.ashx/data.gov/
Crimes/CityCrime?$filter=State%20eq%20%27Washington%27&$top=100";
        public List<CrimeData> GetCrimeData(string stateFilter)
        {
            List<CrimeData> listOfCrimesInWashington = new List<CrimeData>();

            WebRequest azureWebRequest = WebRequest.Create(myDallasURL);
            azureWebRequest.Credentials = new NetworkCredential(myAccountKey,
myUniqueUserId);

            using (HttpWebResponse azureWebResponse = (HttpWebResponse)azureWebRequest.
GetResponse())
            {
                using (Stream AzureDataStream = azureWebResponse.GetResponseStream())
                {
                    using (StreamReader reader = new StreamReader(AzureDataStream))
                    {
                        string responseFromAzure = reader.ReadToEnd();
                        XDocument xmlAzureResultData = XDocument.Parse(responseFrom
                            Azure);

                        XNamespace nsContent = "http://www.w3.org/2005/Atom";
                        XNamespace nsProperties = "http://schemas.microsoft.com/
                            ado/2007/08/dataservices/metadata";
                        XNamespace nsValue = "http://schemas.microsoft.com/
                            ado/2007/08/dataservices";

                        var result = (from q in xmlAzureResultData.
                            Descendants(nsContent + "entry")
                                      select new CrimeData
                                      {
                                          City = q.Element(nsContent + "content").
Element(nsProperties + "properties").Element(nsValue + "City").Value.ToString(),
                                          Year = q.Element(nsContent + "content").
Element(nsProperties + "properties").Element(nsValue + "Year").Value.ToString(),
                                          Population = q.Element(nsContent +
"content").Element(nsProperties + "properties").Element(nsValue +
"Population").Value.ToString(),
                                          ViolentCrime = q.Element(nsContent +
"content").Element(nsProperties + "properties").Element(nsValue +
"ViolentCrime").Value.ToString(),
                                          Robbery = q.Element(nsContent + "content").
Element(nsProperties + "properties").Element(nsValue + "Robbery").Value.ToString(),
                                          PropertyCrime = q.Element(nsContent +
"content").Element(nsProperties + "properties").Element(nsValue +
"PropertyCrime").Value.ToString(),
                                          Burglary = q.Element(nsContent + "content").
Element(nsProperties + "properties").Element(nsValue + "Burglary").Value.ToString()
                                      });
                        foreach (var c in result)
                        {
                            listOfCrimesInWashington.Add(c);
                        }
                    }
                }
            }
            return listOfCrimesInWashington;
        }
    }
}
The purpose of the preceding code is to use a predefined REST URI (one that retrieves crime data for Washington state), as shown here:
https://api.datamarket.azure.com/Data.ashx/Data.gov/Crimes/CityCrime?$filter=State%20eq%20%27Washington%27&$top=100
You then manage the data returned from the Marketplace DataMarket by loading it into an XDocument object that is then parsed and read into your custom object. Remember that you’re reading only specific parts of the XDocument object into the in-memory CrimeData object.
After adding the core service operation, you’ll need to add the interface
contract. To do this, double-click the IDallasCrimeData.cs file, delete
the starter methods, and edit it, adding the bold code as shown below:
using System;
using System.Collections.Generic;
using System.Linq;
using System.Runtime.Serialization;
using System.ServiceModel;
using System.ServiceModel.Web;
using System.Text;

namespace GetDallasData
{
    [ServiceContract]
    public interface IDallasCrimeData
    {
        [OperationContract]
        List<CrimeData> GetCrimeData(string stateFilter);
    }
}
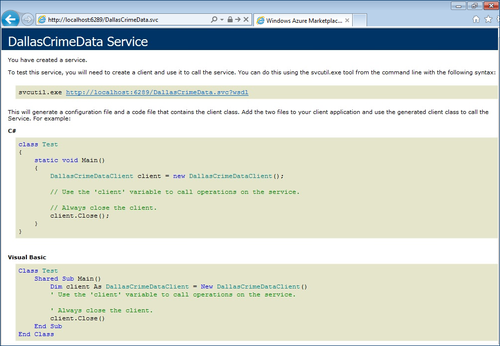
To
test the service, either press F5 on your keyboard or right-click
DallasCrimeData.svc in the Solution Explorer and select View In Browser.
The result should display a file listing in your browser. If you click
your DallasCrimeData.svc file, the resulting page will be similar to the
following image.
You have now created the core WCF service that you’ll be able to use to retrieve the Windows
Azure data from the Marketplace DataMarket. However, before you can use
the service, you’ll want to deploy it somewhere. This requires you to
first publish the service from your Visual Studio solution to a virtual directory and then create an Internet Information Services (IIS) website.
In this exercise, you’ll deploy the service to your local
IIS. Note that you could also deploy this service to Windows Azure and
then call the service from there.
