Logo
programming4us
programming4us
programming4us
programming4us
Home
programming4us
XP
programming4us
Windows Vista
programming4us
Windows 7
programming4us
Windows Azure
programming4us
Windows Server
programming4us
Windows Phone
 
Windows Server

Active Directory Domain Services 2008 : Configure Attribute Range, Create Classes

- Free product key for windows 10
- Free Product Key for Microsoft office 365
- Malwarebytes Premium 3.7.1 Serial Keys (LifeTime) 2019
8/28/2012 6:15:09 PM

Configure Attribute Range

Scenario/Problem: You need to define the upper and lower values an attribute can have.


Solution: Configure the attribute range by using the Active Directory Schema snap-in.

To configure the attribute range, perform the following steps:

1.
Log on to a domain controller or a member computer that has Windows Server 2008 RSAT installed.

2.
Click Start, click Administrative Tools, and click Active Directory Schema.

3.
In the console tree, expand Active Directory Schema and then click Attributes.

4.
In the details pane, right-click the attribute for which you want to configure the range and click Properties.

5.
On the attribute properties page, enter a minimum value in the Minimum field and enter a maximum value in the Maximum field, as shown in Figure 1.
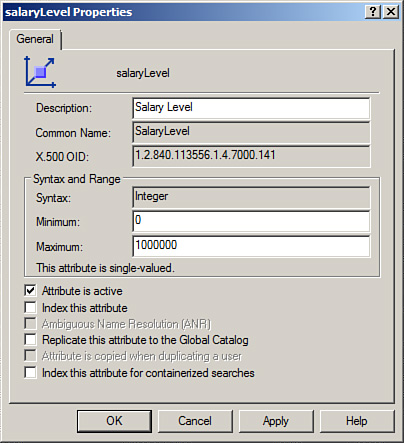
Figure 1. Configuring an attribute’s range.


6.
Click OK to save the changes.

Attribute Range Acceptable Values

The minimum acceptable value is determined by the attribute’s syntax. Integer, Large Integer, and Enumeration syntaxes accept negative numbers. For these syntaxes, the smallest value that can be entered is -2,147,483,648. For all other syntaxes, the smallest value that can be entered is 0 (zero).

The maximum acceptable value is determined by the attribute’s syntax. If minimum and maximum values are defined, the maximum value must be greater than or equal to the minimum value.

Valid characters for minimum and maximum are 0–9.

Create Classes

Scenario/Problem: You need to group a number of attributes together.


Solution: Create a class by using the Active Directory Schema snap-in.

To create a class, perform the following steps:

1.
Log on to a domain controller or a member computer that has Windows Server 2008 RSAT installed.

2.
Click Start, click Administrative Tools, and click Active Directory Schema.

3.
In the console tree, expand Active Directory Schema and then click Classes.

4.
On the Action menu, click Create Class.

5.
On the Schema Object Creation warning box, shown in Figure 2, click Continue.
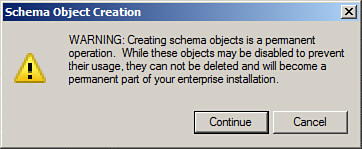
Figure 2. The warning box for schema object creation.


6.
On the Create New Schema Class window, shown in Figure 3, do the following:

  • Type a common name in the Common Name field.

  • Type an LDAP display name in the LDAP Display Name field.

  • Type the OID in the Unique X500 Object ID field.

  • Type a description in the Description field, if required.

  • Type a parent class in the Parent Class field, if required.

  • Select a class type of Structural, Abstract, or Auxiliary in the Class Type field.
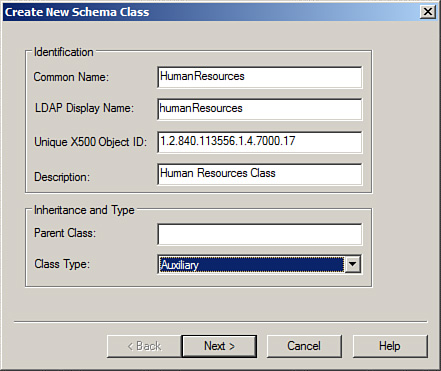
Figure 3. The Create New Schema Class window.


7.
Click Next.

8.
To add mandatory attributes to the class, click Add beside the mandatory field, shown in Figure 4, and select the attributes you want to add as mandatory.
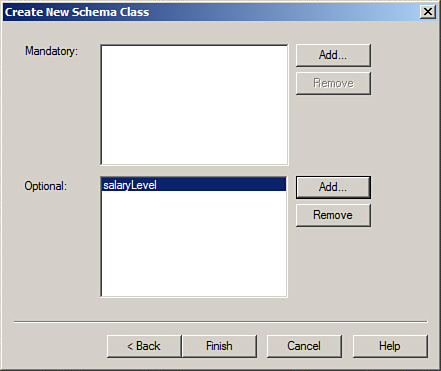
Figure 4. The window for adding attributes.


9.
To add optional attributes to the class, click Add beside the optional field, shown in Figure 4, and select the attributes you want to add as mandatory.

10.
Click Finish.
Other -----------------
- Microsoft Dynamics AX 2009 : Working with Data in Forms - Adding images to records
- Microsoft Dynamics AX 2009 : Working with Data in Forms - Coloring records
- SQL Server 2008 : Data Collector and MDW - Custom collection sets
- SQL Server 2008 : Physical server design - Server consolidation and virtualization
- Windows Server 2008 Server Core : Determining File and Directory Status with the ChkDsk Utility, Performing Boot Time Disk Checks with the ChkNTFS Utility
- Windows Server 2008 Server Core : Changing File and Directory Attributes with the Attrib Utility
- SQL Server 2008 R2 : Creating and Managing Databases - Creating Databases
- SQL Server 2008 R2 : Creating and Managing Databases - Database Files
- InfoPath with Microsoft Content Management Server Web Services : Creating the InfoPath Document
- InfoPath with Microsoft Content Management Server Web Services : Creating the ASP.NET Web Service
 
 
Top 10
- Microsoft Visio 2013 : Adding Structure to Your Diagrams - Finding containers and lists in Visio (part 2) - Wireframes,Legends
- Microsoft Visio 2013 : Adding Structure to Your Diagrams - Finding containers and lists in Visio (part 1) - Swimlanes
- Microsoft Visio 2013 : Adding Structure to Your Diagrams - Formatting and sizing lists
- Microsoft Visio 2013 : Adding Structure to Your Diagrams - Adding shapes to lists
- Microsoft Visio 2013 : Adding Structure to Your Diagrams - Sizing containers
- Microsoft Access 2010 : Control Properties and Why to Use Them (part 3) - The Other Properties of a Control
- Microsoft Access 2010 : Control Properties and Why to Use Them (part 2) - The Data Properties of a Control
- Microsoft Access 2010 : Control Properties and Why to Use Them (part 1) - The Format Properties of a Control
- Microsoft Access 2010 : Form Properties and Why Should You Use Them - Working with the Properties Window
- Microsoft Visio 2013 : Using the Organization Chart Wizard with new data
 
programming4us
Windows Vista
programming4us
Windows 7
programming4us
Windows Azure
programming4us
Windows Server