Logo
programming4us
programming4us
programming4us
programming4us
Home
programming4us
XP
programming4us
Windows Vista
programming4us
Windows 7
programming4us
Windows Azure
programming4us
Windows Server
programming4us
Windows Phone
 
Windows Server

BizTalk 2010 Recipes : EDI Solutions - Creating Custom EDI Pipelines

- Free product key for windows 10
- Free Product Key for Microsoft office 365
- Malwarebytes Premium 3.7.1 Serial Keys (LifeTime) 2019
5/16/2011 6:18:38 PM

1. Problem

You want to add decryption as a stage in your processing of inbound EDI documents. The standard EdiReceive pipeline does not support this, and you need to create a custom pipeline.

2. Solution

This solution does not provide the code for the decryption custom pipeline component, but it does show how to reference a custom pipeline component and the EDI pipeline components to create a custom pipeline.

  1. In your Visual Studio project, add a new pipeline by right-clicking the project, and selecting Add => New Item. Select the Receive Pipeline template, and give it an appropriate name.
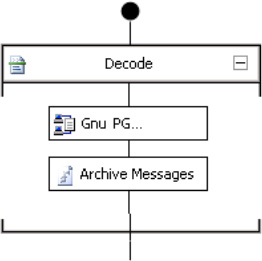
  2. The Decode stage is where you will want to do the decryption. An inbound file must be decrypted before it can be run through the EDI components. Drag the decryption custom pipeline component from the Visual Studio toolbox to the Decode stage of the pipeline. Figure 1 shows the Decode stage with both a decryption and an archiving component.

    Figure 1. The Decode stage of a custom pipeline
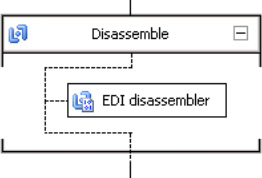
  3. Next, drag and drop the EDI disassembler component onto the Disassemble stage of the pipeline, as shown in Figure 2.
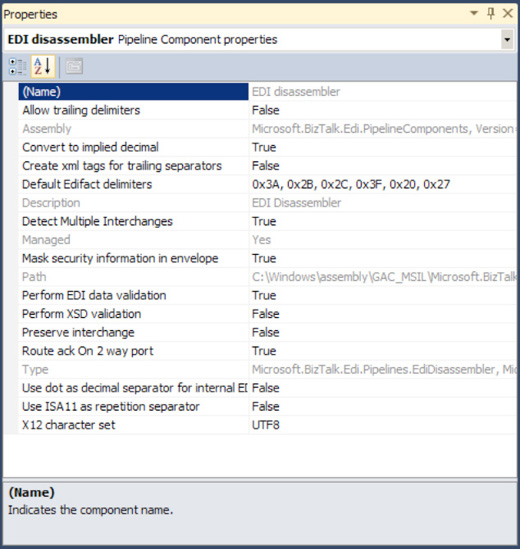
    Figure 2. The Disassemble stage
  4. Set the EDI disassembler properties to the default values that you want. Note that these can all be overridden once the pipeline has been deployed, so these are just being set for the defaults. This can be done by right-clicking the EDI disassembler and selecting Properties. The properties are shown in Figure 3.

    Figure 3. The EDI disassembler properties

3. How It Works

Creating custom pipelines is fairly easy; creating custom pipeline components is not. In this case, you want to create both a custom pipeline component (for decryption) and a custom pipeline (to house this custom component and to execute the standard EDI disassembly that occurs). Once the pipeline is fully configured and built, it can be deployed just like any other BizTalk 
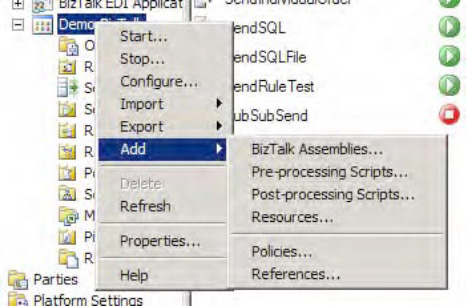
artifact. The easiest thing to do is to right-click the BizTalk application where you want to deploy it and select Add => BizTalk Assemblies (as shown in Figure 4).

Figure 4. Deploying the pipeline
Other -----------------
- Monitoring Exchange Server 2010 : Monitoring Mail Flow (part 3) - Managing Messages
- Monitoring Exchange Server 2010 : Monitoring Mail Flow (part 2) - Monitoring Transport Queues
- Monitoring Exchange Server 2010 : Monitoring Mail Flow (part 1) - Configuring Message Tracking
- BizTalk 2010 Recipes : EDI Solutions - Configuring EDI Validation with Pipelines
- BizTalk 2010 Recipes : EDI Solutions - Configuring Automatic Acknowledgements
- Windows Server 2003 : Planning a Backup Strategy
- Windows Server 2003 : Monitoring Network Servers
- Monitoring Exchange Server 2010 : Monitoring Exchange Databases (part 2) - Monitoring DAGs
- Monitoring Exchange Server 2010 : Monitoring Exchange Databases (part 1) - Monitoring Exchange Database Information and Statistics
- Exchange Server 2010 : Configuring Transport Servers - Edge Transport Servers
 
 
Top 10
- Microsoft Visio 2013 : Adding Structure to Your Diagrams - Finding containers and lists in Visio (part 2) - Wireframes,Legends
- Microsoft Visio 2013 : Adding Structure to Your Diagrams - Finding containers and lists in Visio (part 1) - Swimlanes
- Microsoft Visio 2013 : Adding Structure to Your Diagrams - Formatting and sizing lists
- Microsoft Visio 2013 : Adding Structure to Your Diagrams - Adding shapes to lists
- Microsoft Visio 2013 : Adding Structure to Your Diagrams - Sizing containers
- Microsoft Access 2010 : Control Properties and Why to Use Them (part 3) - The Other Properties of a Control
- Microsoft Access 2010 : Control Properties and Why to Use Them (part 2) - The Data Properties of a Control
- Microsoft Access 2010 : Control Properties and Why to Use Them (part 1) - The Format Properties of a Control
- Microsoft Access 2010 : Form Properties and Why Should You Use Them - Working with the Properties Window
- Microsoft Visio 2013 : Using the Organization Chart Wizard with new data
 
programming4us
Windows Vista
programming4us
Windows 7
programming4us
Windows Azure
programming4us
Windows Server